B1CB28K1 - 406D9 DW10 ENGINE
IDENTIFICATION - DATA CYLINDER BLOCK
1 - IDENTIFICATION
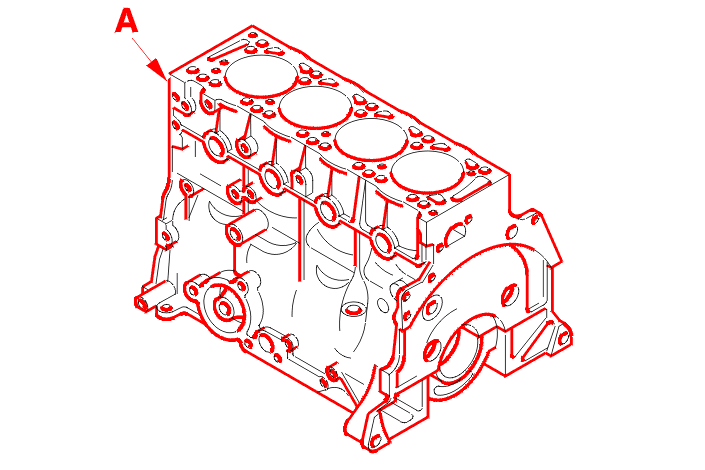
Reference (A) : Area of marking (Repair 1) .
2 - DATA
Repair of the cylinder block always includes :
IMPERATIVE : grinding the barrel plate .
2 - 1 - OVERHAUL
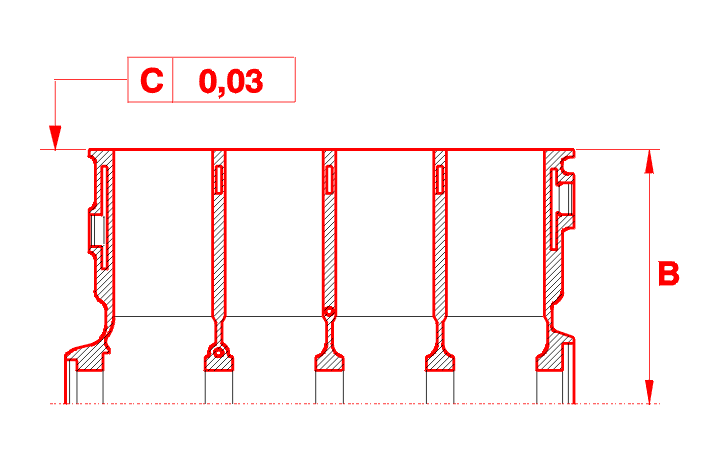
(B) Nominal : 235 ± 0,05 mm .
(B) Repair : 234,8 ± 0,05 mm .
(C) Flatness .
2 - 2 - REBORING
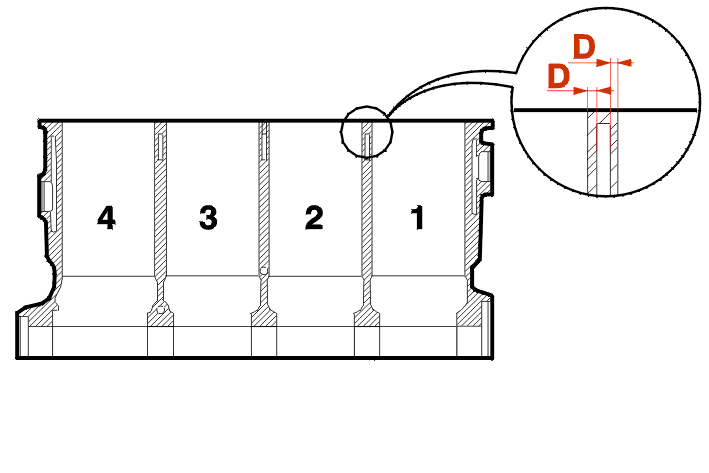
| dimensions (mm) | nominal | repair 1 |
|---|---|---|
| ø barrel(s) + 0,018 0 |
85 | 85,6 |
IMPERATIVE : grinding authorised only if it is possible to accurately determine the value (D) of each cylinder (2,2 mm minimum) .
3 - GRINDING THE BARRELS
IMPERATIVE : after reboring the barrels lap them, referring to the instructions .
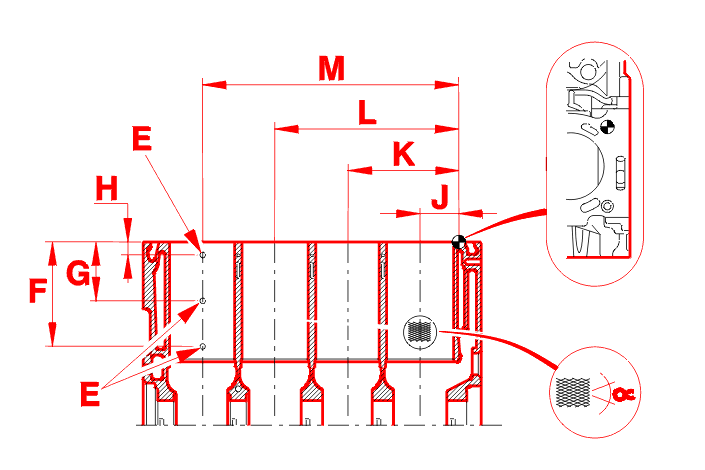
(E) Location of the lift rate measurement .
(F) = 115,7 mm .
(G) = 61,9 mm .
(H) = 8,3 mm .
(J) = 46,5 ± 0,2 mm .
(K) = 139,5 ± 0,2 mm .
(L) = 232,5 ± 0,2 mm .
(M) = 325,5 ± 0,2 mm .
(α) = 50° .
3 - 1 - LIFT RATE
To take the following measurements, observe the correct locations (E) .
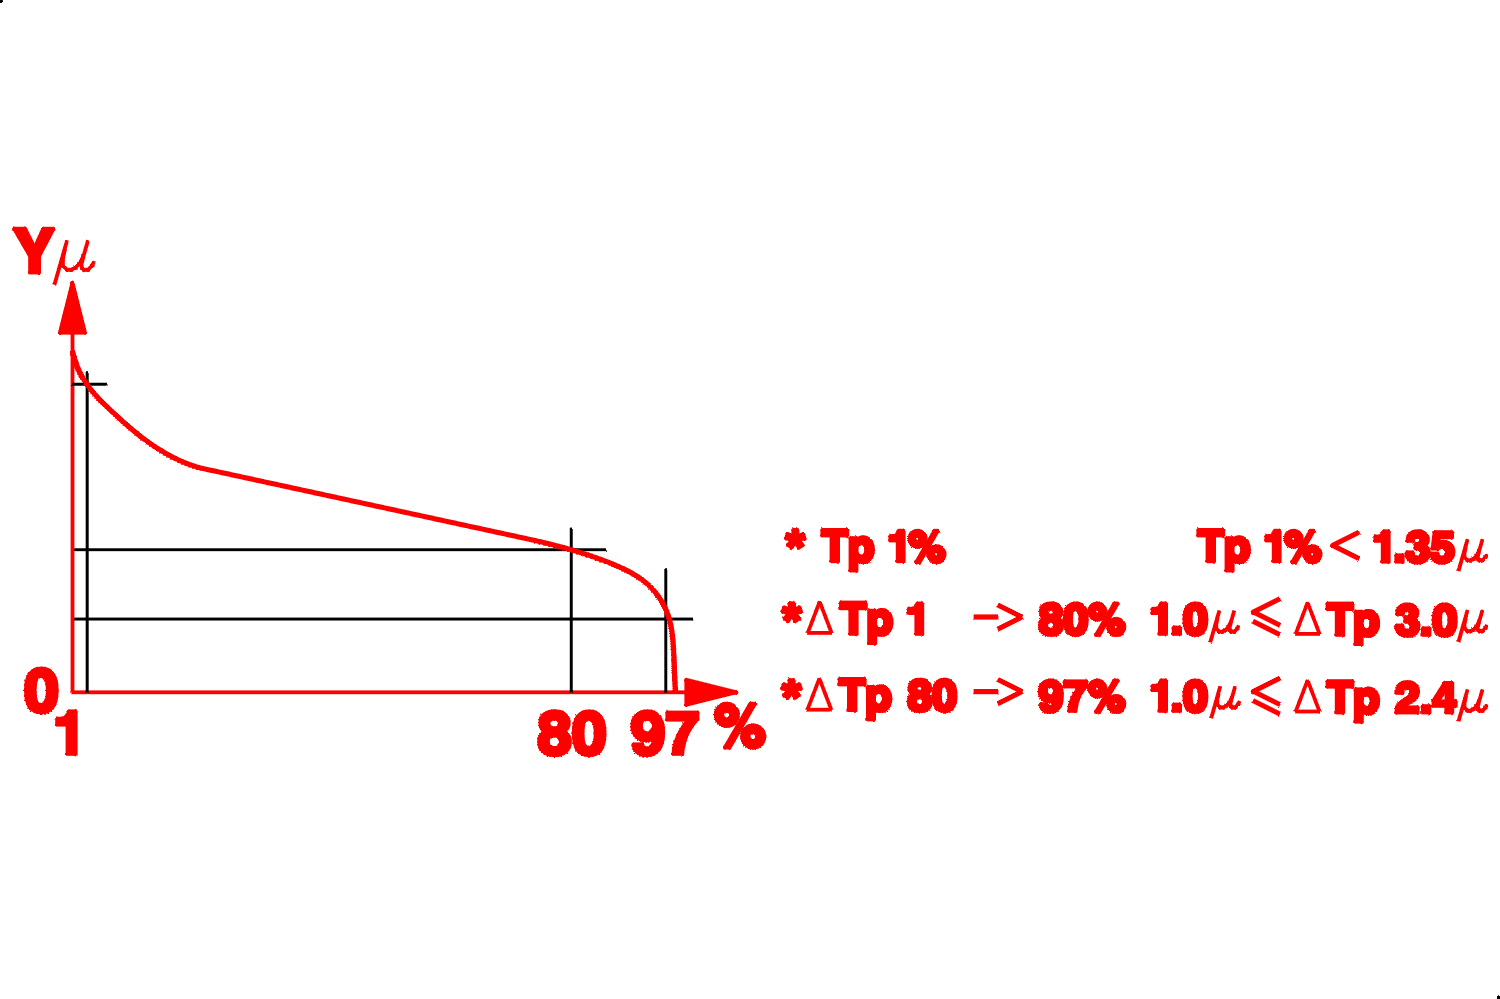
(Y) maximum10 µ .
Measurement of lift rate :
Lift rate :
3 - 2 - SHAPE AND POSITION TOLERANCE
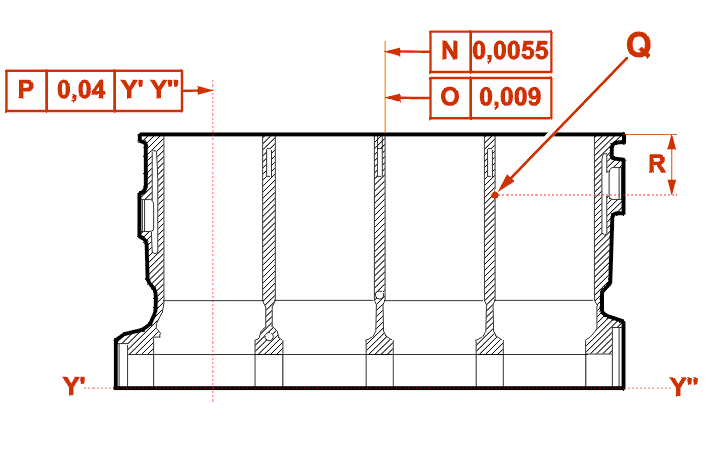
(N) = Straightness .
(O) = Conformity of cylindrical shape .
(P) = Perpendicularity .
(Q) = Ball location .
(R) = 50 mm .
3 - 3 - MEASUREMENT OF STIFFNESS
To take the following measurements, observe the correct locations (Q) .
Stiffness 207/241 HB .
Work hardening depth ≤ 8 µ .
% of graphite flakes found ≥ 20% .