B1CJ0AK1 - 406D9 XU INJECTION
ASSEMBLY CONNECTING RODS - PISTONS
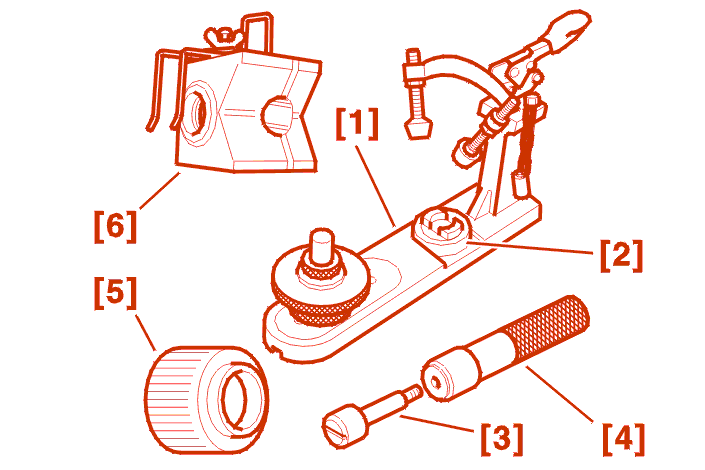
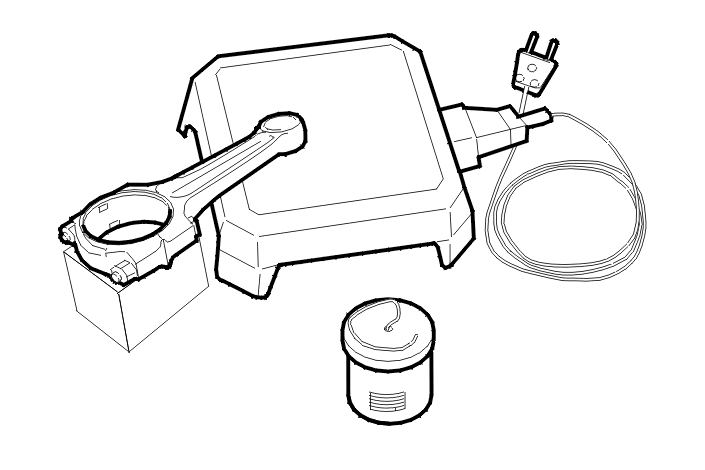
1 - SPECIAL TOOLS
| reference | description | reference | reference |
|---|---|---|---|
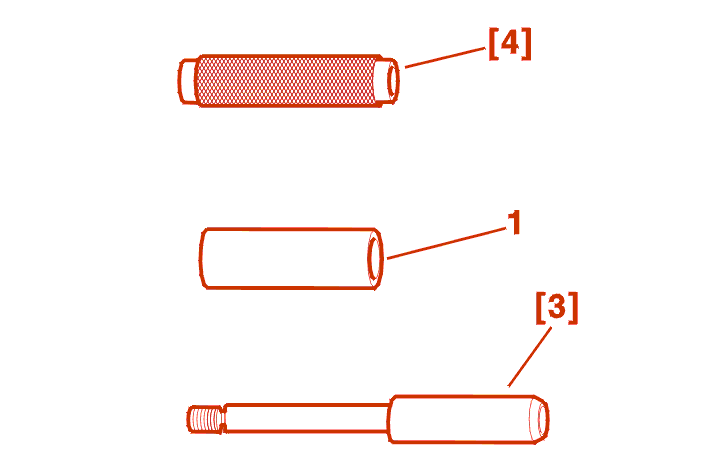
| [1] | base | (-).0139-AZ |
- |
| [2] | piston support | (-).0139 | 6021 - T 9020 - T 9038 - T 7003 - T |
| [3] | gudgeon pin guide XU7 engine |
(-).0139 (-).0132-D2Z |
|
| [4] | handle | (-).0139-B | |
| [5] | support for fitting the gudgeon pin | - | |
| [6] | piston positioning base | - |
2 - PISTONS/CONNECTING RODS ASSEMBLY
Fit the gudgeon pin (3) of the first piston on the guide end piece .
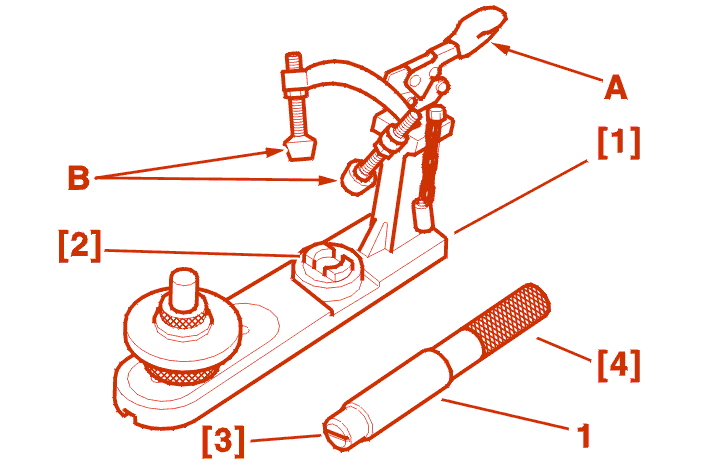
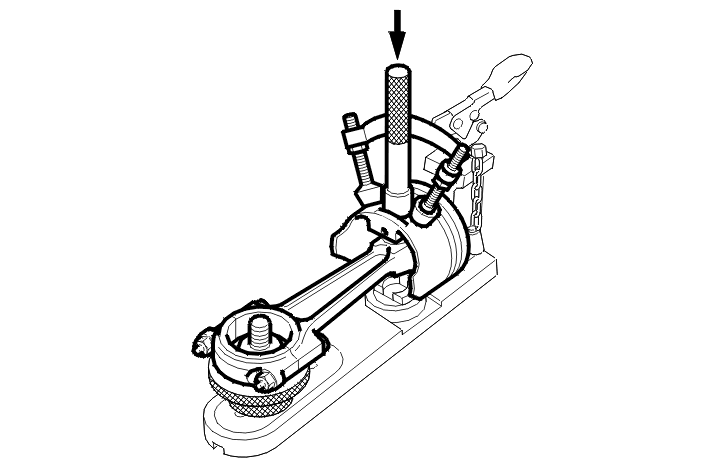
Screw the handle [4] by hand to its limit without forcing it .
Place on the base [1] the abutment [2] .
Open the clamp (A) .
Fully unscrew the pressure screws (B) .
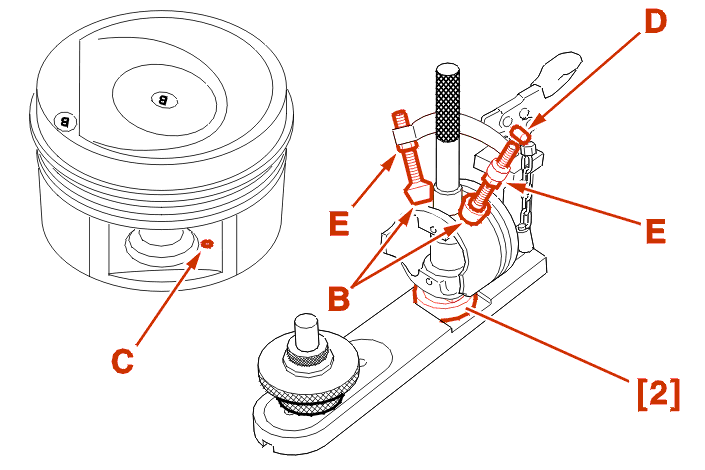
IMPERATIVE : when positioning the piston on the support [C], position the surface with the boss upwards .
Position the piston on the support [2] and guide it using the assembly of handle, pin, guide end piece .
Insert the pin (D) .
Screw the pressure screws (B) into contact with the piston .
Tighten the nuts (E) .

Place the connecting rod with its cap (without shells) in the piston and centralise it with the handle/gudgeon pin end piece assembly .
Adjust the connecting rod support (F) position and height to obtain :
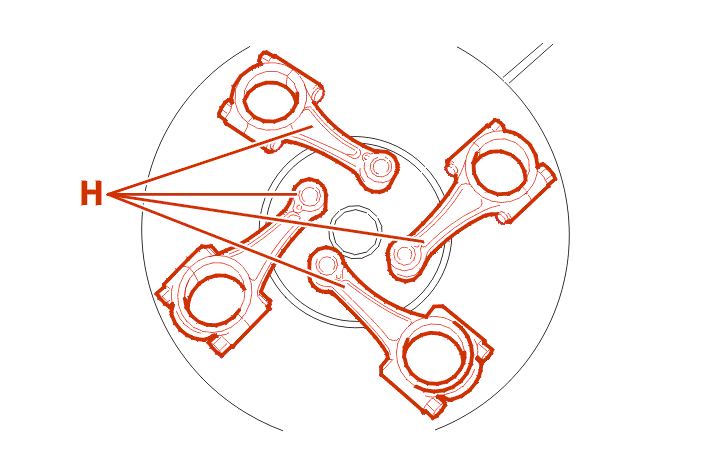
Place the connecting rods on an electric heater .
Place a scrap of tin solder (H) on each little end .
Heat until the solder melts (a temperature of 250 degrees C) .
IMPERATIVE : oil the gudgeon pins .
Clean off the blob of solder .
Position the connecting rod on the assembly .
Rapidly insert the gudgeon pin fully home .
Wait a few seconds before removing the connecting rod/piston assembly .
Proceed in the same way for the other three assemblies .
WARNING : the success of the operations depends on this being done quickly .
2 - 1 - CONNECTING ROD WITH A LUBRICATION HOLE
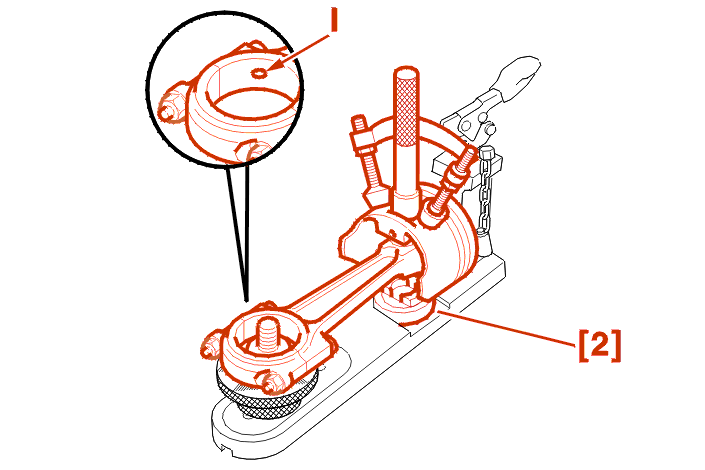
Position the piston on the abutment [2] with the arrow and the marking DIST (timing gear) to the top .
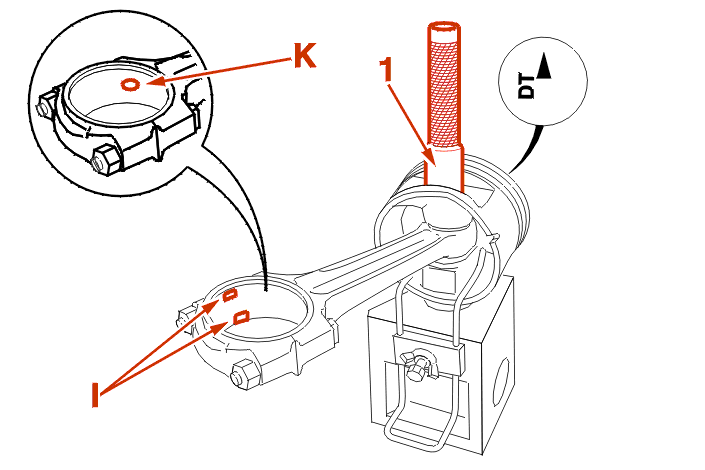
Fit the big end to the assembly directing the lubrication hole (I) to the left in relation to the gudgeon pin .
In the engine, the lubrication hole is located on the exhaust side .
2 - 2 - 2ND POSSIBILITY
Place the gudgeon pin (3) on the drift .
Screw the sleeve [4] onto the drift without fully tightening .
The pin (1) must rotate freely .
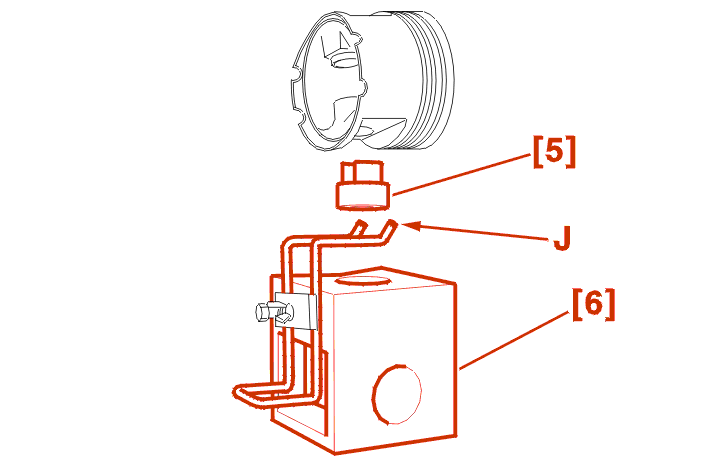
Onto the base [6] place the support [5] .
Fit the piston on the support [5], position the arrow DT upwards .
Align the assembly with the drift [3] and the gudgeon pin .
Retain the piston using clamp (J) on the positioning base clamp [6] .
Place the connecting rod little end on an electric heating plate .
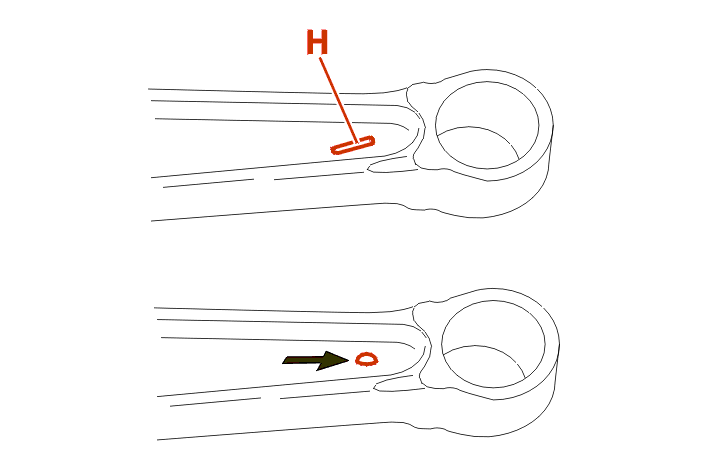
Place a scrap of tin solder (H) on each little end .
Heat until the solder melts (a temperature of 250 degrees C) .
IMPERATIVE : before fitting : lubricate the gudgeon pin (1) .
WARNING : the success of the operations depends on this being done quickly : the pin must be fitted in a single movement .
Clean off the blob of solder .
Place the connecting rod in the piston, the bearing shell stops (I) positioned as shown in the diagram .
Rapidly insert the gudgeon pin (1) fully home .
Wait a few seconds before removing the connecting rod/piston assembly .
Proceed in the same way for the other three assemblies .
2 - 3 - CONNECTING ROD WITH A LUBRICATION HOLE
Fit the big end to the assembly directing the lubrication hole (K) to the left in relation to the gudgeon pin .
In the engine, the lubrication hole is located on the exhaust side .