B1CJ0KK1 - 406D9 ES9J4 ENGINE
REASSEMBLY ENGINE (CYLINDER BLOCK) (ES9J4)
1 - SPECIAL TOOLS
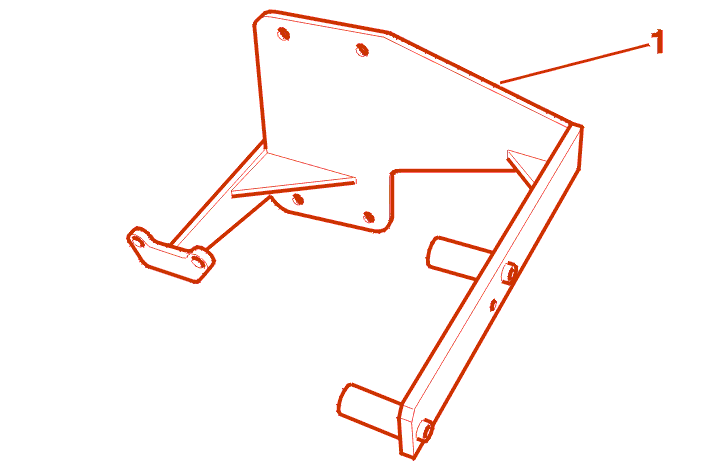
[-] Stand DESVIL .
[1] Adaptors (-).0187-L .
[2] Fitting drift for crankshaft rear seal (-).0187-H .
[3] Fitting drift for crankshaft front seal (-).0187-G .
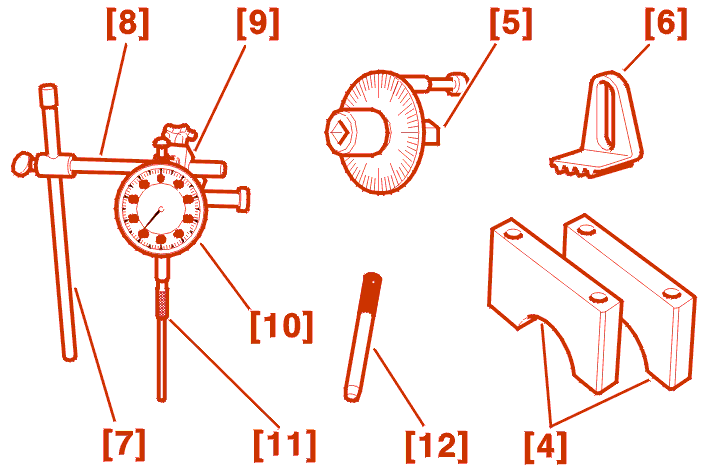
| reference | description | reference | reference |
|---|---|---|---|
| [4] | dummy main bearings | (-).0187-M | (-).0187-M |
| [5] | angular locking cotter | FACOM D.360 type | 4069-T |
| [6] | flywheel stop | FACOM D.86 type | 9044-T |
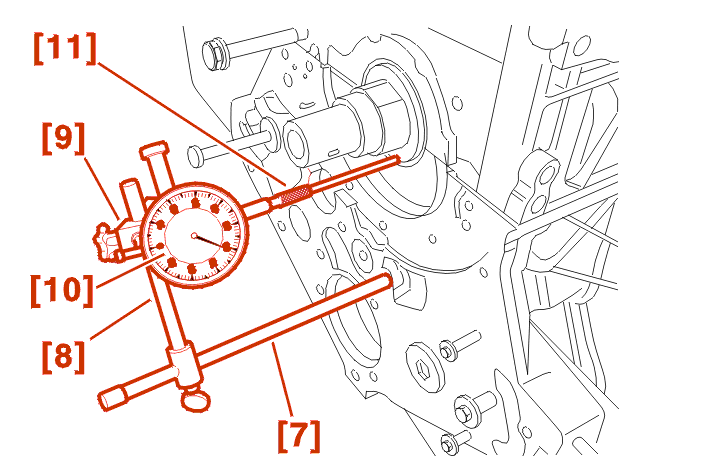
| [7] | dial gauge support rod | (-).0117-AQ | 5708-T.V1 kit 5708-T |
| [8] | dial gauge support rod | (-).0504-A1Z | 5708-T.V2 kit 5708-T |
| [9] | dial gauge support | (-).0504-A2 | 5708-T.V3 |
| [10] | dial gauge | (-).01504 | 2437-T |
| [11] | dial gauge extension | (-).0117-T | 5003T-C |
| [12] | crankshaft setting rod | (-).0187-A | (-).0187-A |
2 - REASSEMBLY
Place the cylinder block on the stand [1] .
Clean the joint faces with an approved descaling product .
Clean the threads and taps .
Do not use sharp or abrasive tools .
The joint faces must not have any trace of knocks or scores .
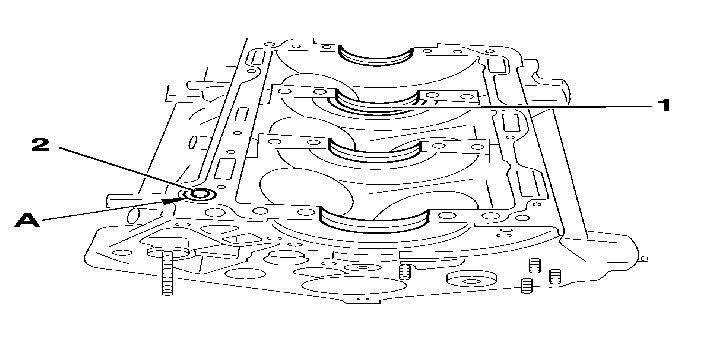
Fit the grooved main bearing half-shells on the cylinder block side .
NOTE : the half-shell (1) is fitted with stop thrust washers .
Check that pin (2) is present .
Always change the O-ring at (A) .
Oil the half shells and the journals .
Fit the crankshaft .
Check that the 8 centralising studs are present (3) .
Fit the new smooth main bearing shells in main bearing cap casting .
NOTE : the half-shell (4) is fitted with stop thrust washers .
Oil the main bearing shells and stop thrust washers .
2 - 1 - CHECK OF THE MAIN BEARING CAP CASTING BOLTS BEFORE RE-USE
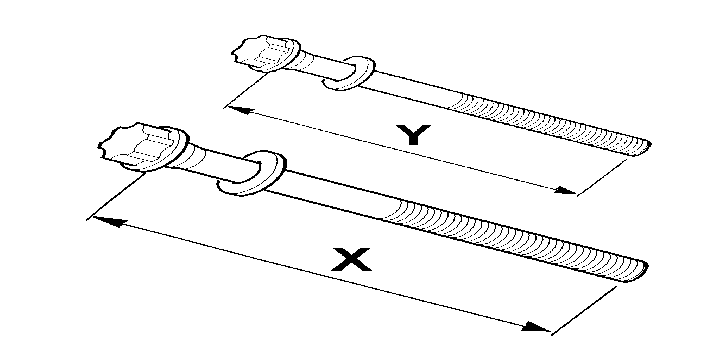
Bolt (M11) : (X) must be less than 131,5 mm .
Bolt (M8) : (Y) must be less than 199 mm .
3 - REASSEMBLY (CONTINUED)
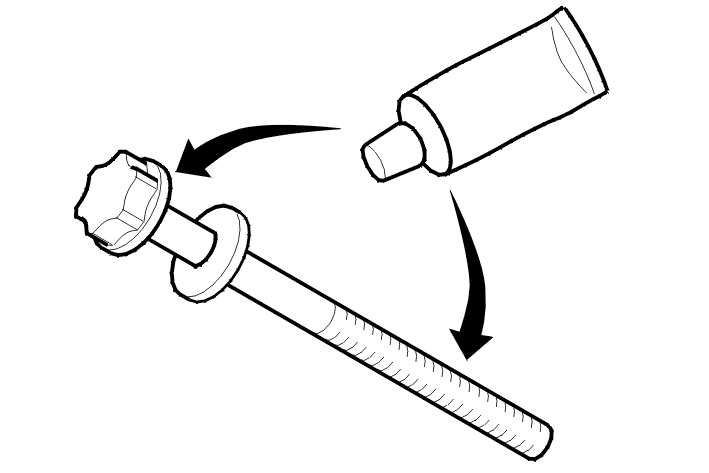
Brush the bolt threads .
Coat the threads and the contact area under the bolt head with (G10) grease .
Refit the main bearing cap casting .
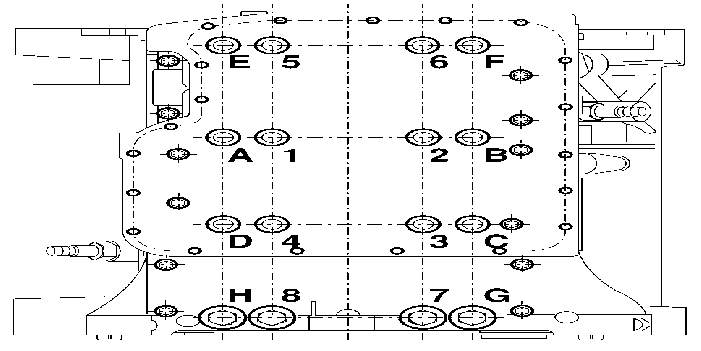
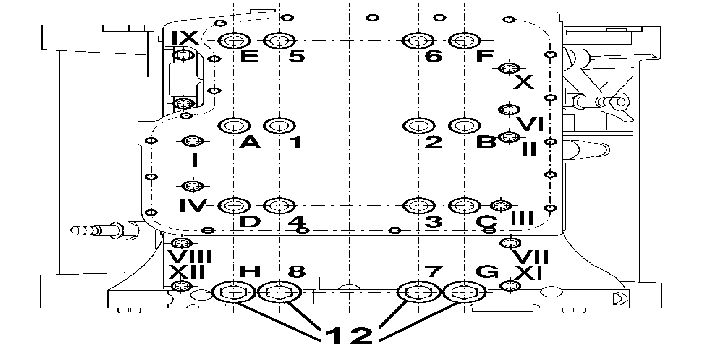
Pre-tighten the bolts (M11) to 3 m.daN (From (1) to (8)) .
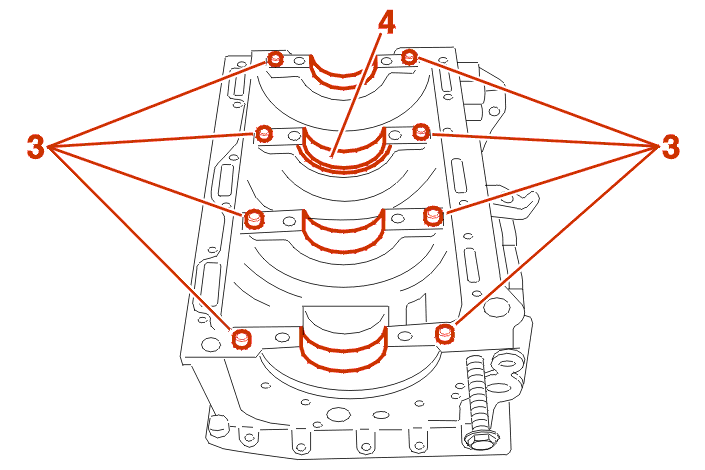
Pre-tighten the bolts (M8) to 1 m.daN (From (A) to (H)) .
Fit :
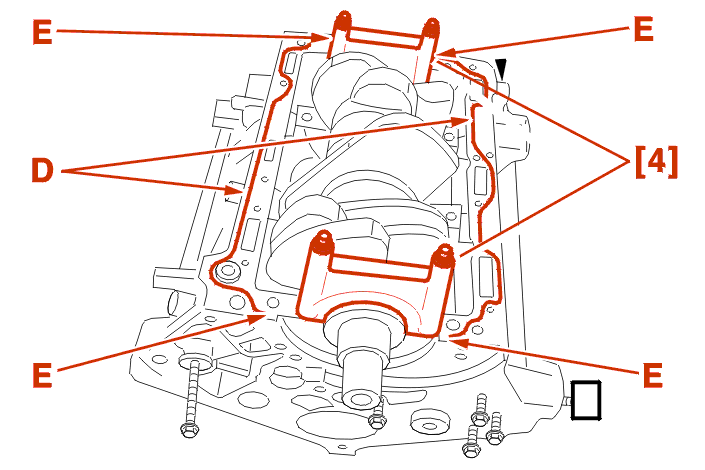
Fit the bracket [9] to the rod [8] .
Fit rod [7] on the cylinder block, on the timing gear end .
Permissible play: 0,1 to 0,3 mm .
IMPERATIVE : if the figures read do not correspond to those indicated, identify the cause of the fault: crankshaft condition, burrs, impurities...) .
Remove the tools [7] - [8] - [9] - [10] - [11] .
Remove :
Position :
Run up the bolts (M11) .
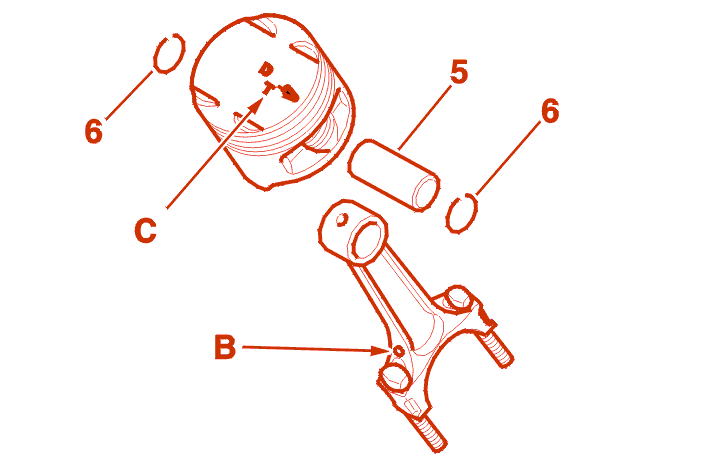
Piston and pin must match .
Assemble the connecting rods and the pistons positioning the oil jet hole (B) in relation to the marking identified at (C) on the piston .
Fit :
Ensure that the con rods turn freely on their pins .
Check that the new main bearing shell is fitted on the con rod big end .

Fit the rings using piston ring pliers :
Position the ring gaps at 120 degrees to the scraper ring gap .
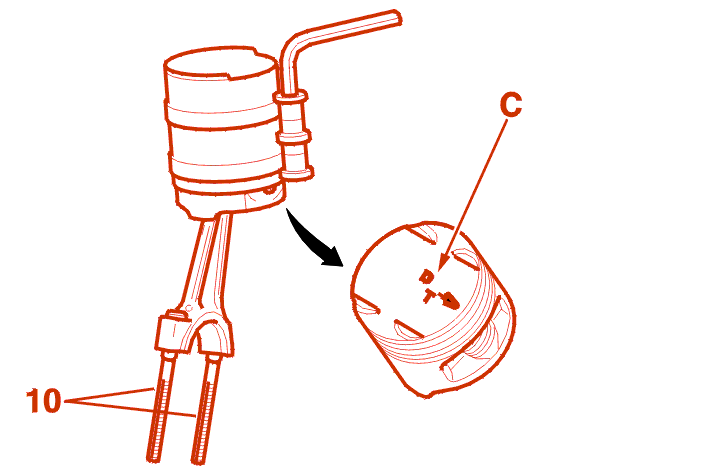
IMPERATIVE : position the mark identified as (C) on the timing end .
Position :
Oil the piston rings and cylinder jackets .
Insert the con rod/piston assembly in the corresponding cylinder using a ring compressor .
WARNING : there is a correct way round for the big end caps to be fitted ; the notches of the big end caps half-shells must be opposite the notches of the big end half-shells .
Fit the big end cap with a new oiled main bearing shell .
Clean : The bolts, The nuts .
Coat the big end nuts (thread and contact surface) with G10 .
Tightening is carried out in two stages .
Stage 1 :
Stage 2 :
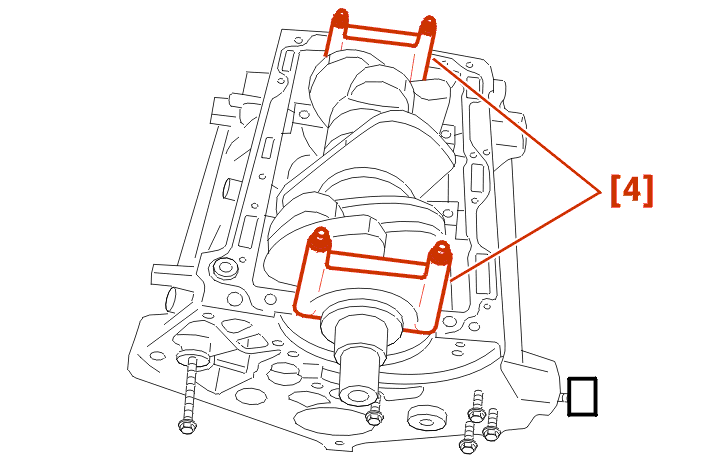
Remove the tools [4] .
IMPERATIVE : carefully degrease the joint face and fill groove (D) up to the ends (E) of the cylinder block with (E10) sealing compound .
Coat the threads and the contact area under the bolt head with (G10) grease .
Refit the main bearing cap casting .
This operation is performed in 3 stages .
Stage 1 :
Stage 2 :
Stage 3 :
Fit :
Tighten the bolts (In the order shown) (Bolts pre-coated with E3) .
Pre-tighten : 0,5 da.Nm .
Tightening torque: 0,8 da.Nm .
Check the tightening : 0,8 da.Nm .
IMPERATIVE : before fitting the crankshaft seal, ensure that the bottom of the housing is free of sealing compound ; the outer face of the lip seal must be free of all traces of oil .
Fit :
5 GEARBOX
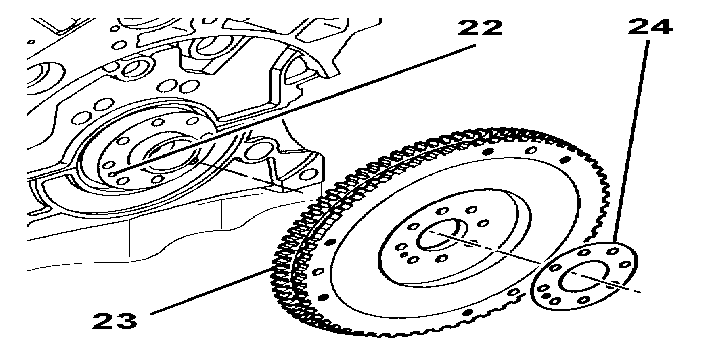
Check that the centralising pin is present (22) .
Fit :
Lock the flywheel with the stop [6] .
Tighten the bolts to 2 daN.m + E5 .
Finally tighten by turning through 60 ° (Using the tool [5]) .
4 AUTOMATIC GEARBOX
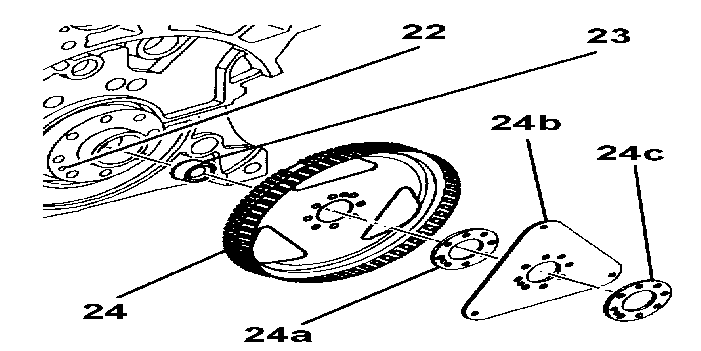
Check that the centralising pin is present (22) .
Fit :
Immobilise the crown-wheel carrier using the immobilising tool [6] .
Tighten the bolts to 2 daN.m + E5 .
Finally tighten by turning through 60 ° (Using the tool [5]) .
ALL MODELS
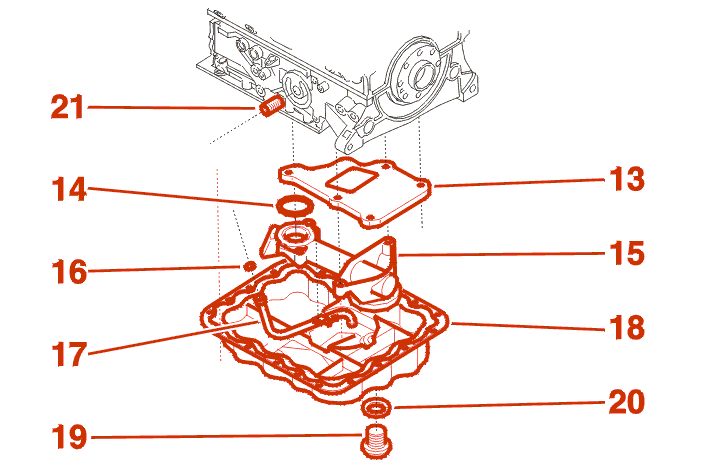
NOTE : the oil pump is fitted with a composite gasket capable of withstanding removal several times : if the gasket is damaged, it can be partially repaired with (E10) jointing paste .
Refit the oil pump .
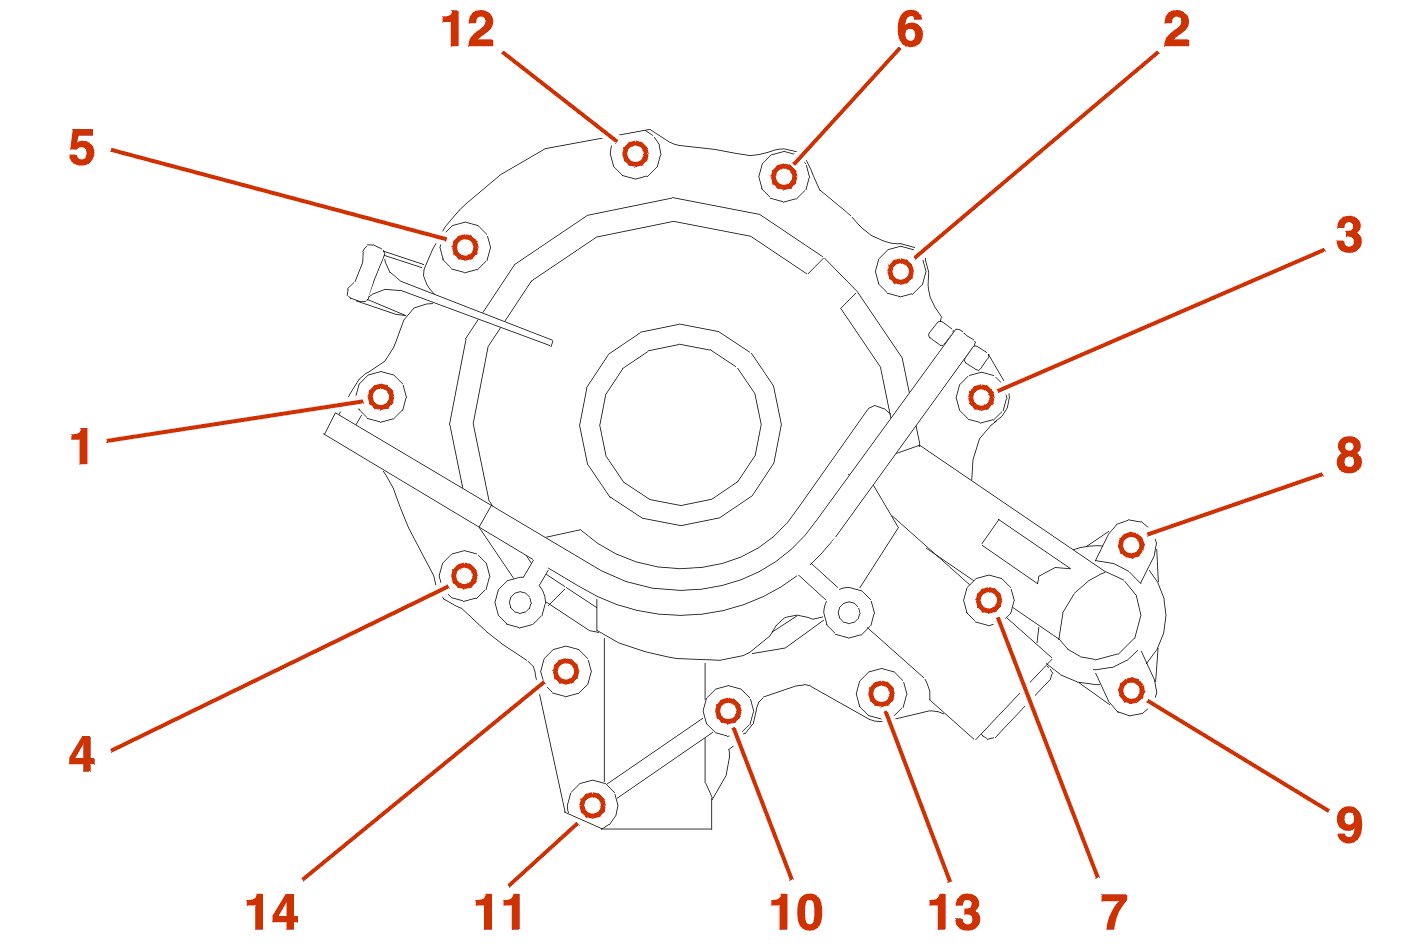
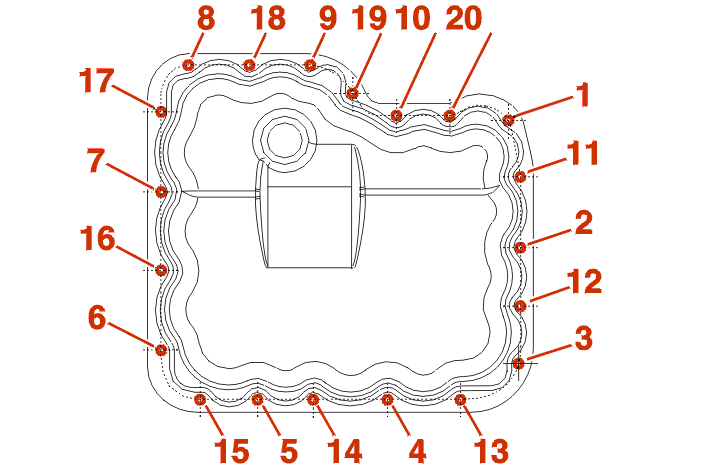
IMPERATIVE : finger tighten then progressively tighten the securing bolts in the order shown (from (1) to (14)) .
Pre-tighten : 0,5 da.Nm .
Tightening torque: 0,8 da.Nm .
Check the tightening : 0,8 da.Nm .
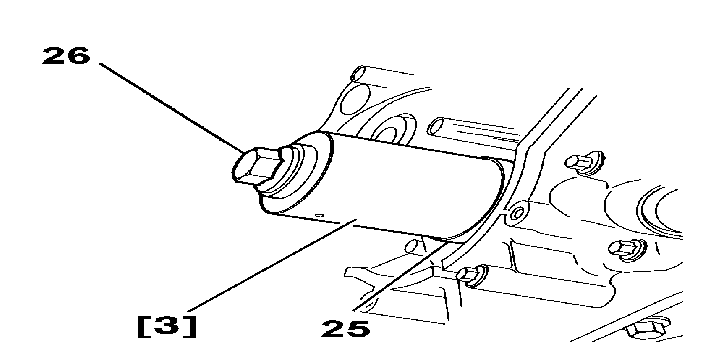
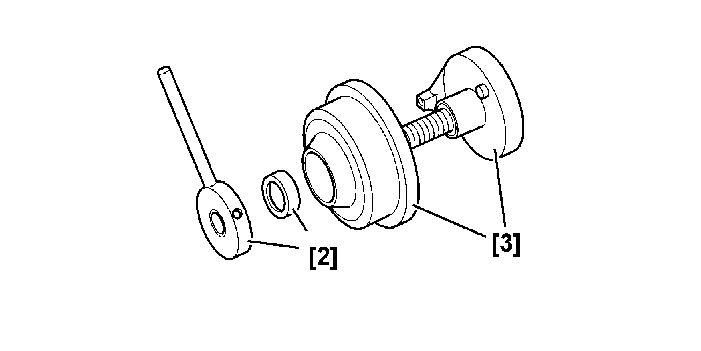
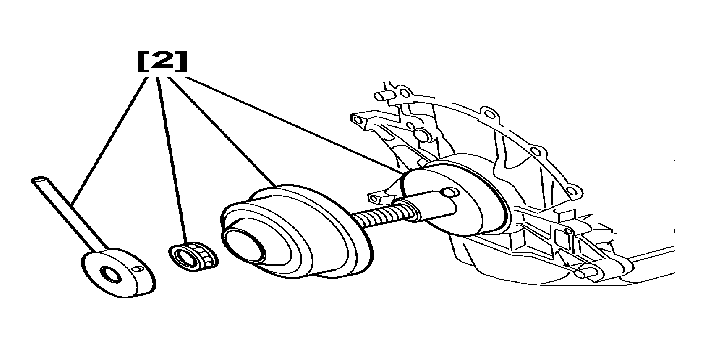
Fit a new oil seal (25) using tool [3] and the bolt (26) .
Check that the cotter pin is present .
Refit the crankshaft gear .
Tighten the bolt to 4 da.Nm .
Finally tighten by turning through 80 ° (Using the tool [5]) .
Remove the tool [6] .
Peg :