B1DJ05K1 - 406D9 XU7JP4 ENGINE XU10J4R ENGINE
DISMANTLING - ASSEMBLY 16 VALVE CYLINDER HEAD
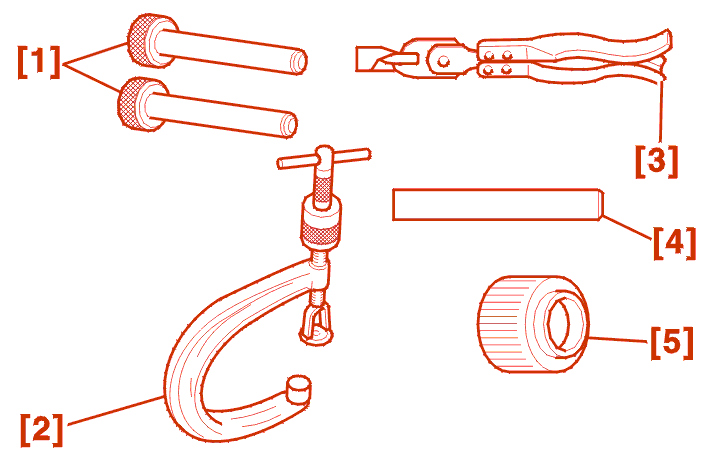
1 - SPECIAL TOOLS
| reference | description | reference | reference |
|---|---|---|---|
| [1] | camshaft hub setting rods XU10J4R - XU10J4RS - XU7JP4 engines XU10J4 engine |
(-).0153-AB (-).0153-M |
9041 - T.Z 7014 - T.M |
| [2] | valve lifter cup press |
FACOM U43LA + U43LA16A |
FACOM U43LA + U43LA16A |
| [3] | valve stem oil seal pliers | (-).0170 | 4517 - T |
| [4] | valve stem oil seal drift | (-).0132-W | 4511 - T |
| [5] | camshaft oil seal fitting drift | (-).0153 | 9041 - A.A 7014 - T.K |
2 - DISMANTLING
Slacken the bolts (1), (2) Rod(s) [1] in position .
Remove :
Remove :
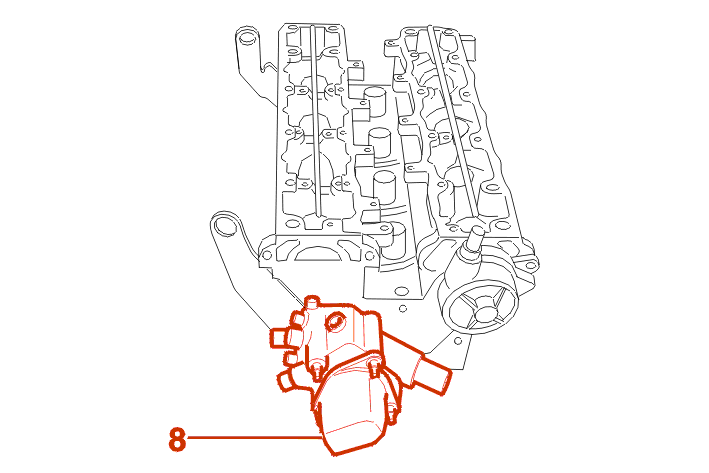
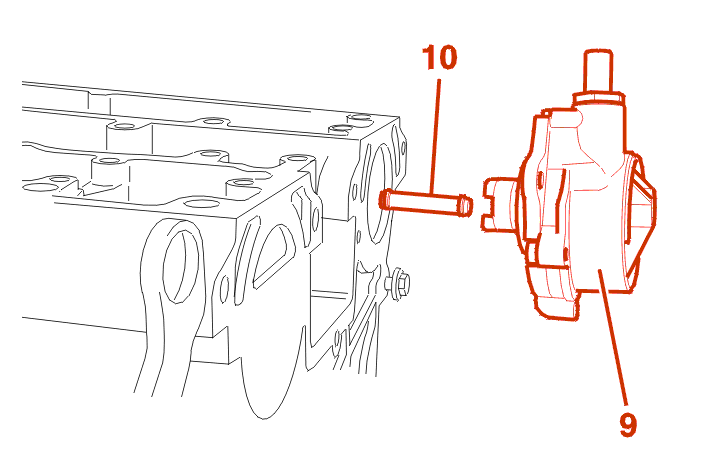
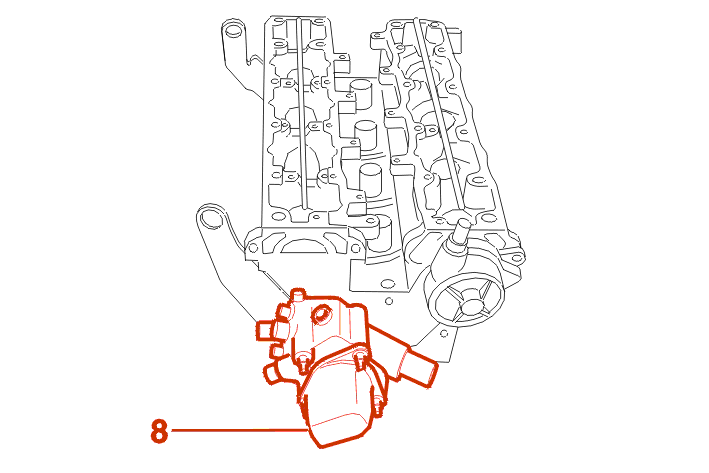
Remove the thermostat housing (8) .
Depending on engine type :

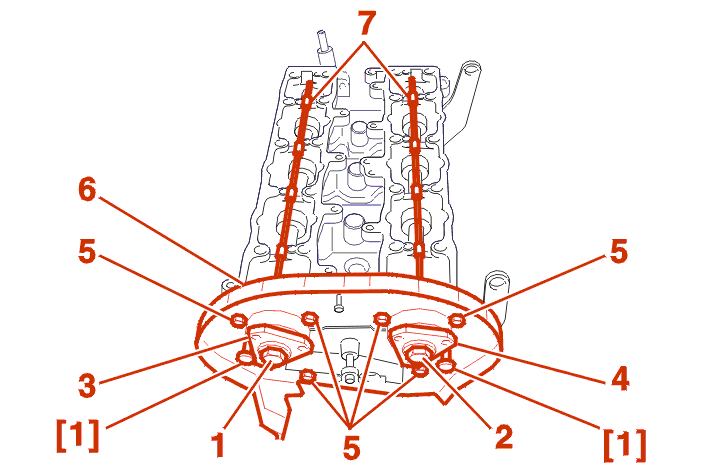
Slacken by several turns the 12 securing bolts on each camshaft bearing housing (11) - (12) .
Progressively unscrew the bolts securing the bearing housings (11) - (12) .
Remove the camshaft bearing housings (11) - (12) .
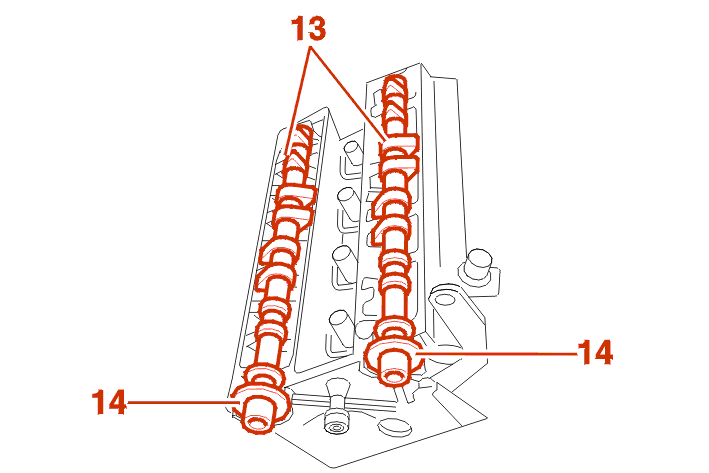
To remove the camshafts (13) :
Remove the lip seals (14) .

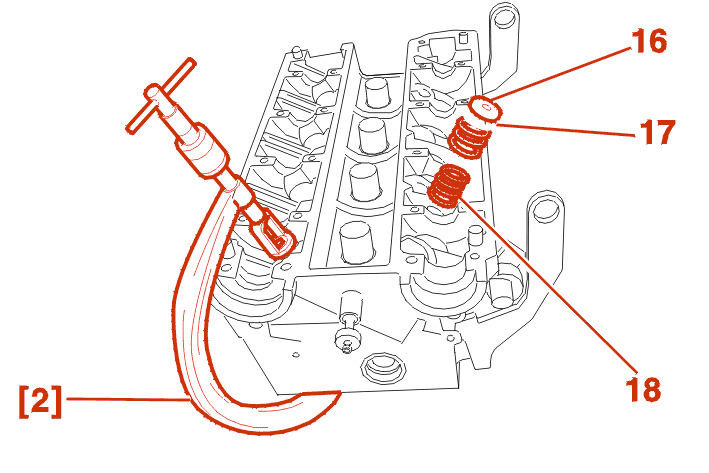
Removal of the tappets (15) :
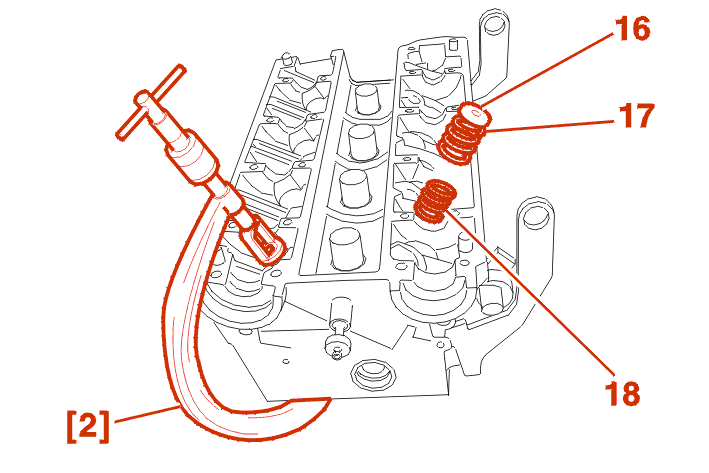
Using the tool [2] .
Remove :
Remove :
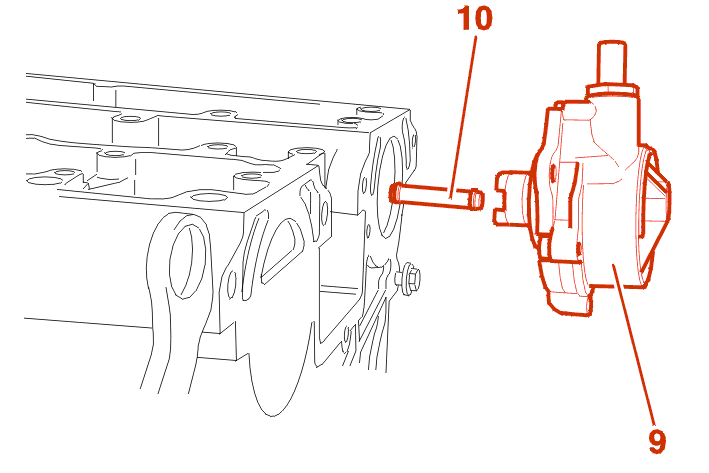
3 - REMOVAL : ANTI-RETURN VALVE
Plug the pipe (20) .
Using bellows fitted with a 6.5 mm diameter end piece, blow into the pipe (21) .
WARNING : do not damage the camshaft seal contact surfaces .
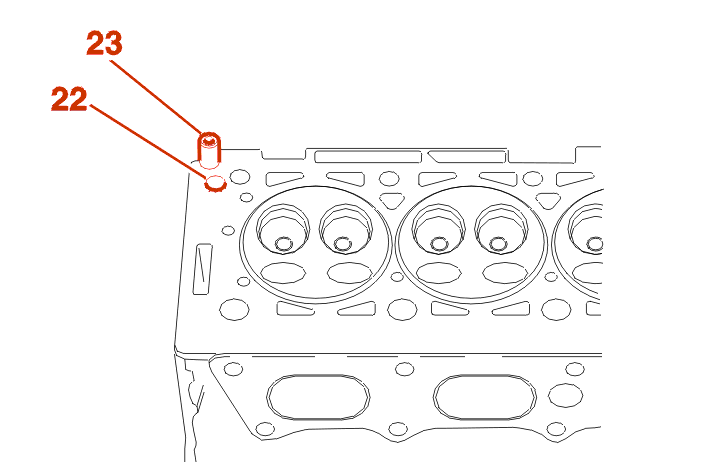
(22) : Non-return valve housing (23) .
Remove the anti-return valve (23) .

Check the flatness :
NOTE : in order to clean the seal surfaces, use scouring product DECAPLOC 88 (or equivalent) .
Check the condition :
Make the necessary repairs .
IMPERATIVE : for the checking, grinding and replacement of the parts, refer to sections : data - identification .
4 - ASSEMBLY
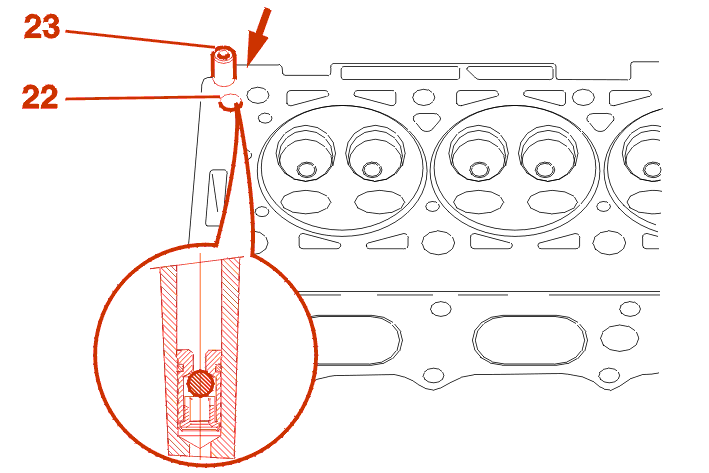
Fit a new anti-return valve (23) in the pipe (22) .
WARNING : ensure that the direction of fitting of the anti-return valve is correct .
Fit :
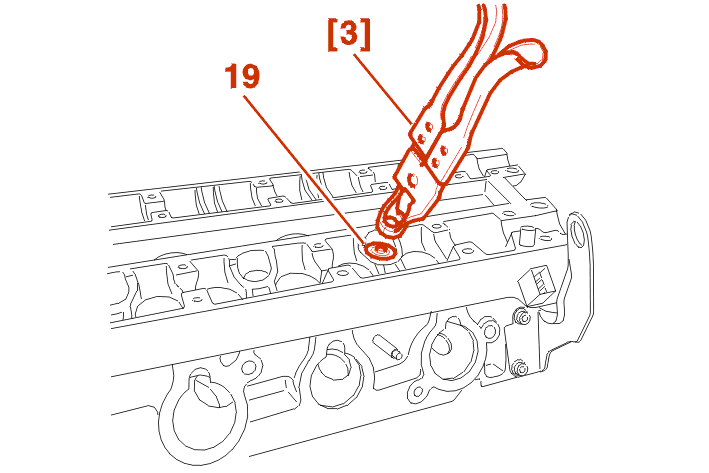
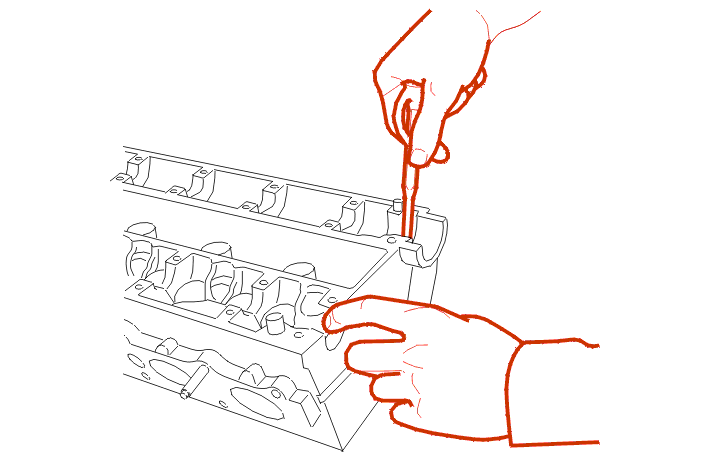
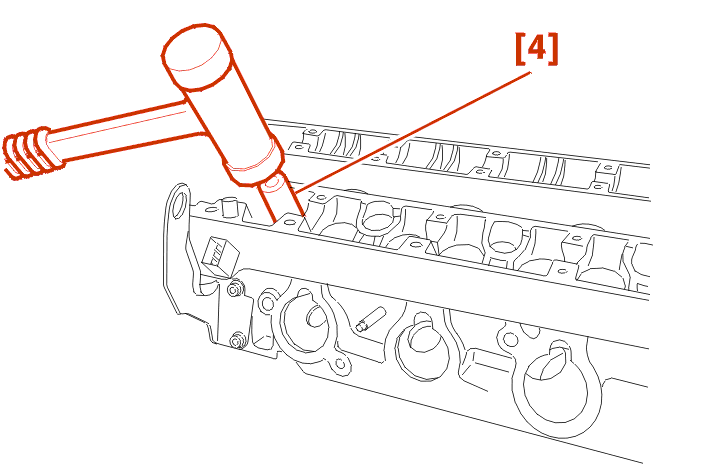
Insert the new valve stem seals using the tool [4] .
Using tool [2], refit :
Lubricate the tappets .
Refit the tappets in their original positions .
4 - 1 - HYDRAULIC TAPPETS
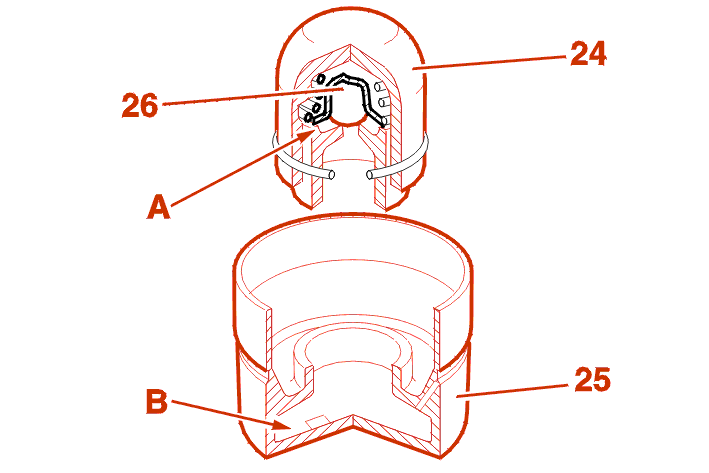
Check that the hydraulic tappets are not fully extended .
To check, compress the piston (24) in the tappet between the thumb and index finger to compress the spring .
If the piston appears blocked, the high pressure chamber (A) is full of oil and fully extended .
To drain the high pressure chamber, remove the piston (24) by tapping the tappet on a block of wood .
Remove the oil by pressing on the ball (26) and drain the low pressure chamber (B) .
When refitting, place a little oil in the low pressure chamber (B) .
5 - ASSEMBLY (CONTINUED)
Lubricate the cams and the bearings (MOLYDAL GB SP 370G) .
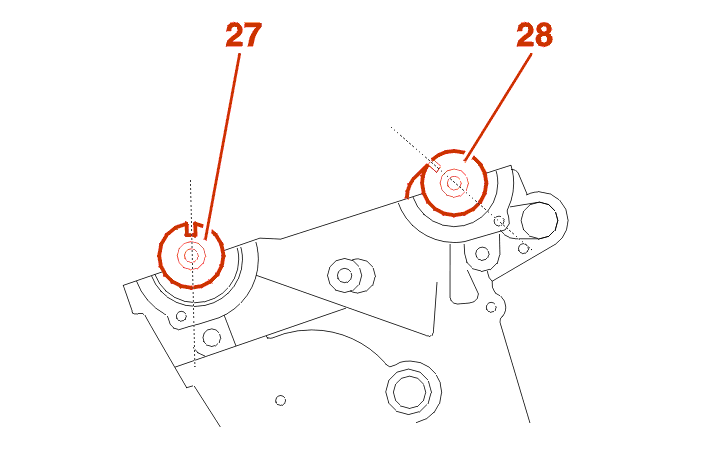
Fit the camshafts and turn them with the groove (27) at 12 o'clock and the groove (28) at 11 o'clock .
(The groove (27) is vertical and the groove (28) is aligned with the timing hole) .
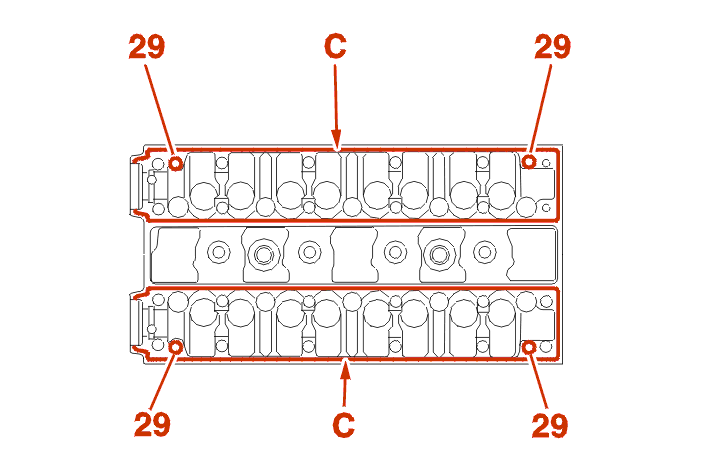
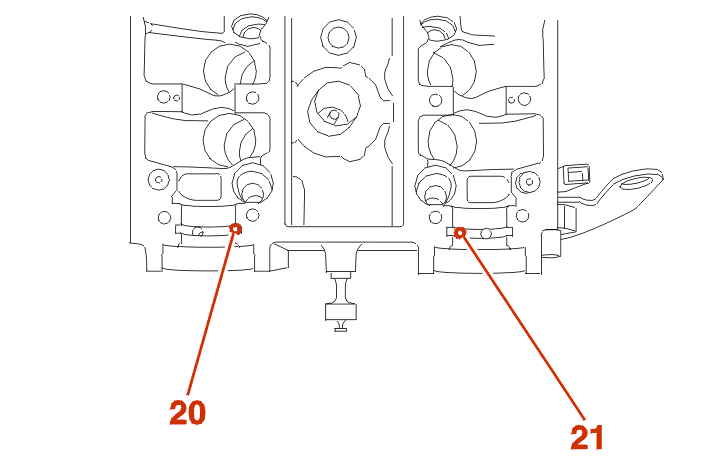
Check that the pins (29) are present .
Apply a bead of SILICONE AUTOJOINT OR CATEGORIE 2 jointing paste at (C) round the perimeter of the joint faces and the tappings for the securing bolts .
Fit the camshaft bearing housings (11) and (12) .
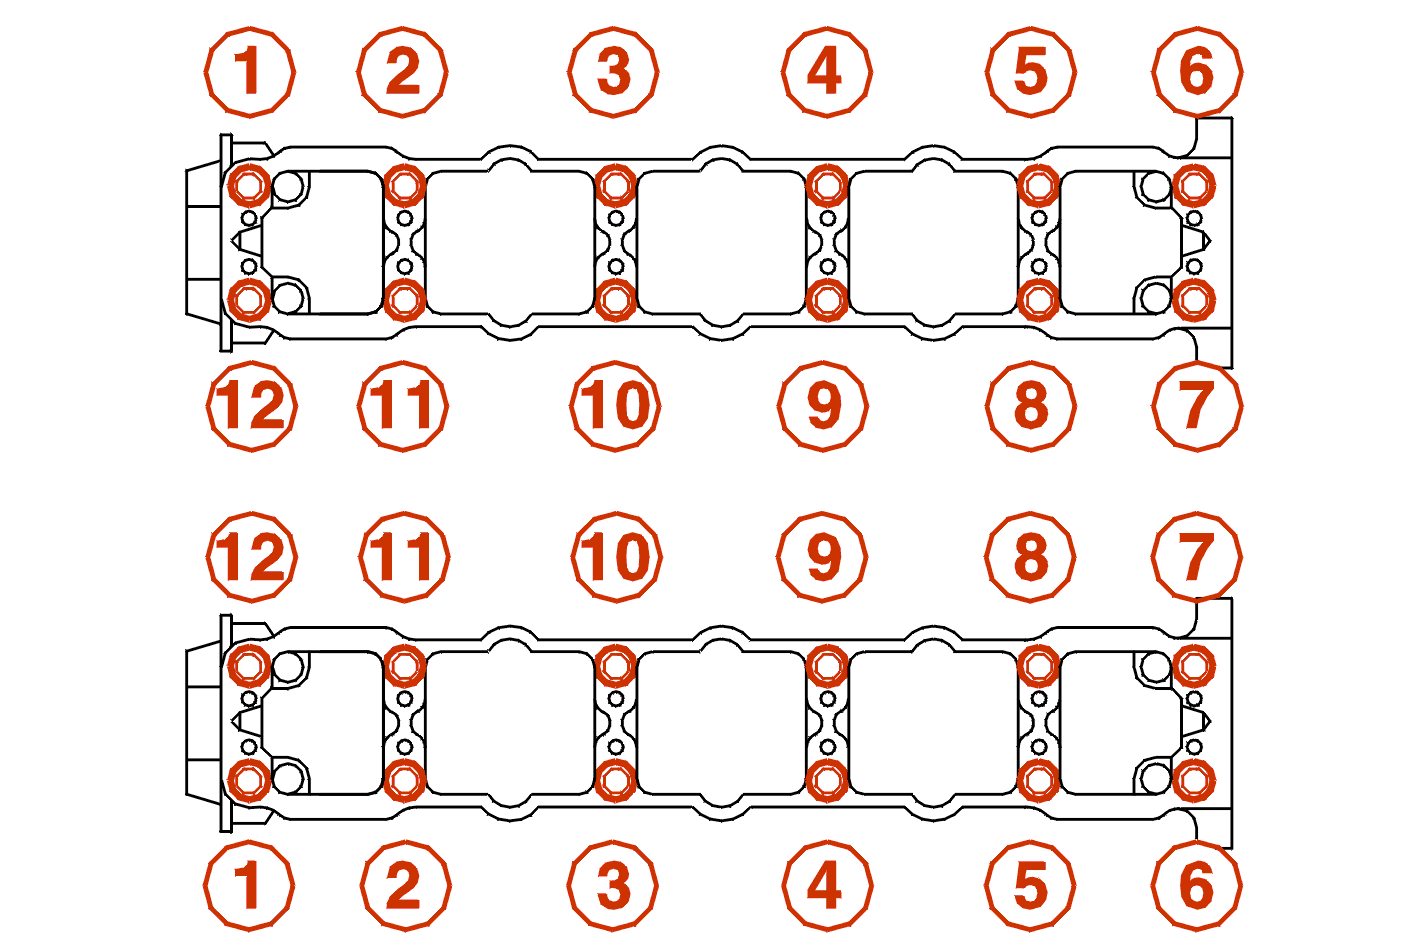
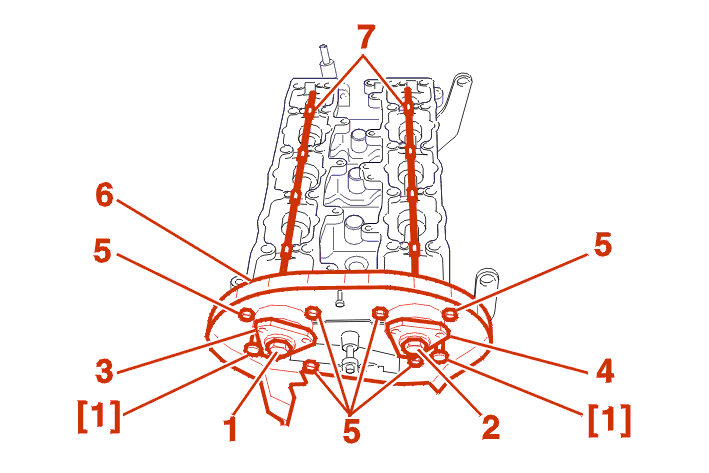
IMPERATIVE : finger tighten then progressively tighten the securing bolts in the order shown (from (1) to (12)) .
Pre-tighten : 0.5 da.Nm .
Tightening torque: 1 da.Nm .
NOTE : the cylinder head covers have composite gaskets which can be used several times, if the gasket is damaged, it can be partially repaired with SILICONE AUTOJOINT OR CATEGORIE 2 jointing paste .
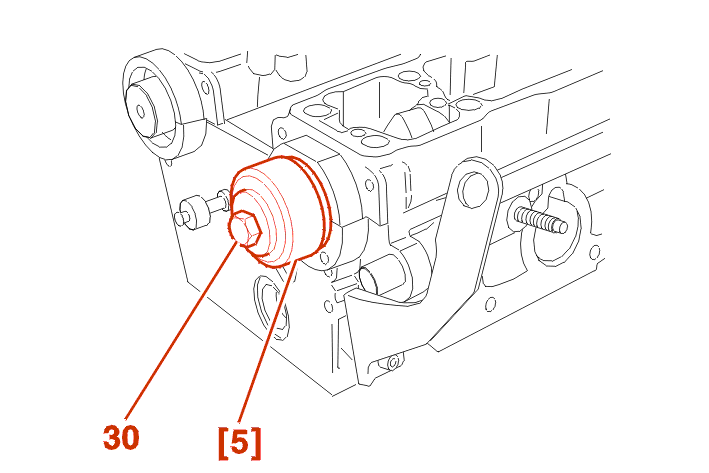
Fit new camshaft oil seals using tool [5] and the camshaft hub securing bolts (30) .
Fit (Depending on engine type) :
Fit :
Fit :
Tighten the bolts (5) .
Fit :
Tighten the bolts (1) and (2) to 7.5 daN.m. .