B2CG1GK1 - 406D9 BE4 GEARBOX
REMOVAL - REFITTING GEARBOX
1 - SPECIAL TOOLS
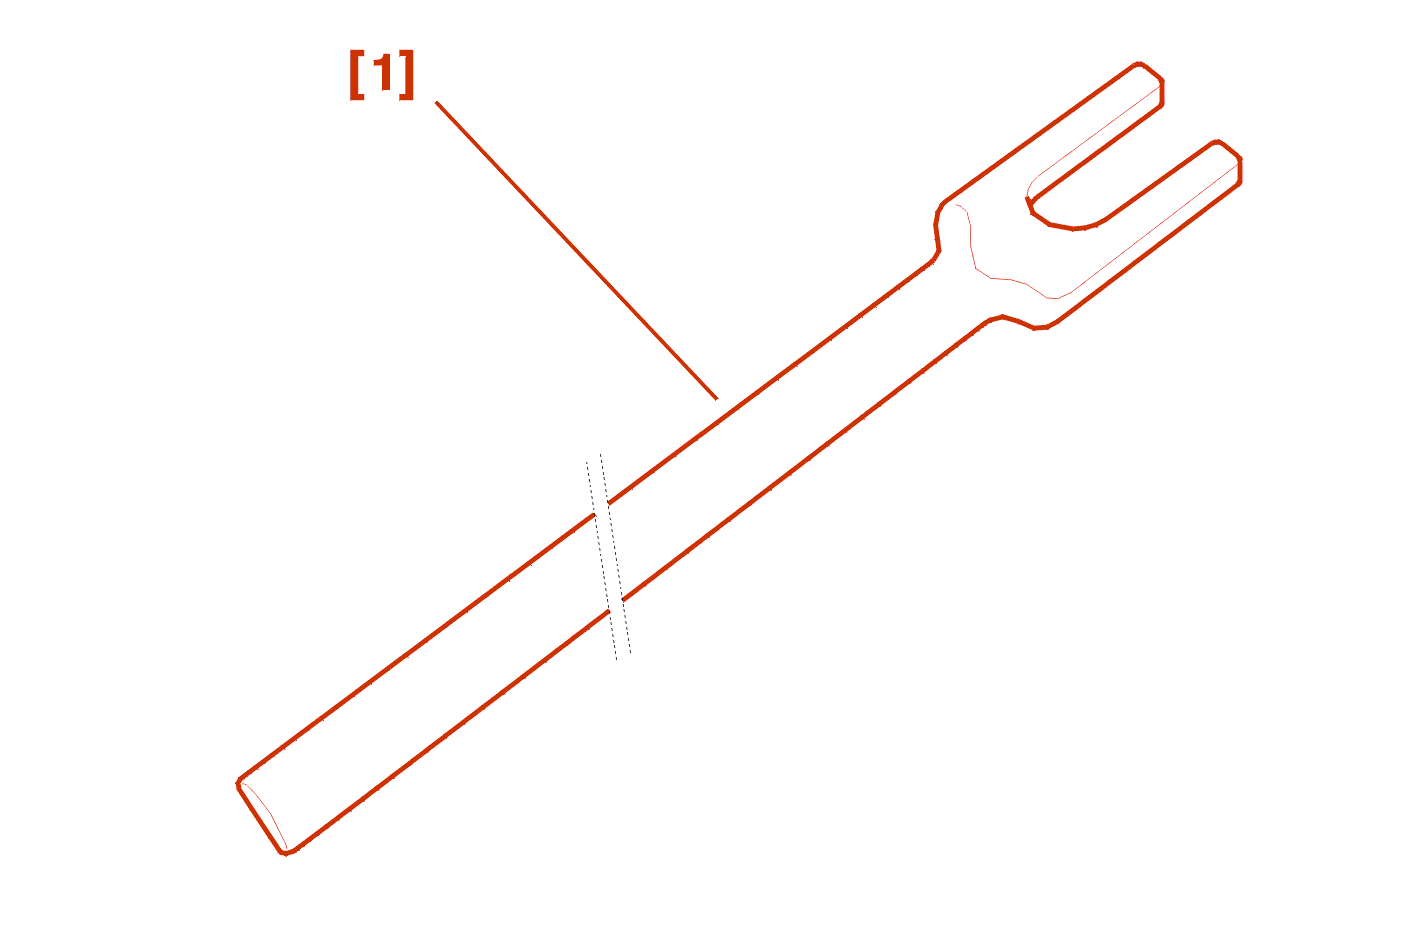
[1] Tool for unclipping 13 dia. ball joints (-).0216-G2 .
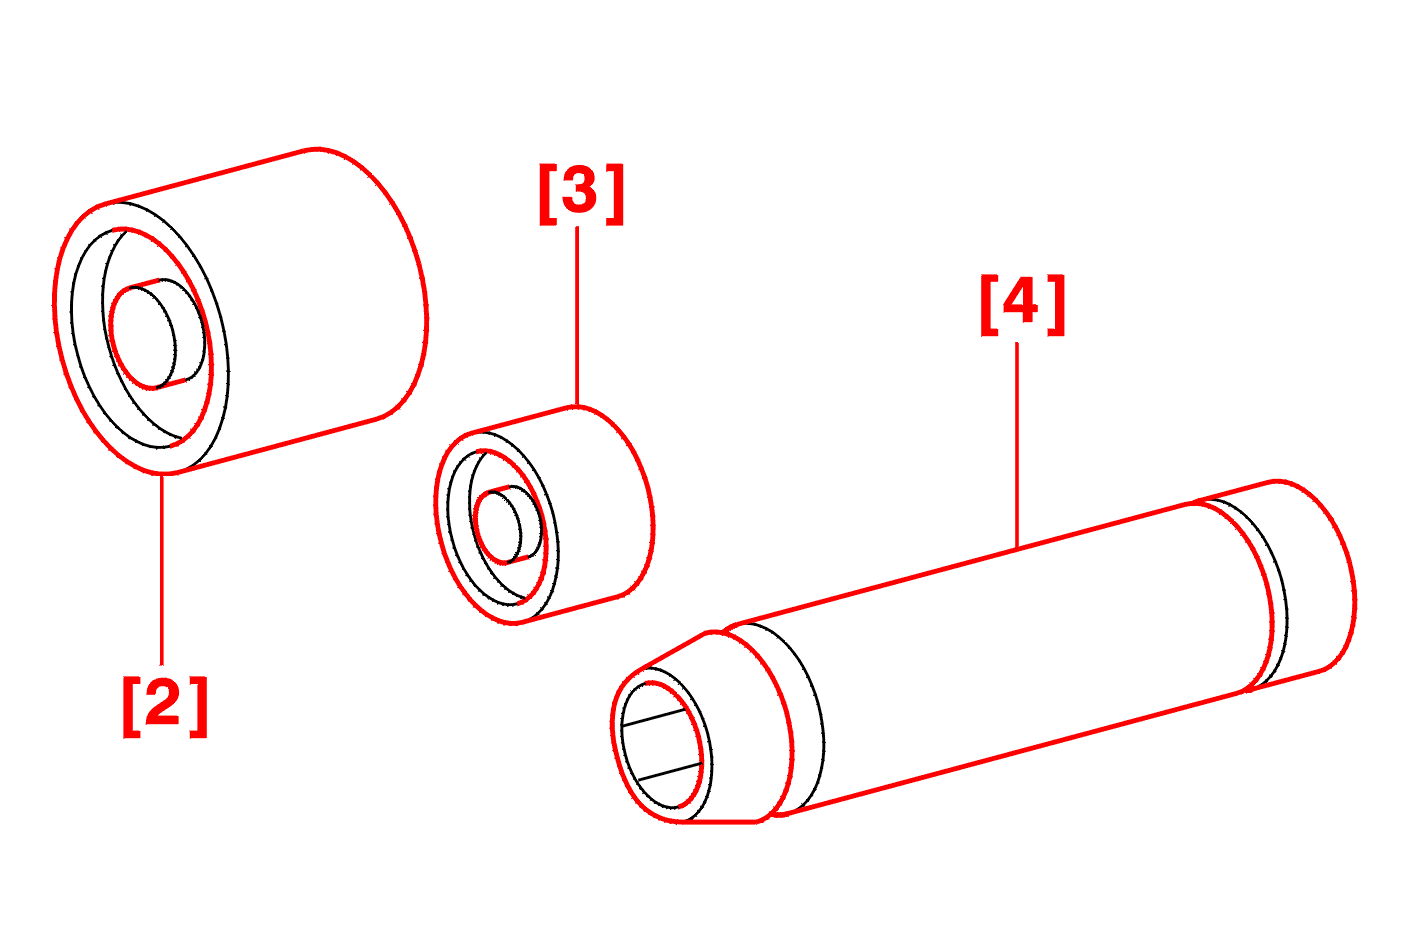
[2] Fitting drift for final drive right-hand output oil seal (-).0317-U .
[3] Fitting drift for final drive left-hand output oil seal (-).0317-T .
[4] Socket for the removal of the gearbox shaft (-).0317-AB .
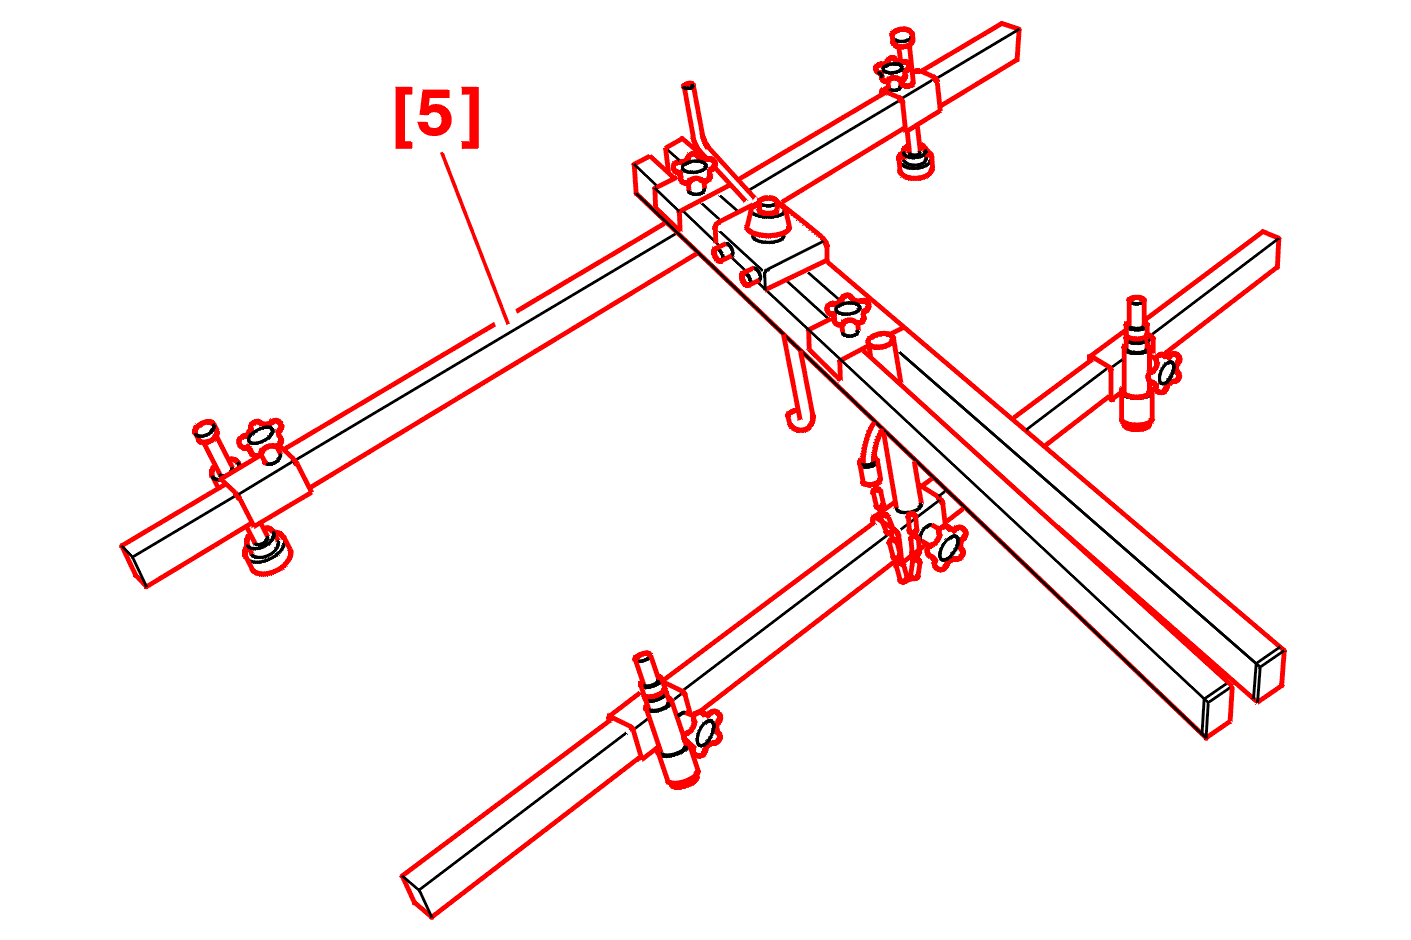
[5] Power train support crossmember (-).0009 .
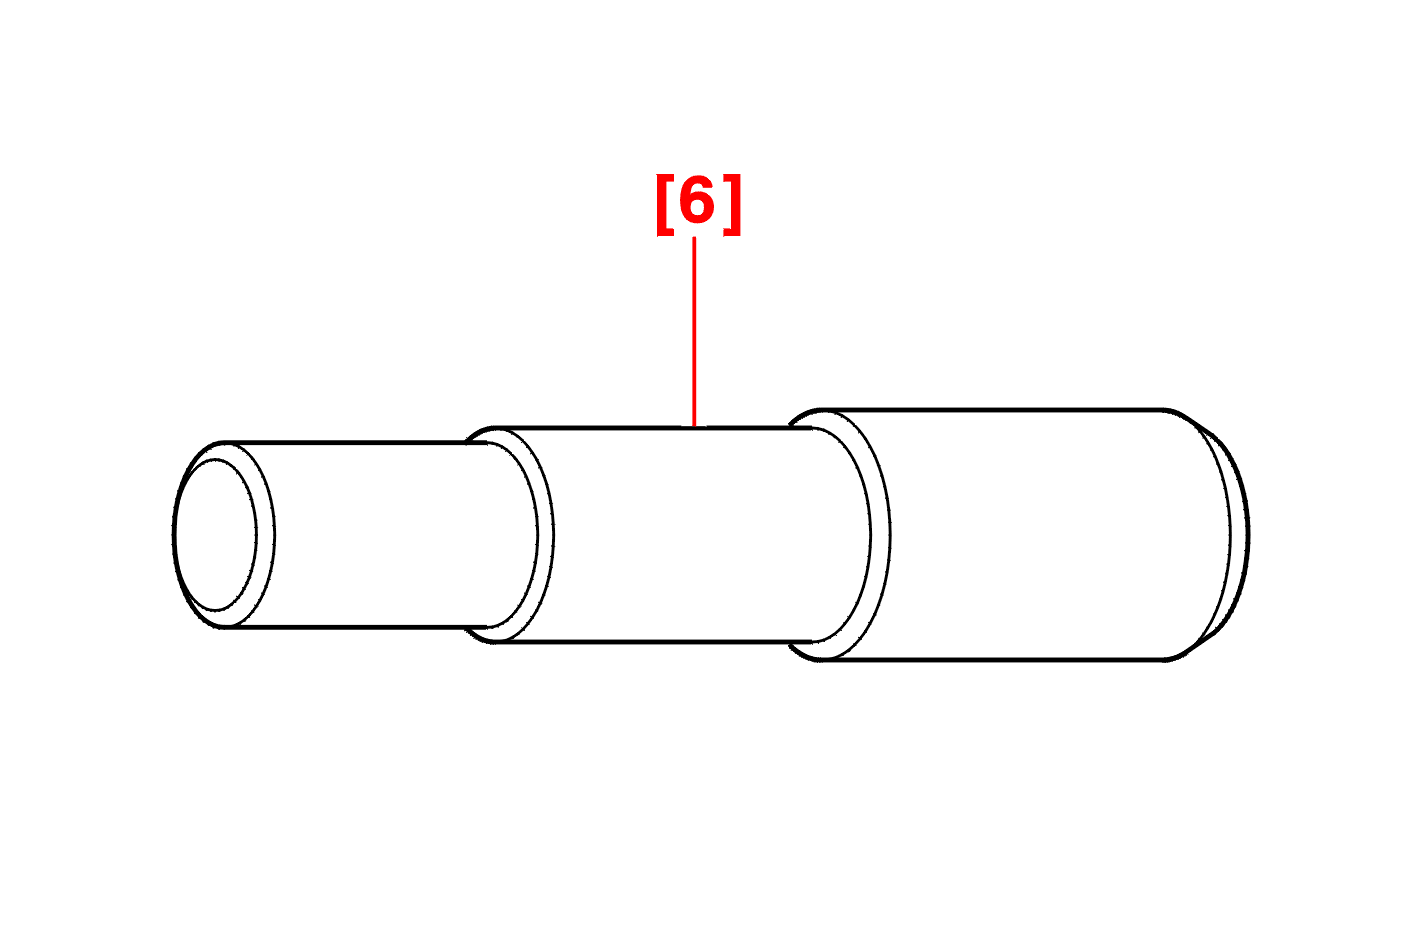
[6] Clutch plate centralising mandrel (-).0214 .
2 - REMOVAL
WARNING : the gearbox is removed from under the vehicle .
Disconnect the battery .
Remove the pipe and the air cleaner housing .
Disconnect, unclip and move aside the electrical harnesses which are connected to the gearbox .
Move aside the clutch slave cylinder without opening the circuit .
WARNING : do not press the clutch pedal (risk of clutch slave cylinder breakage) .
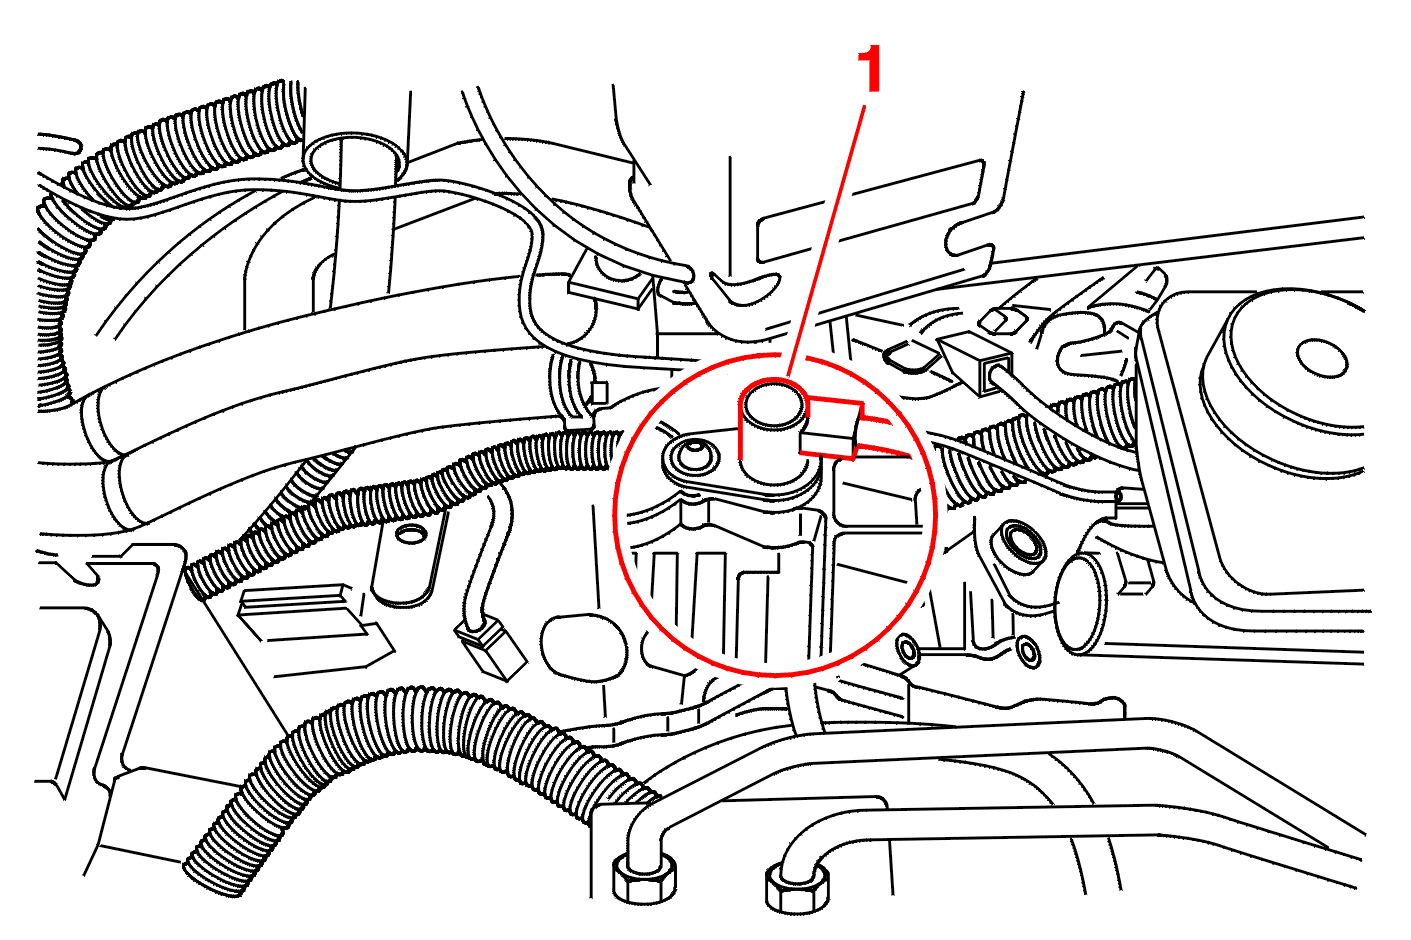
Remove :
Remove the 3 starter securing bolts .
Move aside the starter without disconnecting it .
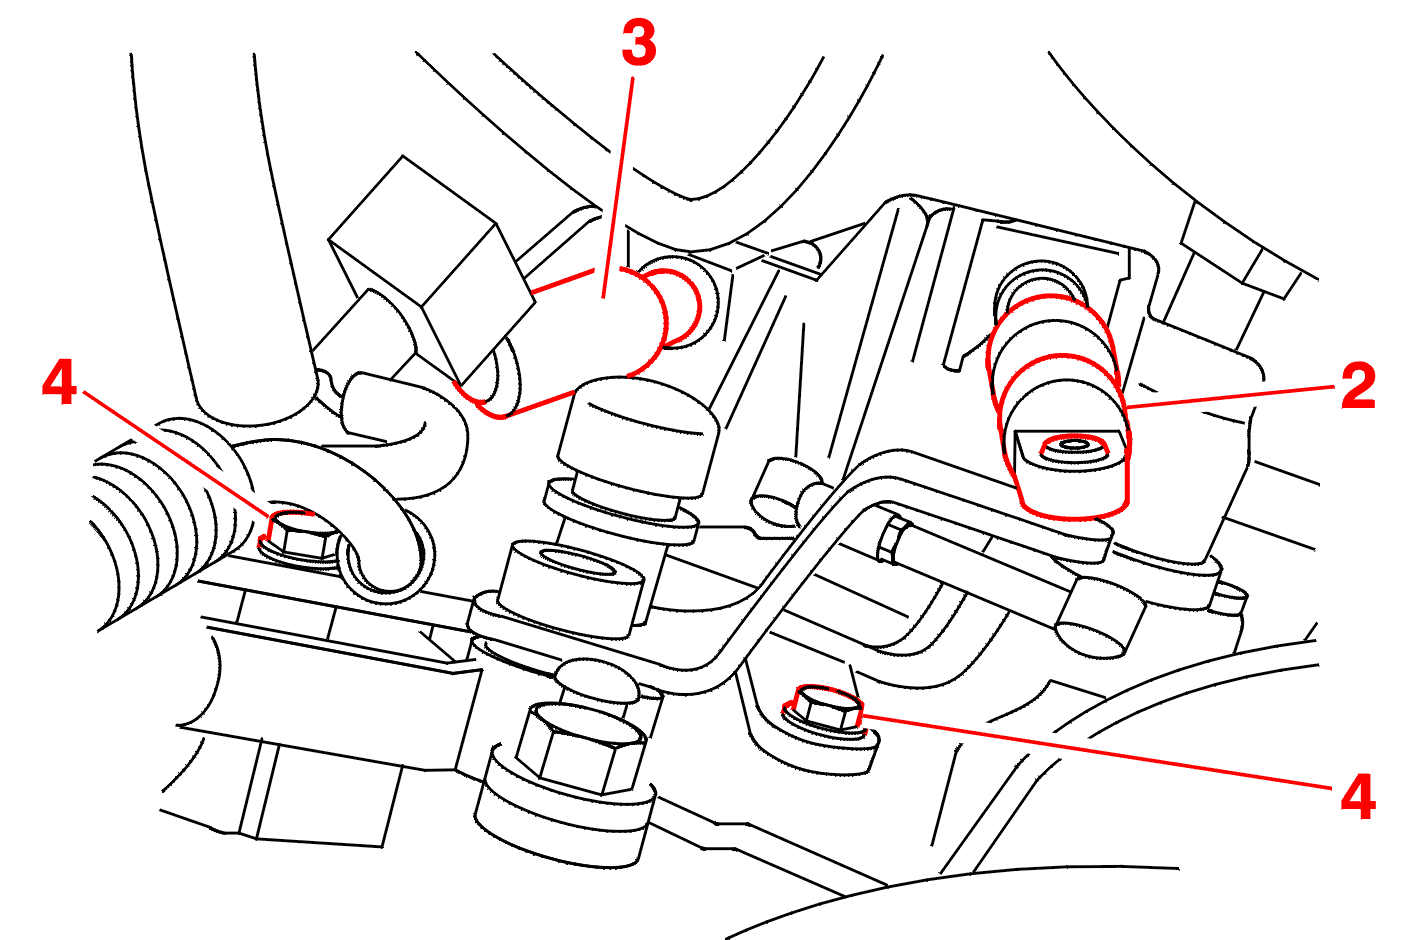
Uncouple :
Remove the 2 bolts (4) .
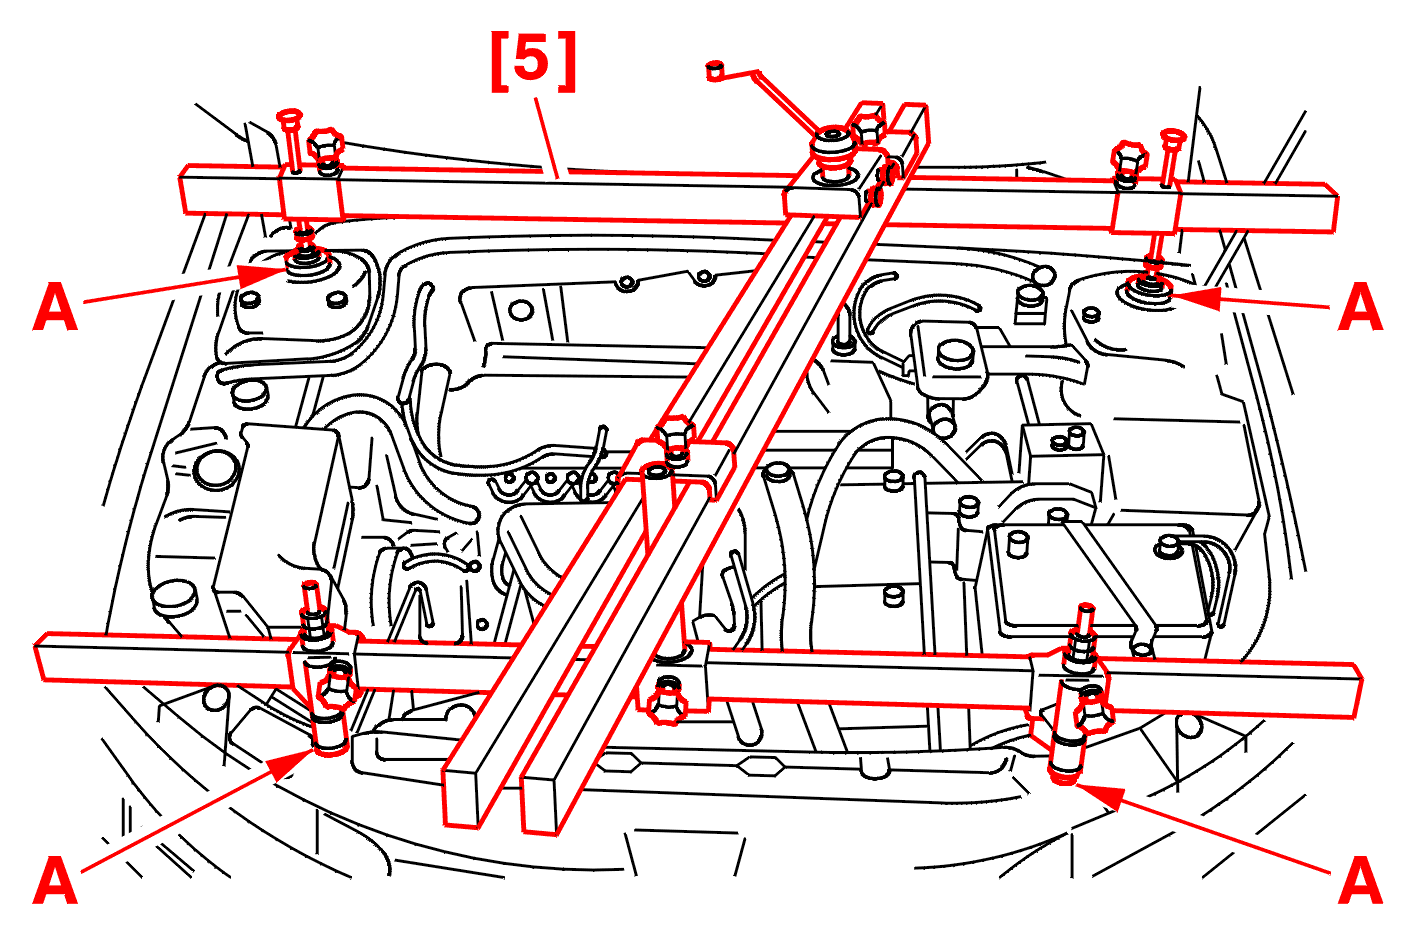
Position the crossmember [5] and its brackets .
WARNING : position the contact points at (A) .
Hook the crossmember [5] or the engine lifting hook .
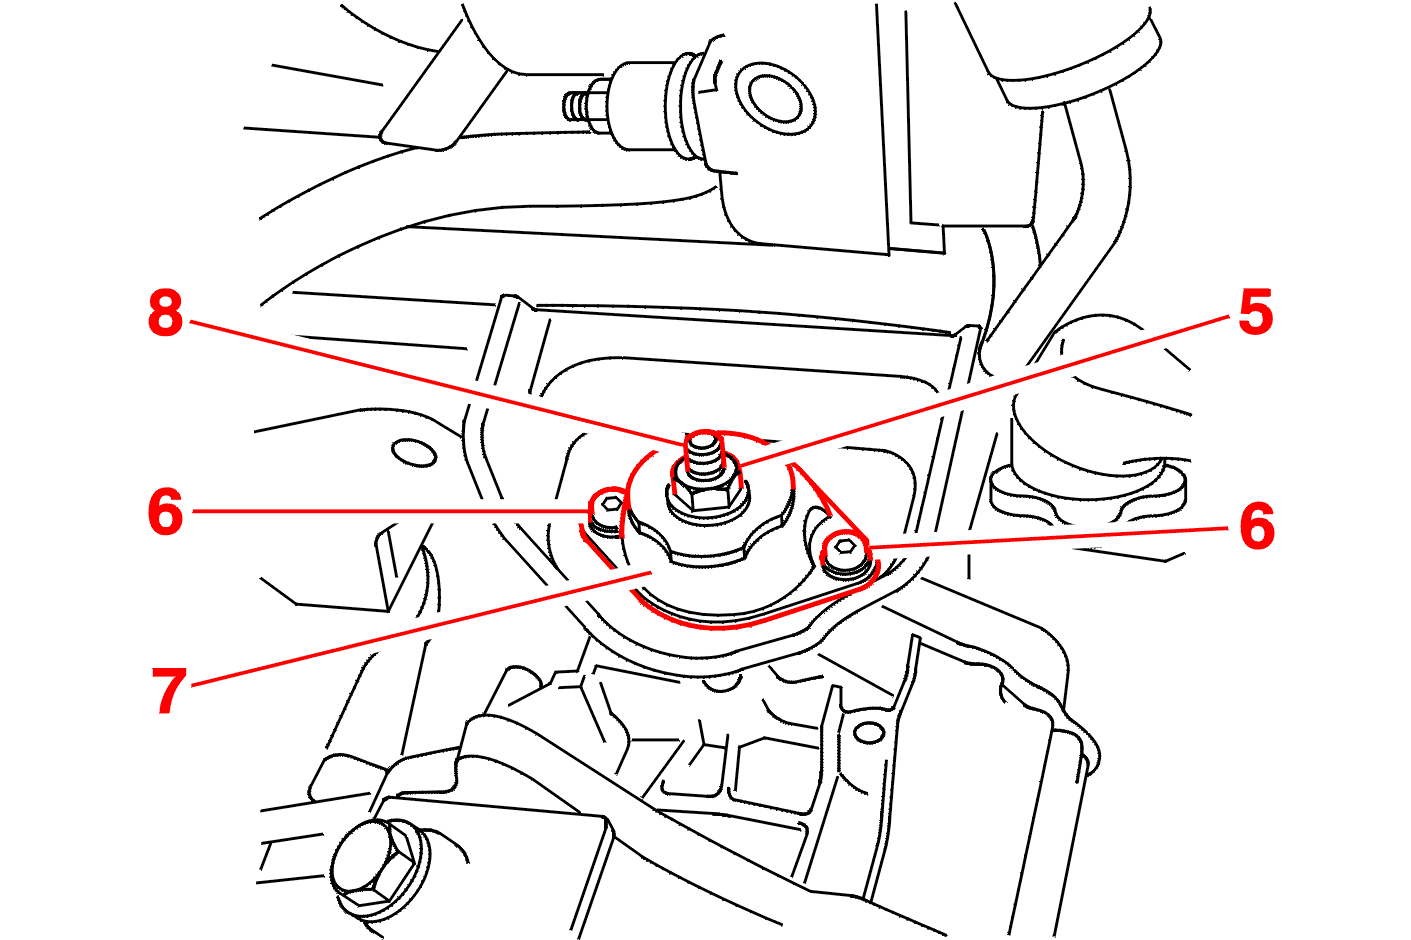
Remove :
Lift and support the vehicle with front wheels suspended .
Remove :
Drain the gearbox .
IMPERATIVE : remove : the exhaust pipe .
remove the drive shafts .
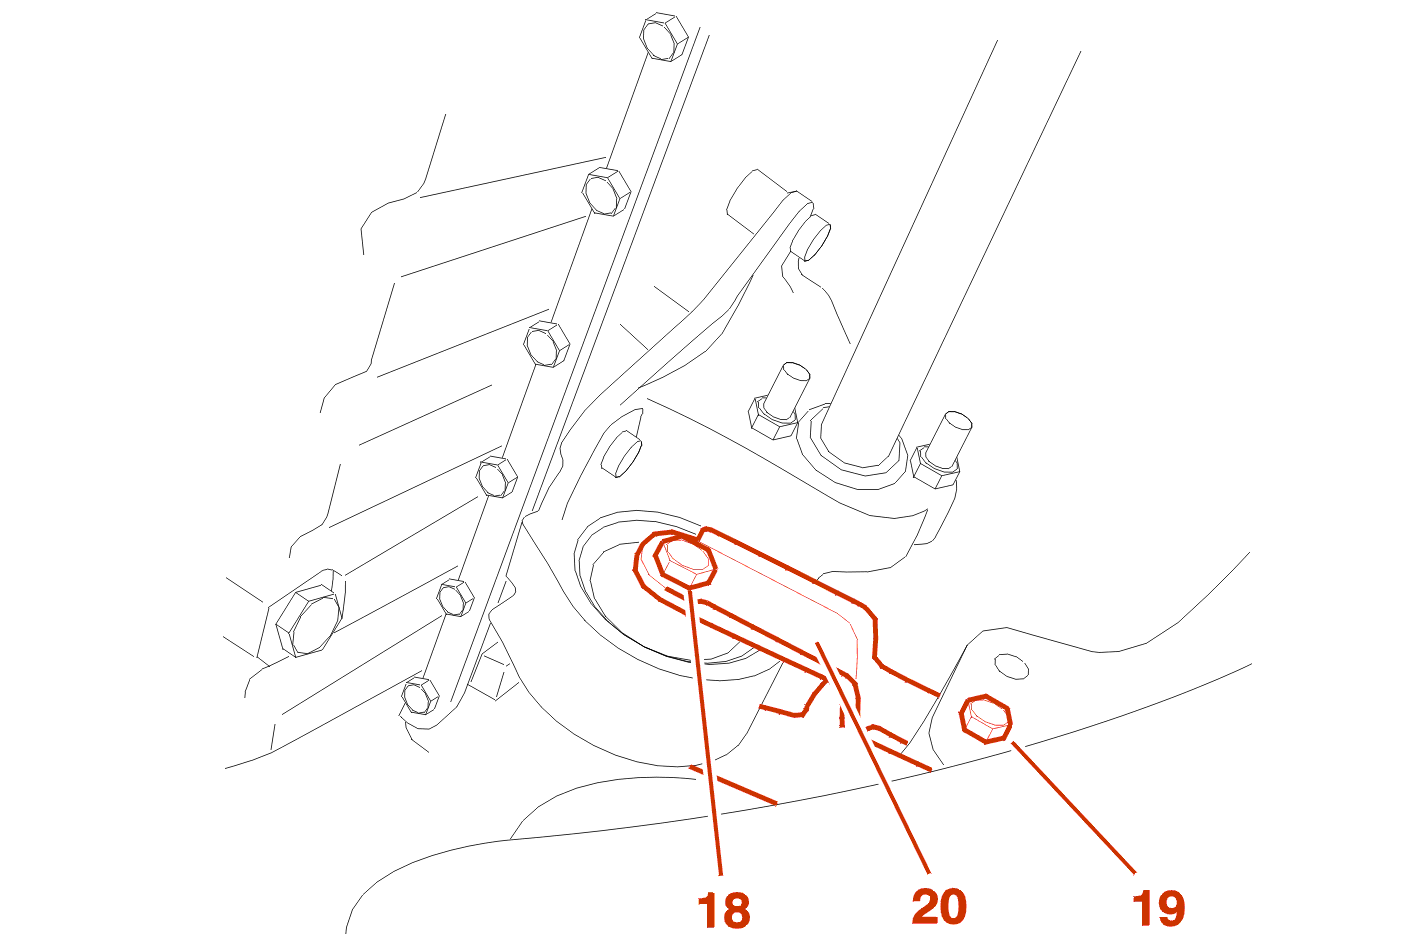
Remove :
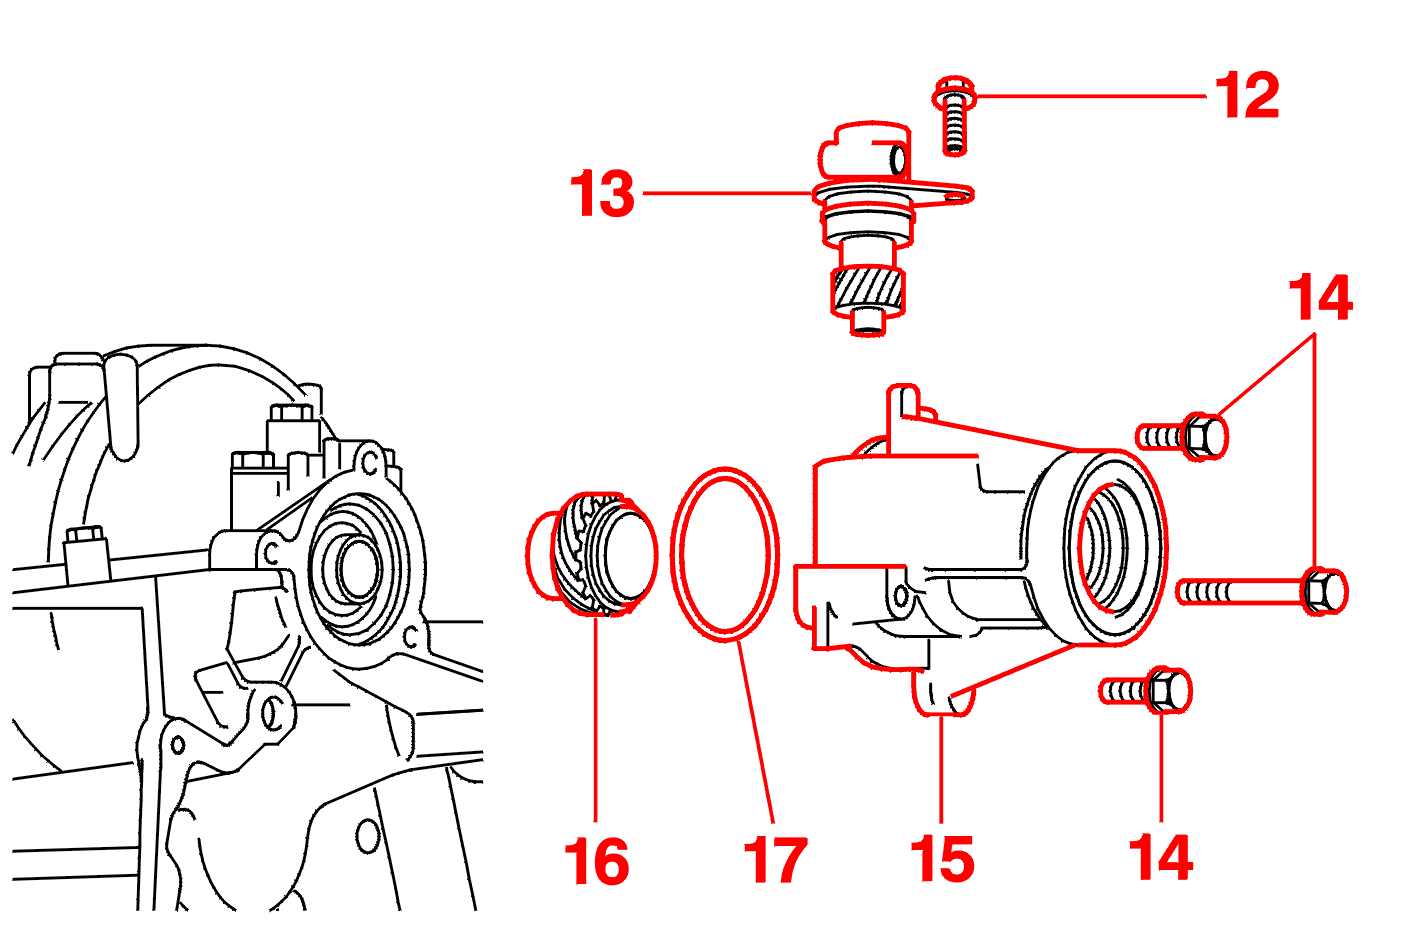
Remove :
Retrieve :
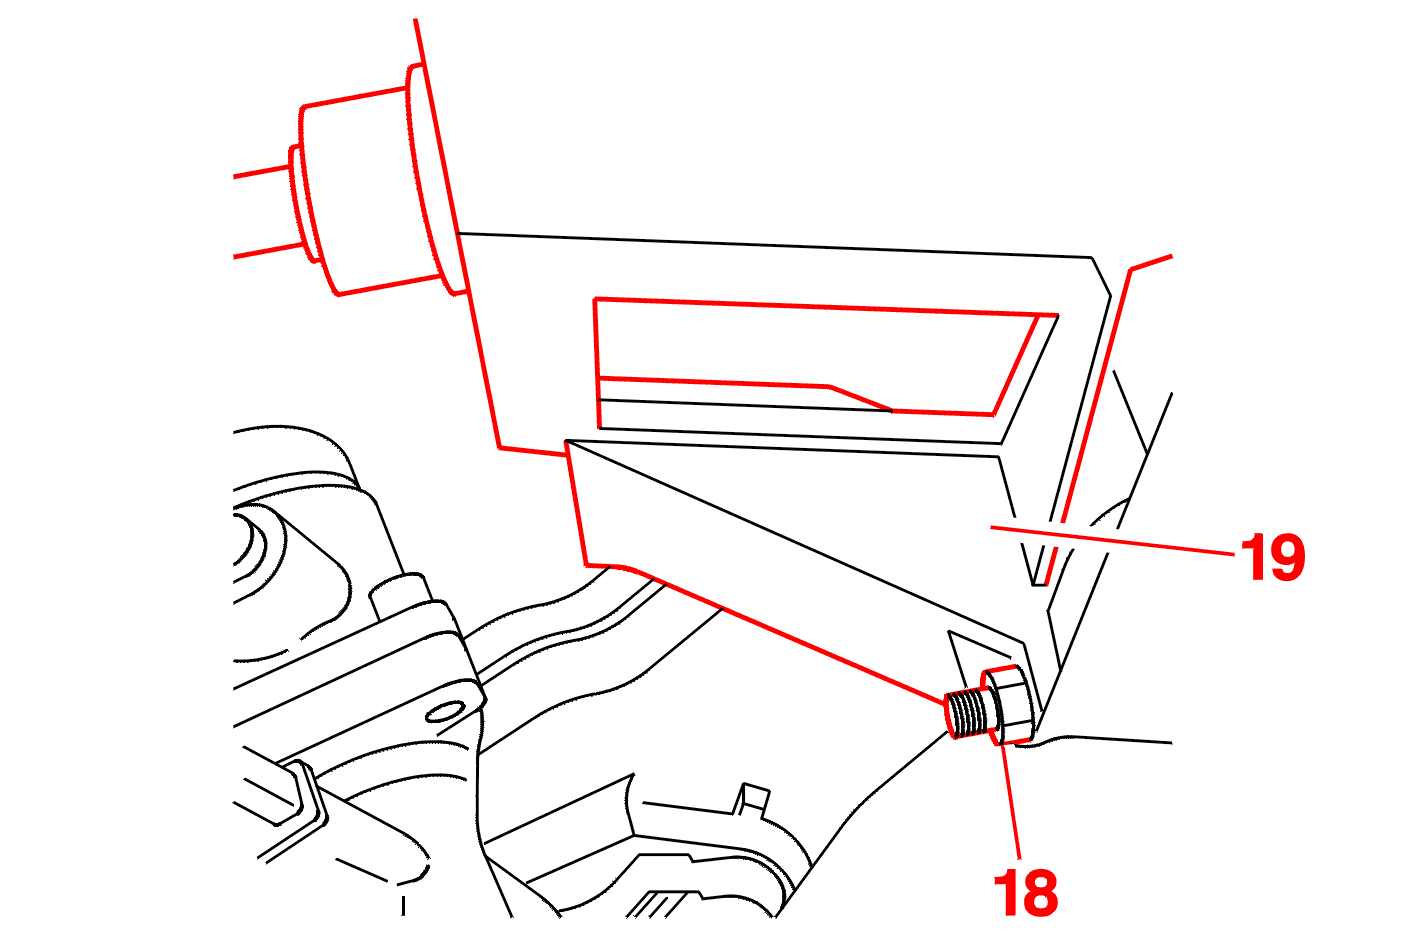
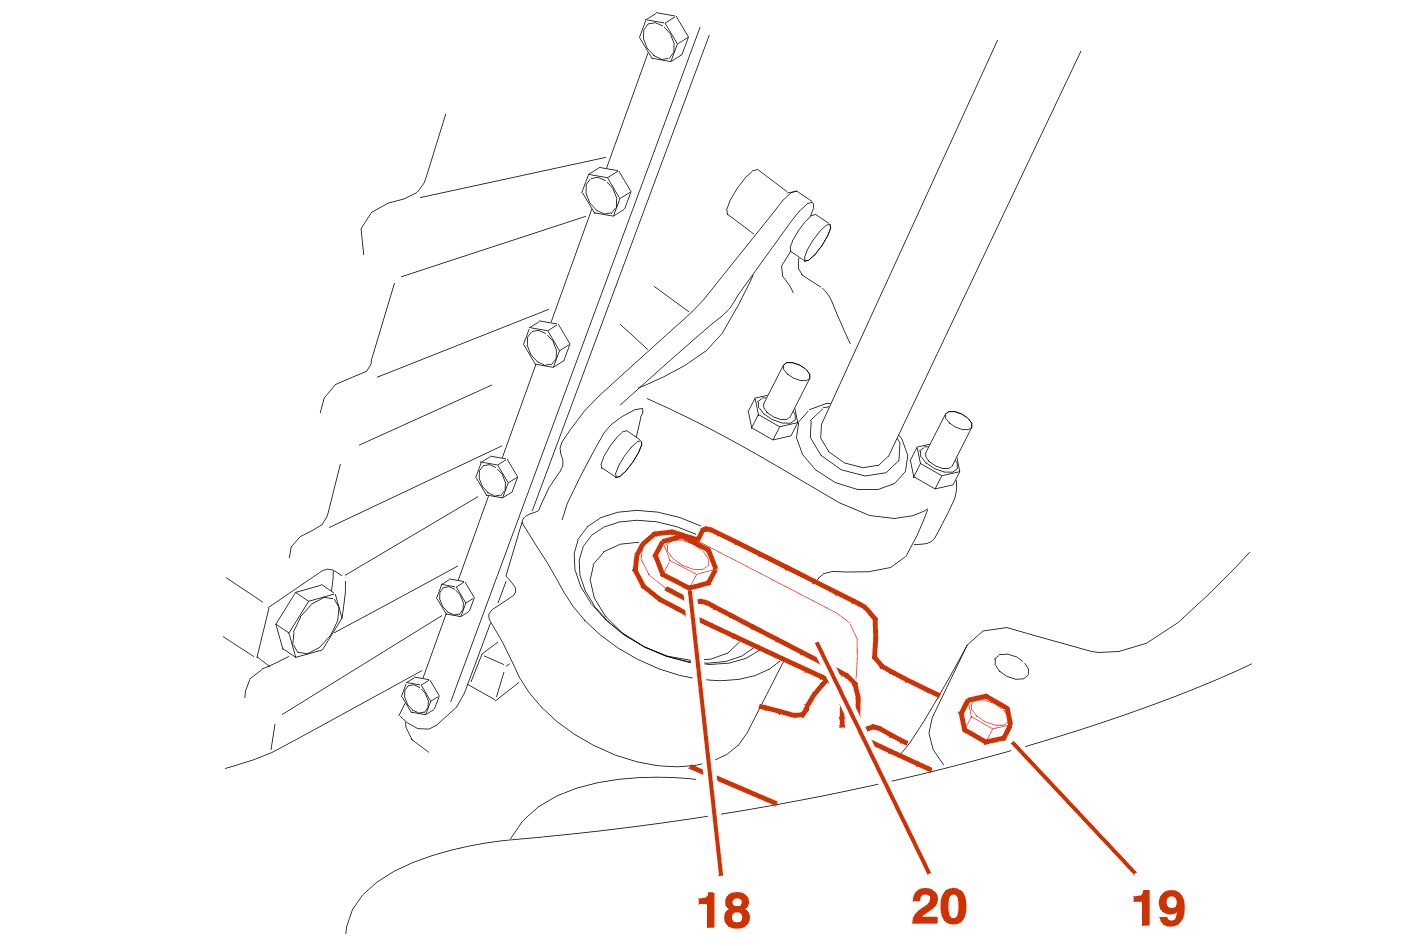
Remove the nut (18) .
Move aside : The gearbox control plate (19) .
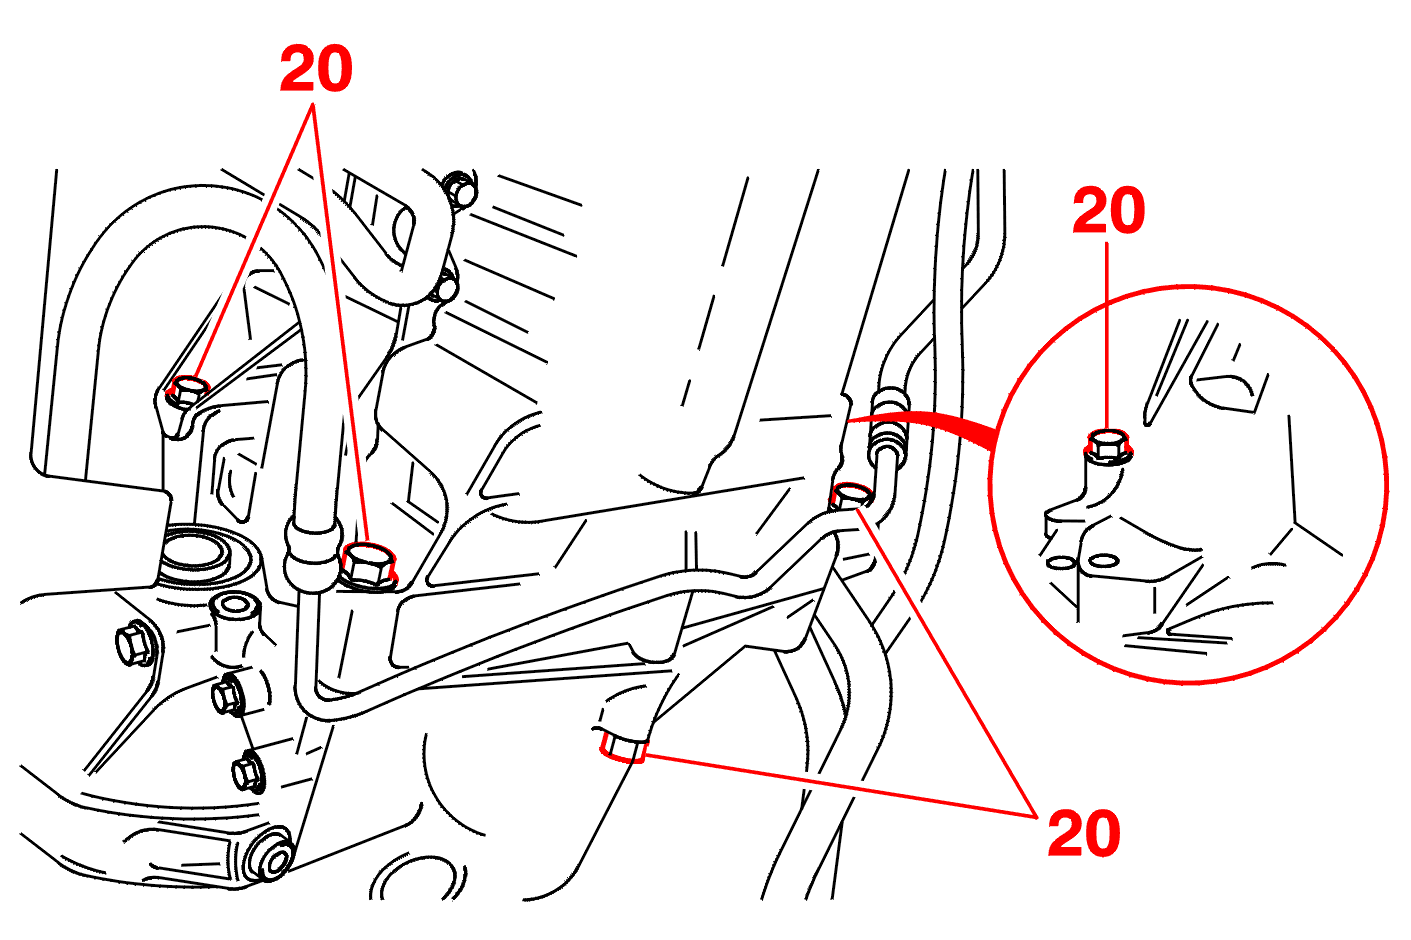
Remove : The gearbox lower mounting bolts (20) .
Lower the power train slightly using the threaded rod of the crossmember [5] .
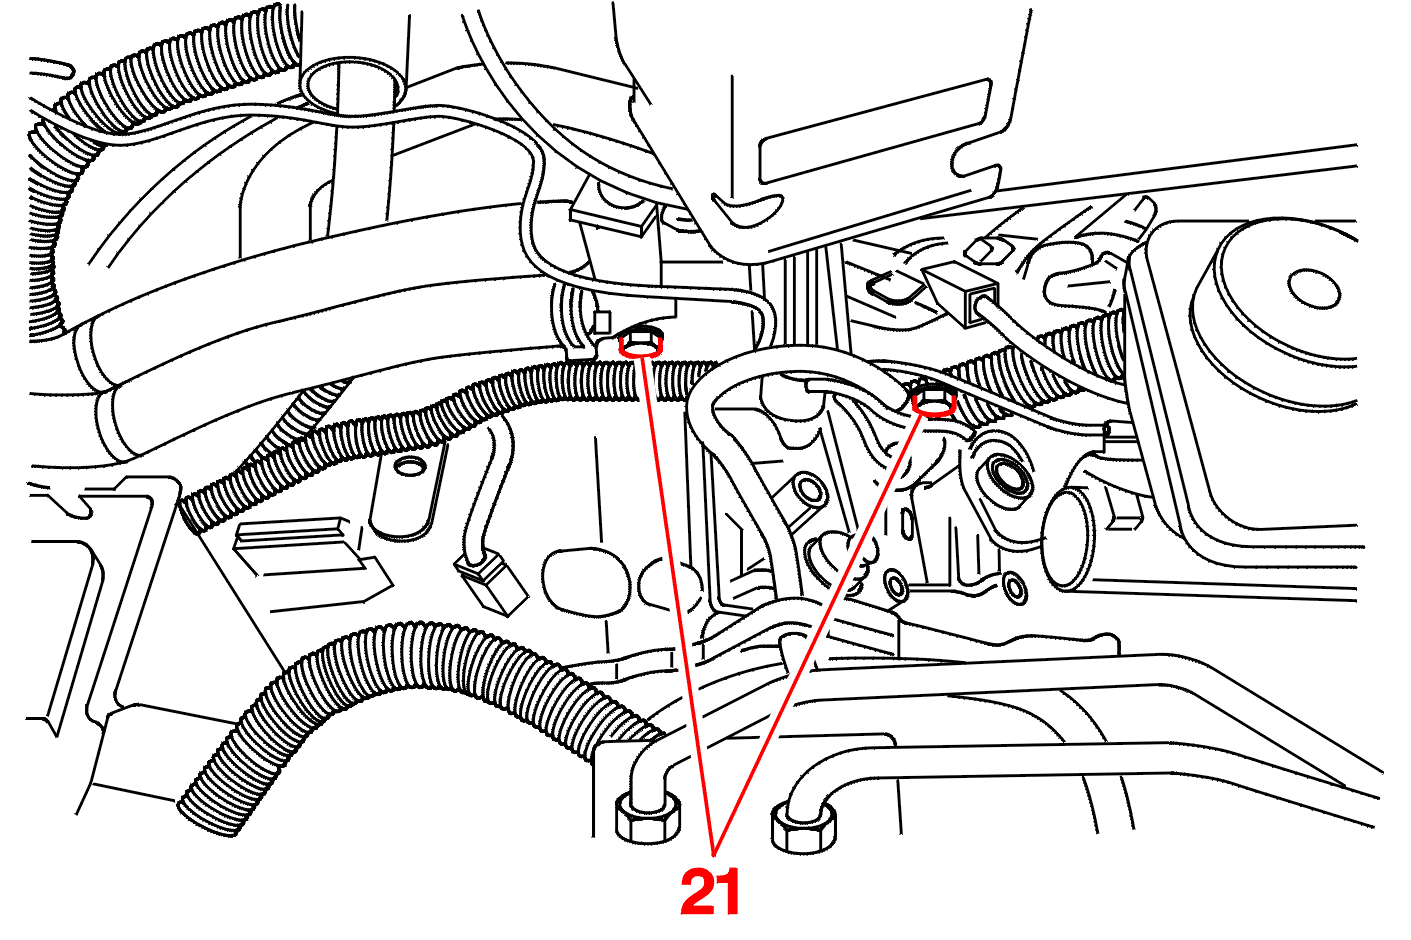
Attach a crane to the gearbox with the hook .
Remove :
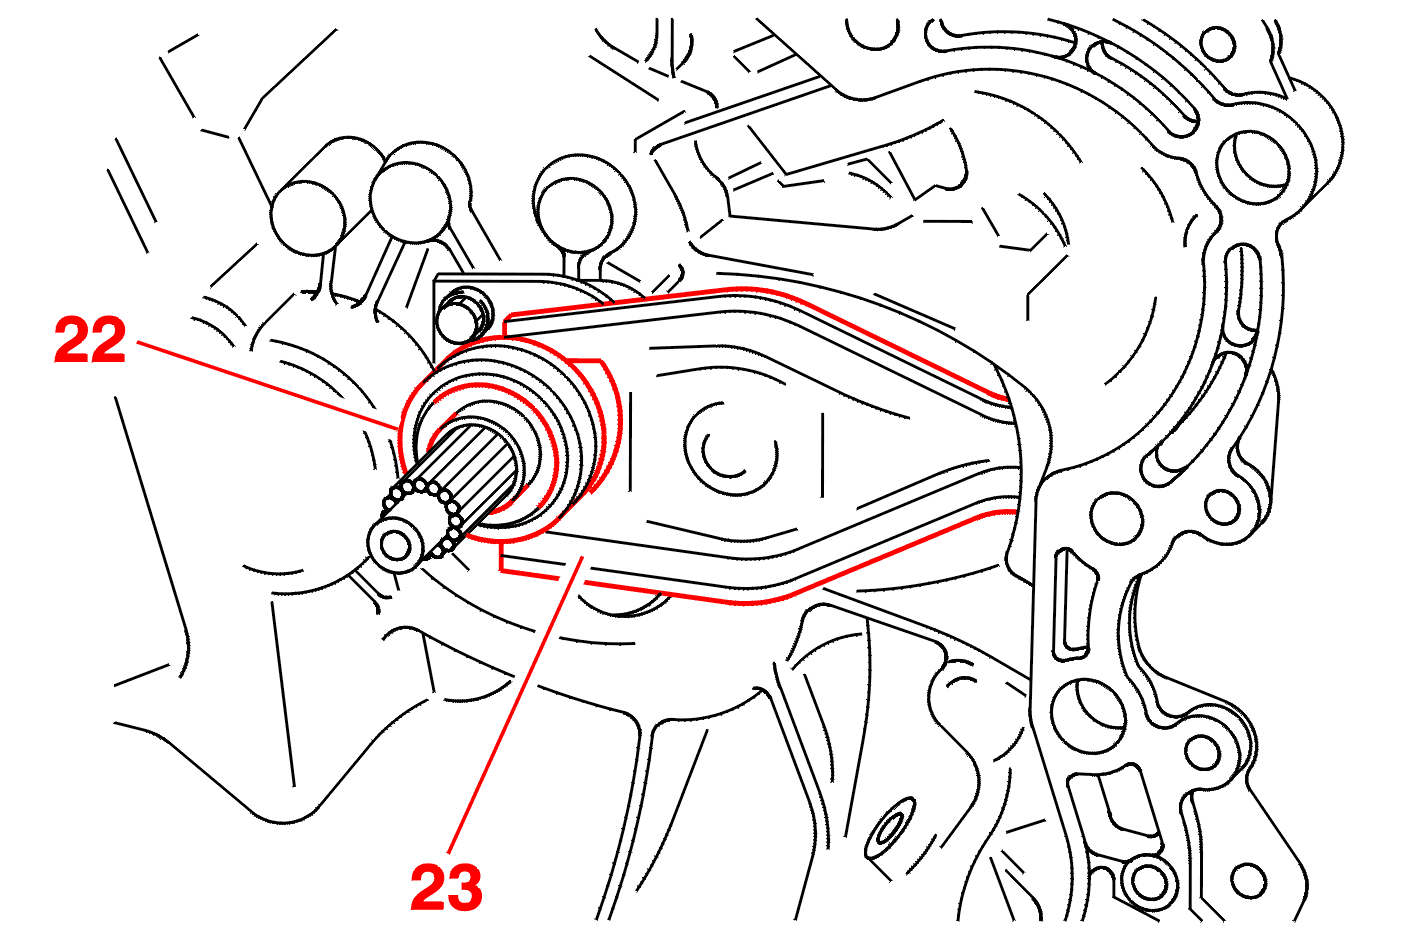
Remove the stop (22) and fork (23) assembly .
3 - REFITTING
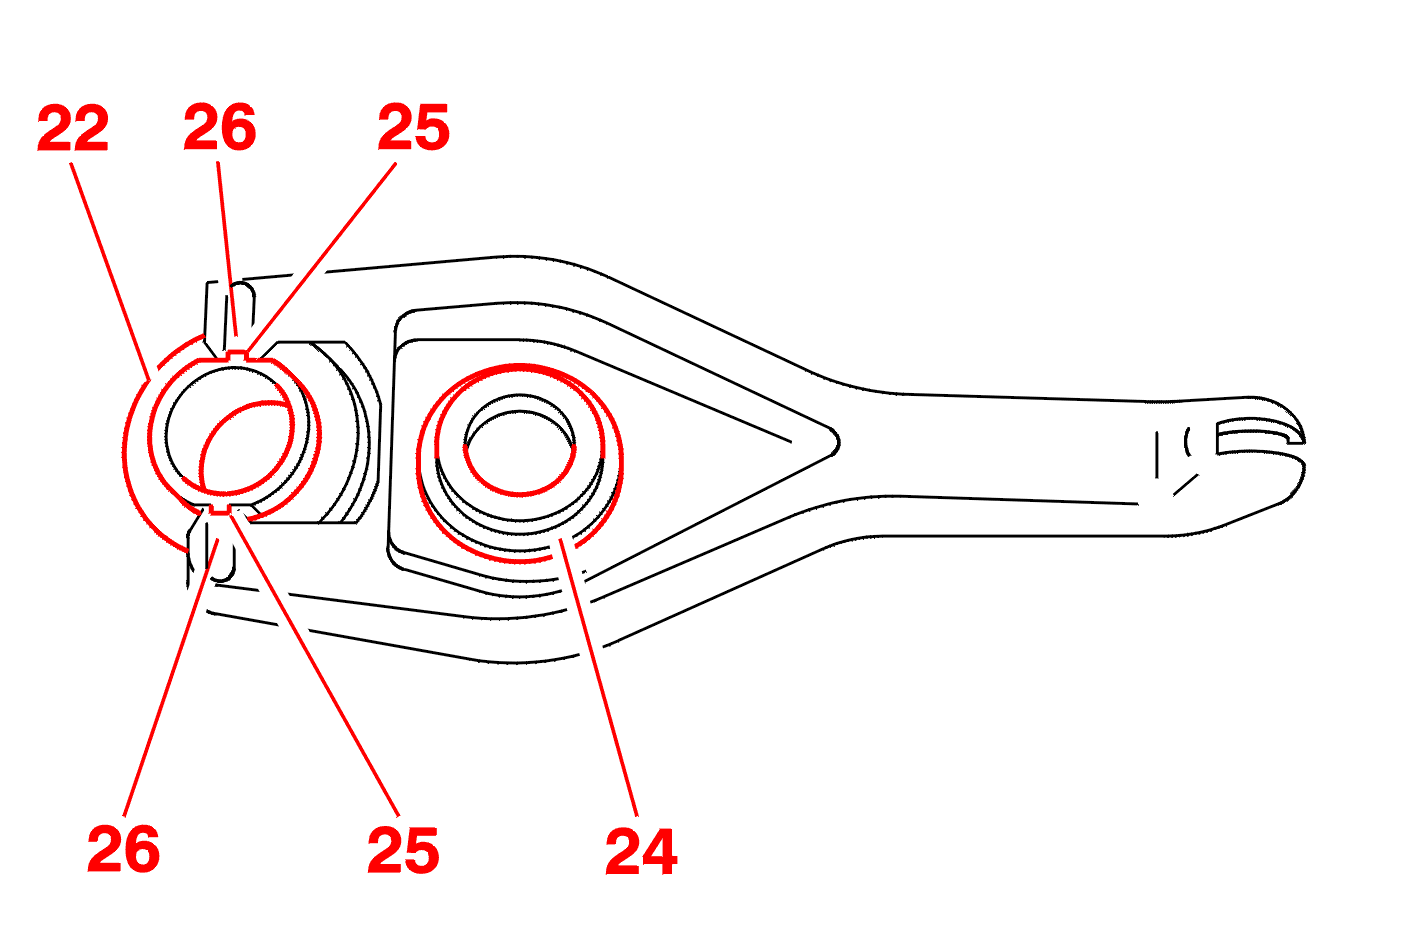
Check the condition of the ball joint shell bearing (24) .
If incorrect : Replace the clutch fork .
Coat lightly with MOLYKOTE BR2 PLUS grease, The fingers of the fork (25) .
Position the stop (22), with the lugs (26) on the fork arms (25) .
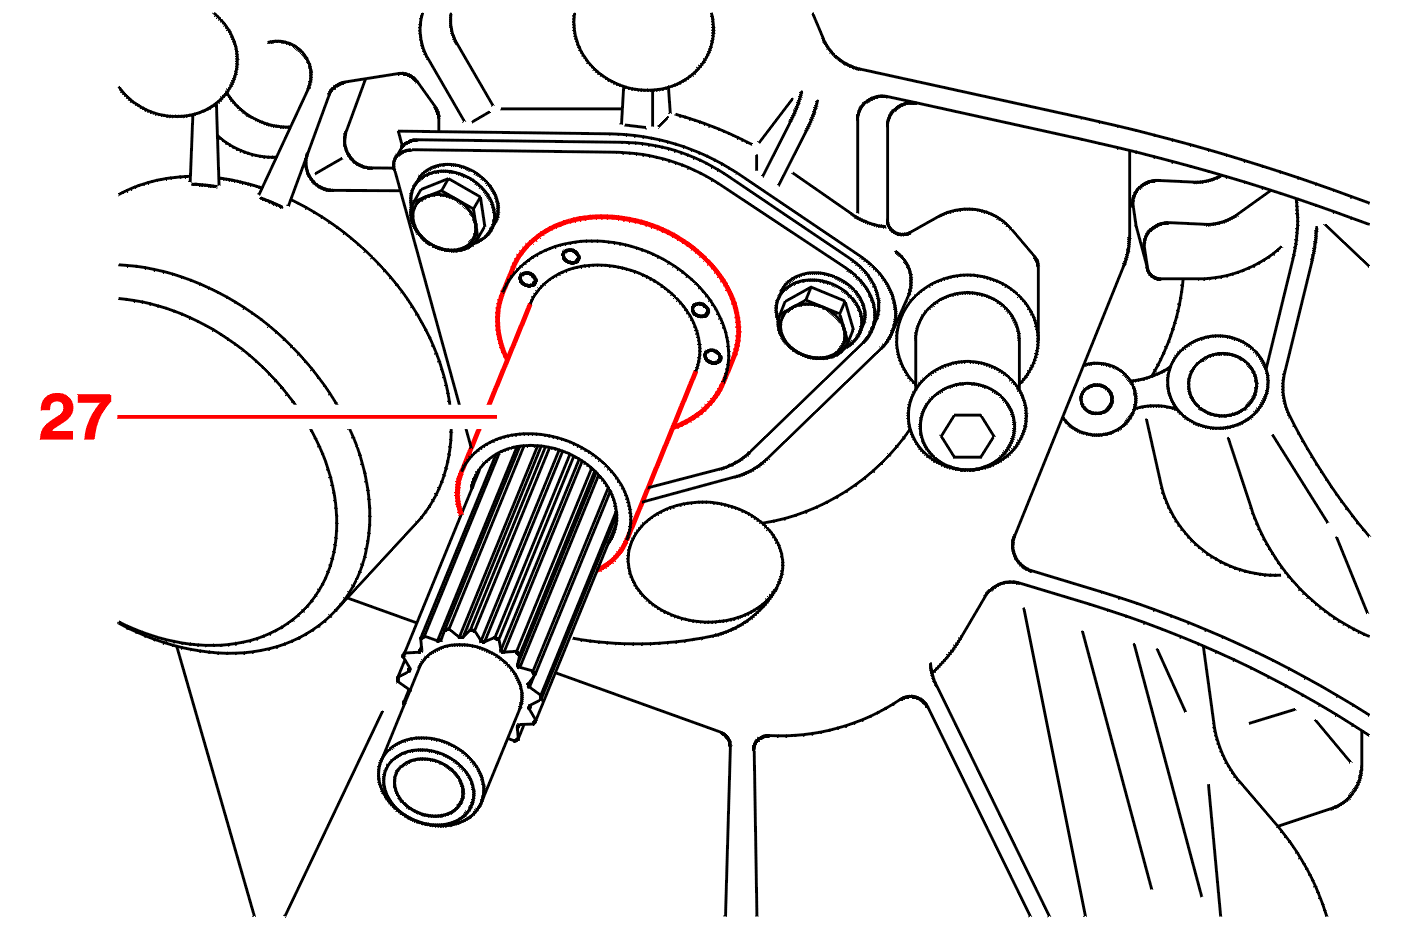
Coat lightly with MOLYKOTE BR2 PLUS grease, The bearing guide tube (27) .
WARNING : do not grease the input shaft splines .
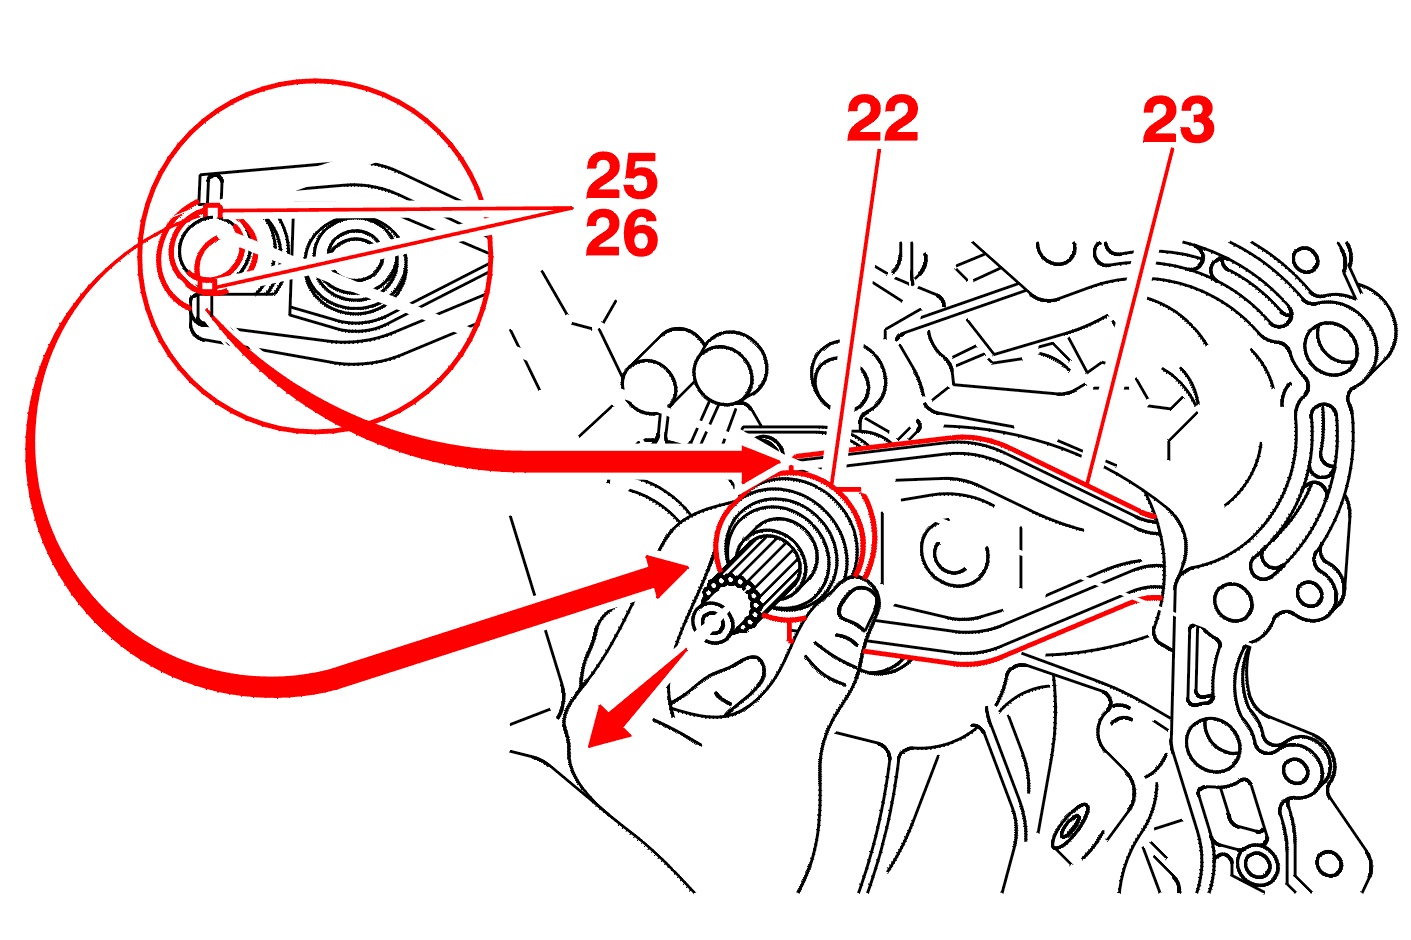
Refit the fork (23) + stop (22) assembly .
Move the stop (22) in order to check that the lugs (26) are positioned behind the fork arms (25) .
IMPERATIVE : the stop should move with the fork .
Always renew :
WARNING : ensure that the gearbox locating pins are fitted .
Fill the space between the oil seal lips with grease .
WARNING : do not trap the electrical harnesses when refitting the gearbox .
Attach the gearbox to the engine .
Fit the upper securing bolts (21) .
Tightening torque 5,5 da.Nm .
Clean the threads of the gearbox shaft (8), and coat with threadlock LOCTITE .
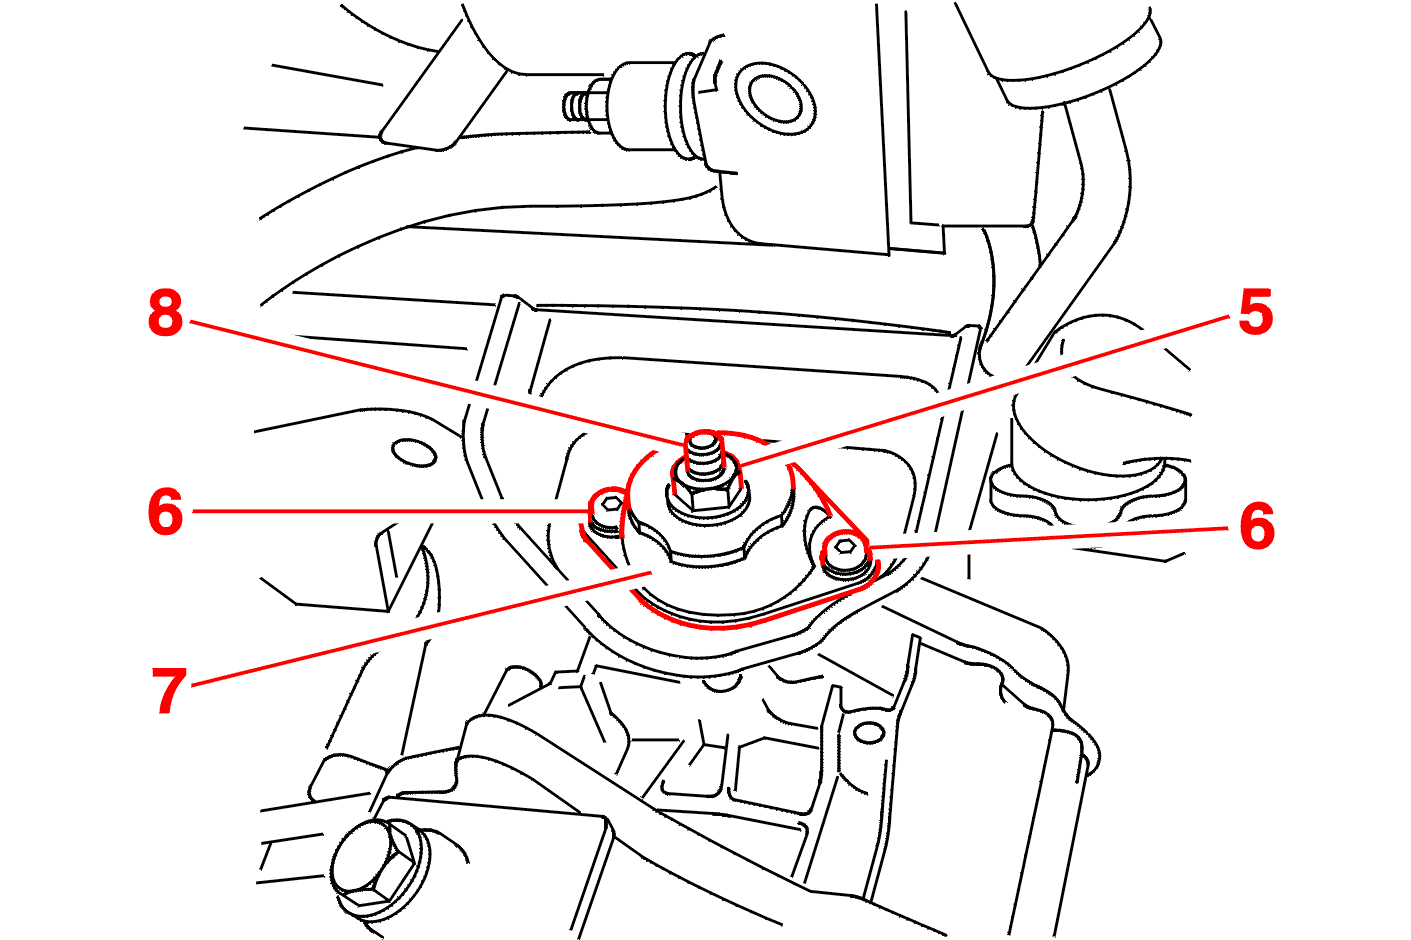
Fit the gearbox shaft (8) and its washer ; Using the tool [4] .
Tighten the shaft (8) to 5 da.Nm .
Fit :
WARNING : centralise the power train before tightening the bolts securing the flexible mounting .
Tighten :
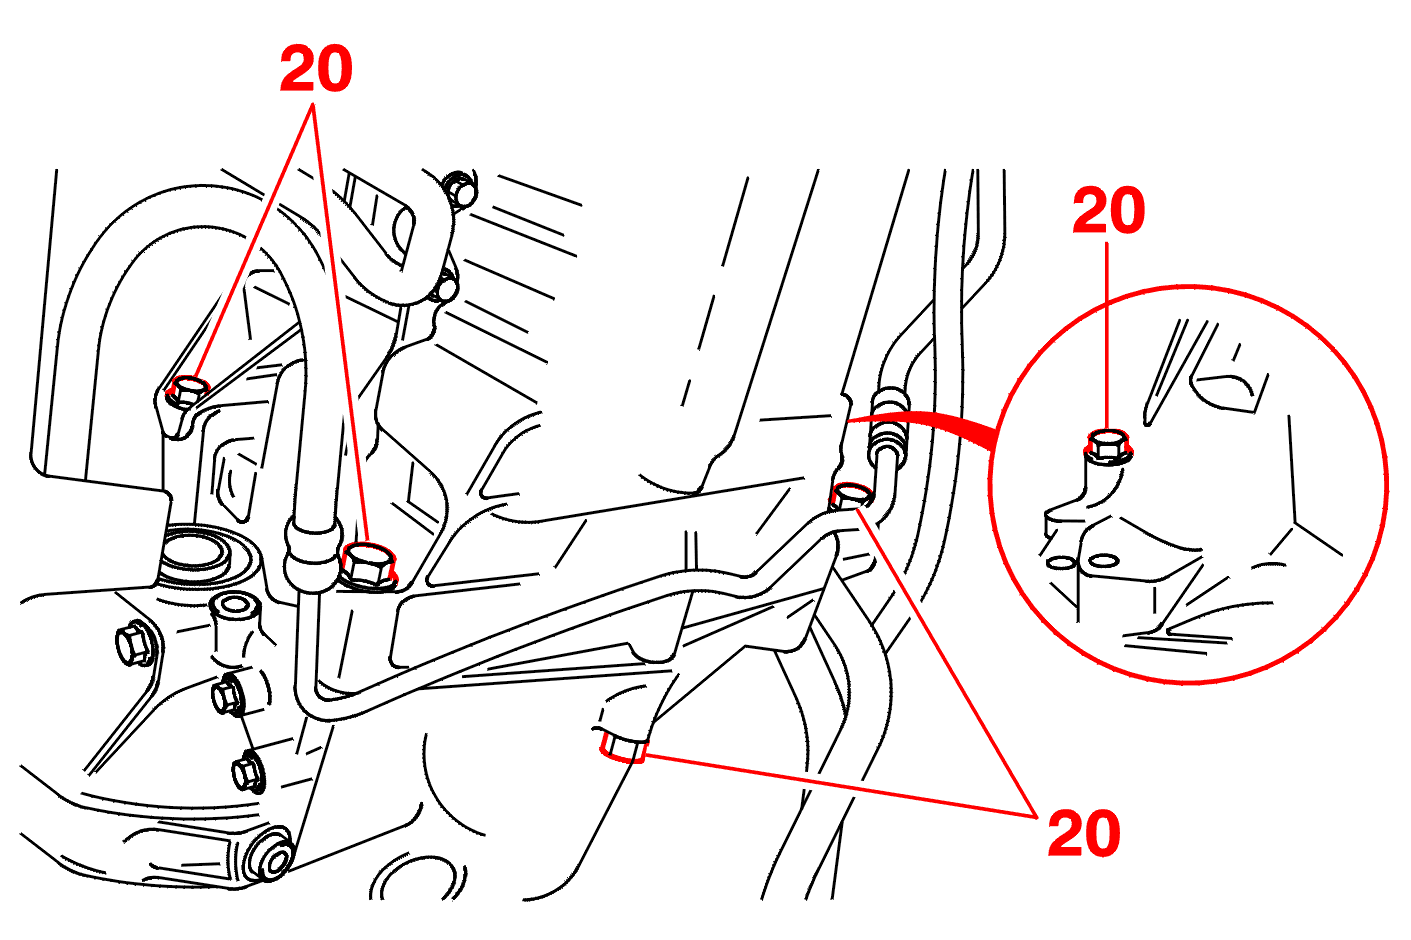
Tighten the bolts (20) to 5,5 daN.m .
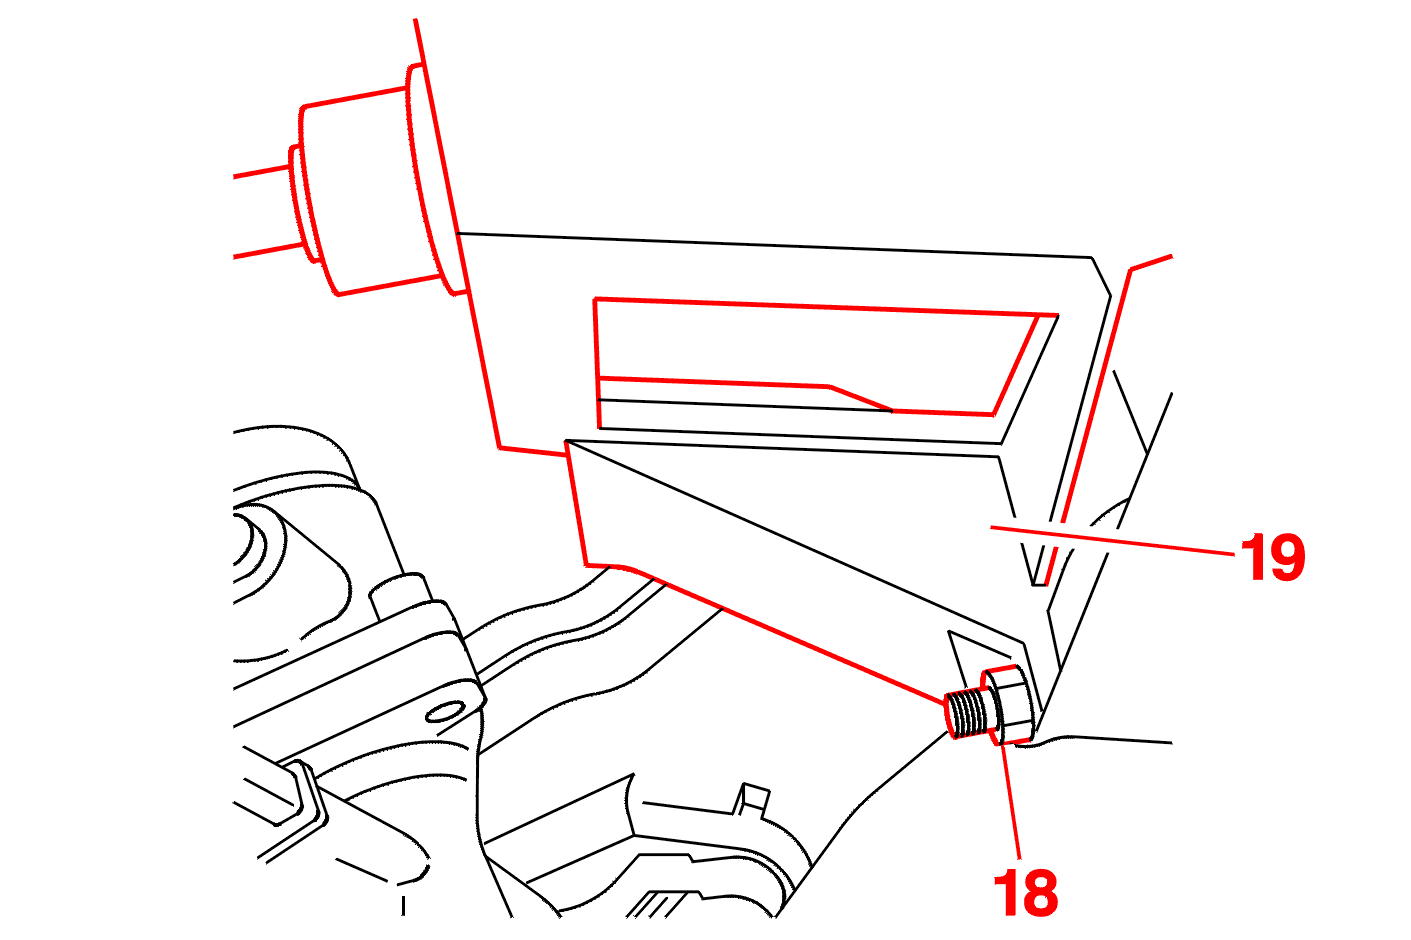
Position : The gearbox control plate (19) .
Tighten the nut (18) to 1,5 da.Nm .
Tighten the 2 bolts (4) to 2 da.Nm. .
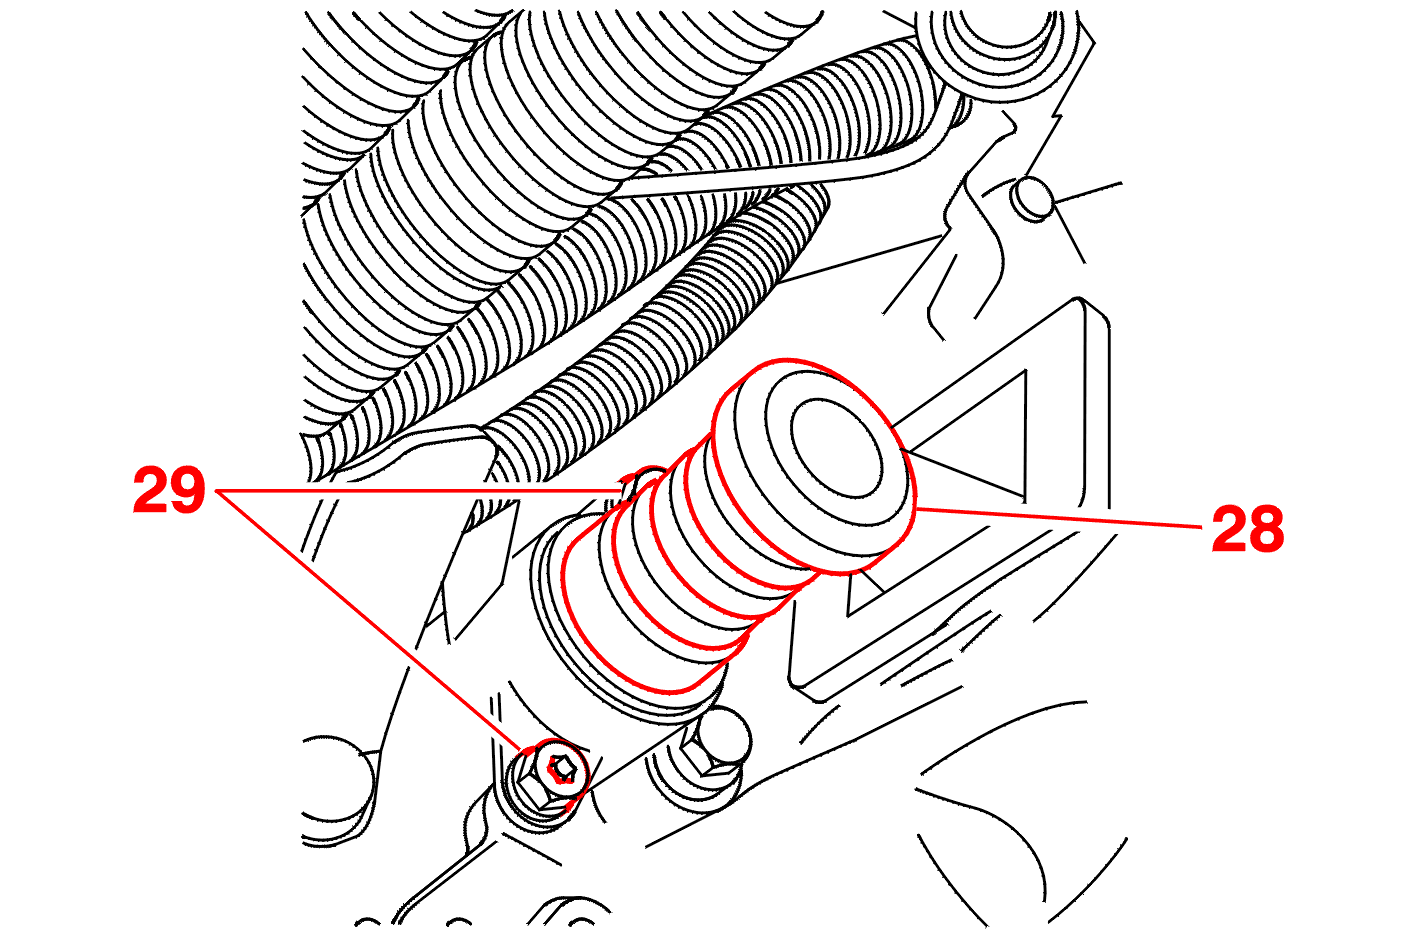
Position the clutch slave cylinder (28) .
Tighten the bolts (29) to 2 daN.m .
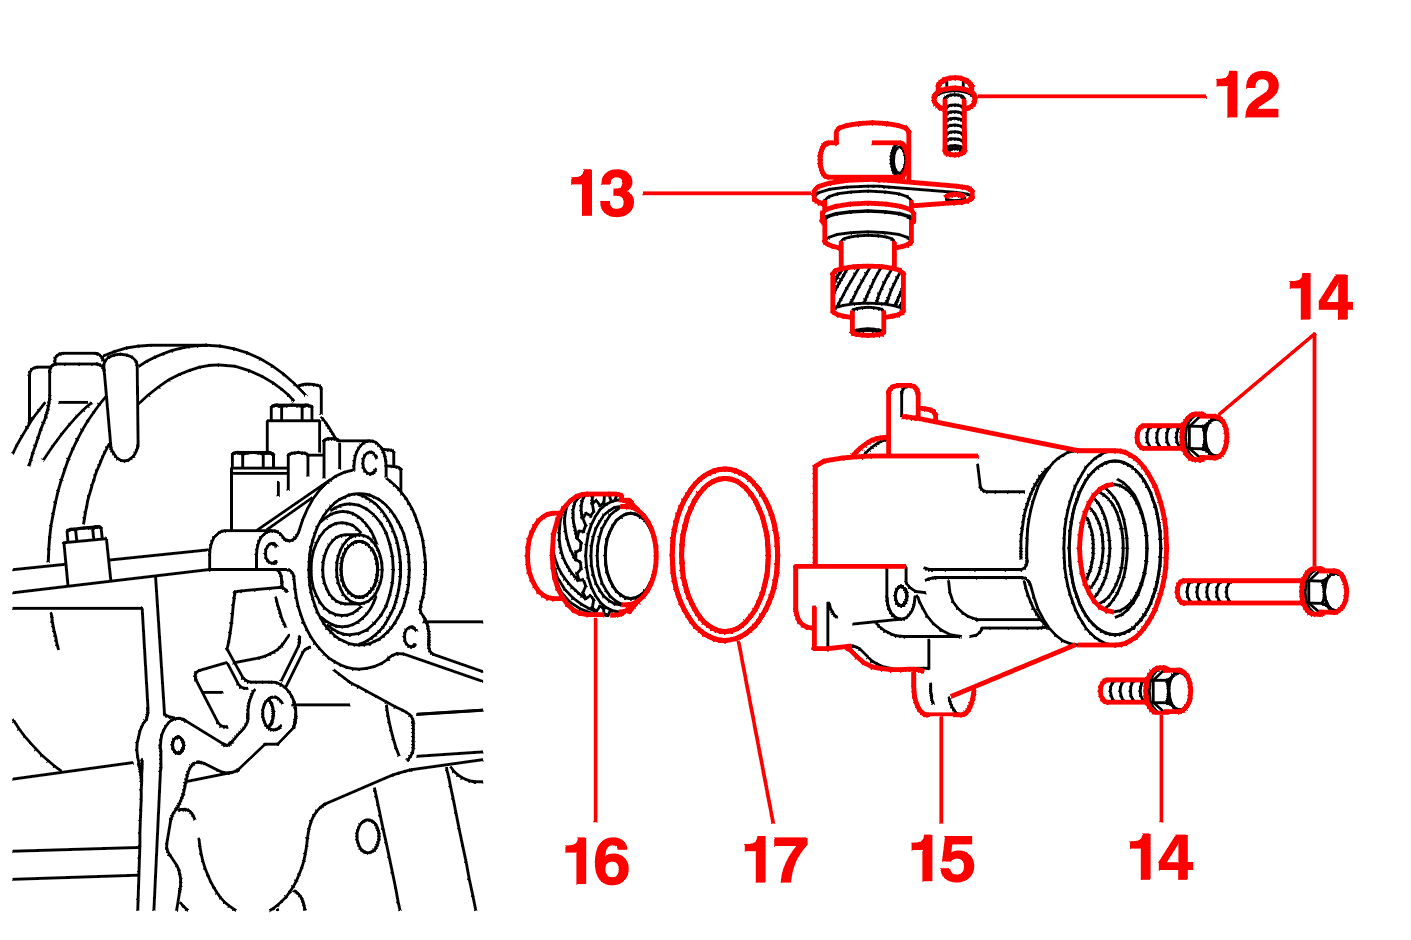
Fit :
Fit :
Proceed in the reverse order to removal .
IMPERATIVE : always renew : the exhaust clip .
Fill the gearbox to the correct level (Add new oil) .
Initialise the various ECUs .
4 - TIGHTENING TORQUE(S)
The gearbox shaft (8) : 5 da.Nm .
The mounting bolts (6) : 3 da.Nm .
The gearbox shaft nut (5) : 6,5 da.Nm .
Clutch slave cylinder securing bolt(s) (29) : 2 da.Nm .
The bolt (9) of the movement limiter to 4,5 da.Nm. .
The bolt (10) of the movement limiter to 8,5 da.Nm. .
Differential extension fastener (14) : 1,5 da.Nm .
The gearbox lower mounting bolts (20) : 5,5 da.Nm .
The gearbox upper mounting bolts (21) : 5,5 da.Nm .
Starter securing bolt : 3,5 da.Nm .
Drive shaft bearing nut : 1,35 da.Nm .
Drive shaft nut : 32,5 da.Nm .
The wheel bolts to 9 da.Nm .