B1EG24K1 - 607 DW12TED4 ENGINE
REMOVAL - REFITTING TIMING BELT
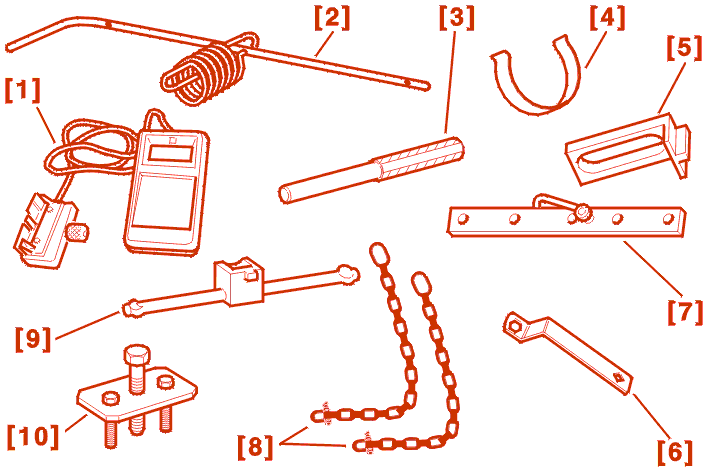
1 - SPECIAL TOOLS
| reference | description | reference |
|---|---|---|
| [1] | SEEM C.TRONIC tension measuring equipment (type 105.5M) | - |
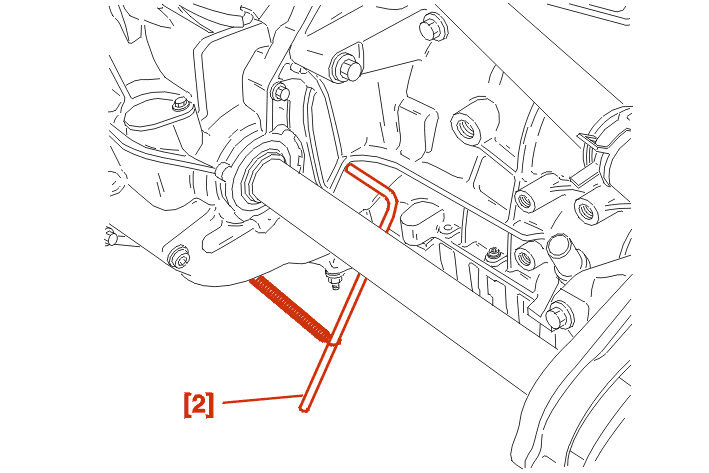
| [2] | crankshaft setting rod | (-).0188-X |
| [3] | camshaft setting rod | (-).0188-M |
| [4] | belt retaining clip | (-).0188-K |
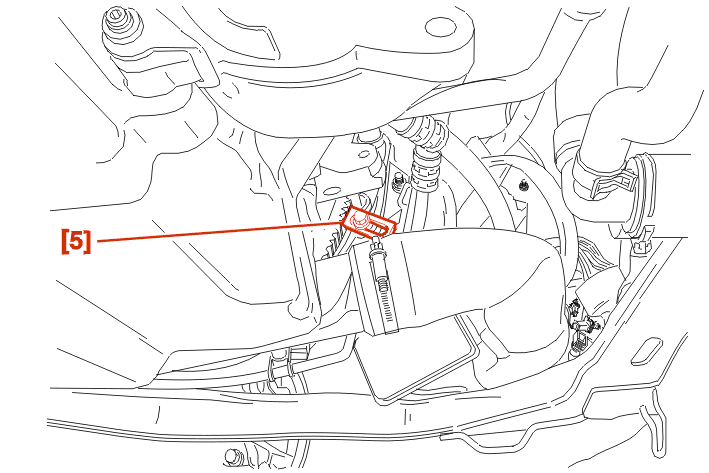
| [5] | engine flywheel lock ring | (-).0188-F |
| [6] | crankshaft spanner | (-).0117-EZ |
| [7] | cross beam | (-).0102-D |
| [8] | lifting chain | (-).0102-M |
| [9] | tension lever | (-).0188-J2 |
| [10] | pulley extractor | (-).0188-P |
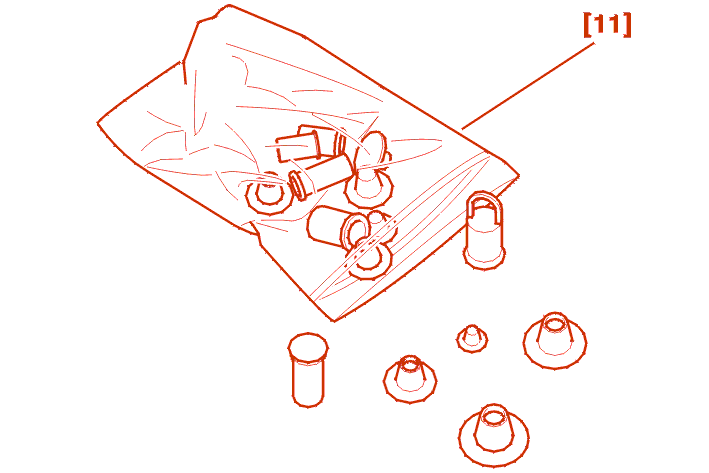
[11] Set of plugs (-).0188-T .
2 - REMOVAL
IMPERATIVE : remove the exhaust pipe to avoid damaging the flexible hose; this cannot withstand the torsion, traction or bending tensions caused by the removal of one of the power train supports .
Remove :
Move aside the right-hand front mud shield .
Remove :
Remove :
Lock the flywheel with the stop [5] .
Remove the ancillaries drive pulley bolt .
Refit the bolt without the washer .
Remove : The ancillary drive pulley (Using the tool [10]) .
Remove the tool [5] .
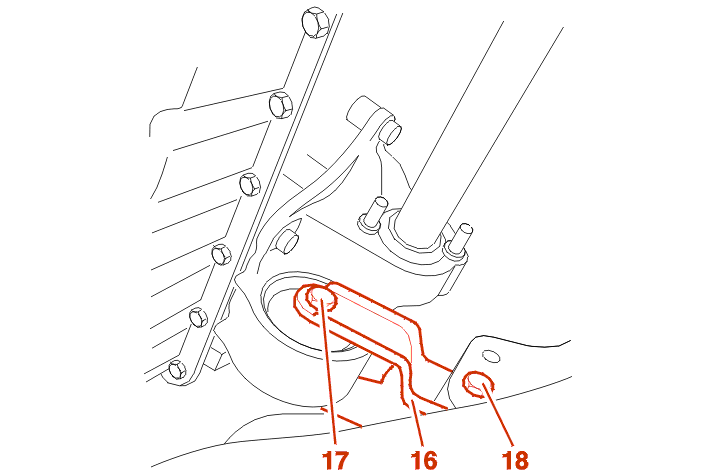
Remove : The lower torque reaction link .
Turn the crankshaft with the tool [6] .
Peg the flywheel using the rod [2] .
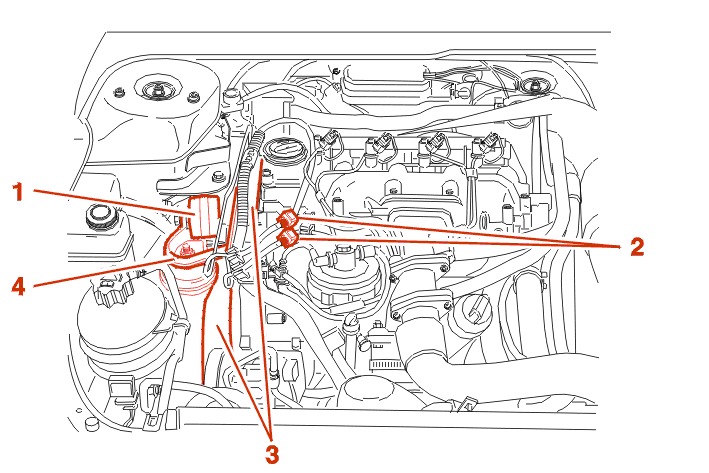
Disconnect the battery .
Remove the style cover .
Remove :
IMPERATIVE : plug the holes using tool [11] .
Support the engine with a crane attached to the lifting eye or with a jack placed under the engine (Using tools [7] and [8]) .
Protect the radiator honeycomb with strong cardboard cut to the dimensions of the radiator .
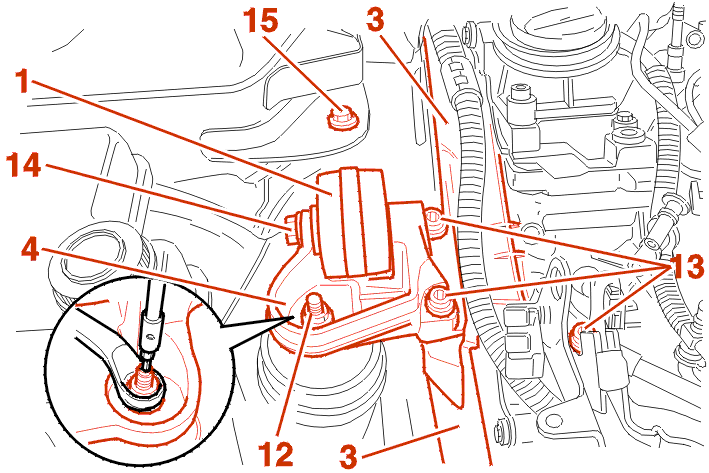
Remove the right-hand engine mounting (4) .
Remove :
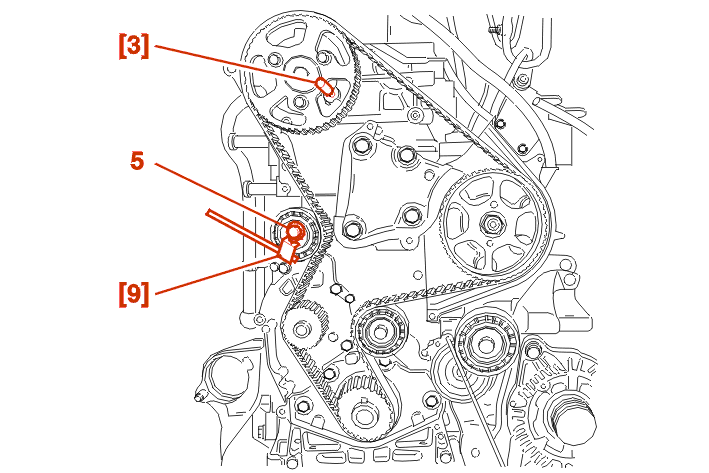
Peg the camshaft pulley with tool [3] .
Slacken the roller tensioner fastener (5) .
Retighten the fastener in the maximum slack position (Tightening torque : 0.1 da.Nm) .
Remove the timing belt .
3 - REFITTING
IMPERATIVE : check that the rollers (5), (6) as well as the coolant pump (7) turn freely (no play or hard spots), also check that these rollers are not noisy and/or do not show traces of grease .
In the event of replacement, Tightening torque(s) : Roller (6) to 4.3 m. daN .
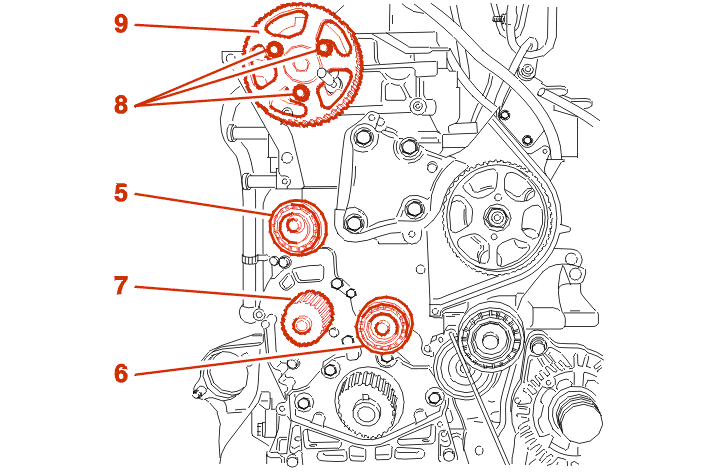
Slacken the bolts (8) .
Check that the pulley (9) rotates freely on its hub .
Tighten the bolts (8) by hand .
Slacken the bolts (8) by 1/6 turn .
Turn the pulley (9) clockwise to the limit at the end of the slots .
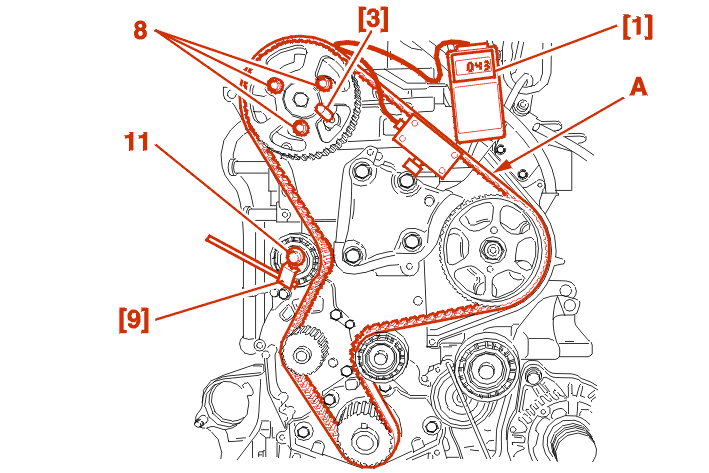
Fit the timing belt, fully taut, in the following order :
Lay the timing belt on the pulley (10) .
Slightly turn the camshaft pinion in the opposite direction to the rotation of the engine in order to engage the belt on the pinion .
WARNING : the angular movement (α) of the pulley in relation to the belt must not be more than one tooth space .
Engage the belt on the roller tensioner (5) and on the coolant pump gear (7) .
Place the tensioner roller (5) in contact with the belt .
Pre-tighten the tensioner roller securing bolt to 0.1 daN.m .
Remove the tool [4] .
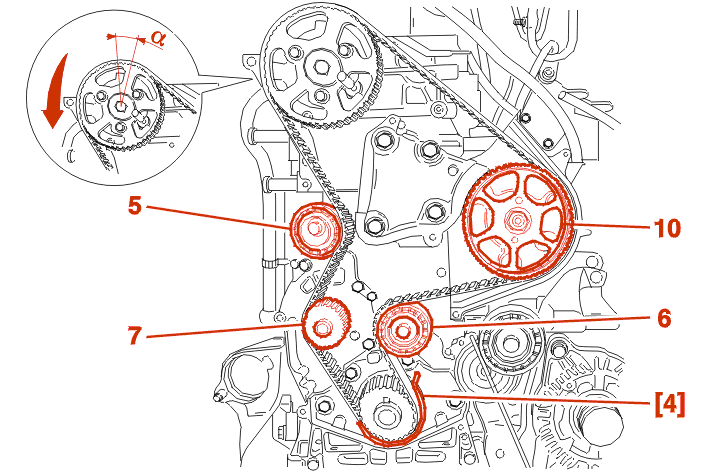
3 - 1 - PRE-TENSIONING AND FITTING THE TIMING BELT
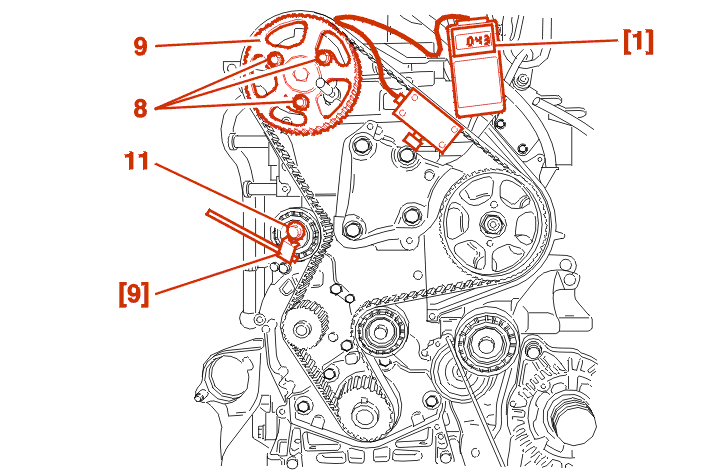
Fit the tool [1] .
NOTE : check that the tool is not touching anything in the near vicinity .
Turn the roller tensioner (5) anti-clockwise (Using the tool [9]) .
Tighten the bolt (11) to 2.3 da.Nm (Without altering the position of the roller) .
Remove the tool [1] .
IMPERATIVE : by removing a bolt (8) on the pulley (9), ensure that these bolts (8) are not at the limit of the slot; if this is the case, repeat the timing belt fitting operation .
Bring the bolts (8) into contact with the pulleys .
Tighten the bolts (8) to 2 daN.m .
Remove the setting pins [3], [2] .
Turn the engine over 8 times in the normal direction of rotation .
IMPERATIVE : never turn the crankshaft in the reverse direction .
3 - 2 - FITTING AND TENSIONING THE TIMING BELT
Refit the rods [2] - [3] .
Unscrew : The bolts (8) .
Tighten the bolts (8) by hand .
Slacken the bolts (8) by 1/6 turn .
Slacken the bolt (11) .
Place the tool [1] on the span (A) .
Turn the roller tensioner anti-clockwise (Using the tool [9]) .
Display 51 ± 2 SEEM units .
Display 51 ± 2 SEEM units .
Tighten the bolt (11) to 2.3 da.Nm (Without altering the position of the roller) .
Tighten the bolts (8) to 2 daN.m .
Remove the tool [1] to release the internal forces .
Refit the tool [1] .
The tension value should be between 48 and 55 SEEM units .
IMPERATIVE : if the value read is outside the tolerance : slacken the belt and repeat the operation .
Remove :
3 - 3 - CHECKING THE VALVE TIMING
Turn the crankshaft 2 revolutions in the direction of running without turning in the reverse direction .
Fit the rod [2] .
IMPERATIVE : visually check that the offset between the camshaft hub hole and the corresponding setting hole does not exceed 1 mm .
Remove the rod [2] .
Fit :
IMPERATIVE : apply a counter-torque at (A) .
Fit :
Fit :
Refit the torque reaction link (16) .
Tighten :
Refit the ancillaries drive pulley .
Clean the threads of the bolt of the pulley in the crankshaft by using a M16 X 150 tap .
Brush the thread of the bolt .
Tighten the bolt to 7 da.Nm + LOCTITE FRENETANCH .
Finally tighten by turning through 60 ° (Using a FACOM D360 type tool) .
Check the tightening : 26 da.Nm .
fit the ancillary drive belt .
Remove the tool [5] .
Refit the closing plate : Tightening torque 0.7 da.Nm .
IMPERATIVE : always replace the exhaust clip .
Fit :
Tighten the wheel bolts to 9 da.Nm .
Refit the various components in the reverse order to removal .
Initialise the various ECUs .