B1BG0YK1 - 406D9 DW10 ENGINE
REASSEMBLY ENGINE (CYLINDER BLOCK)
1 - REASSEMBLY
Place the cylinder block on the stand .
Carefully clean all the seal surfaces using scouring product .
Clean the threads and taps .
Do not use sharp or abrasive tools .
The joint faces must not have any trace of knocks or scores .
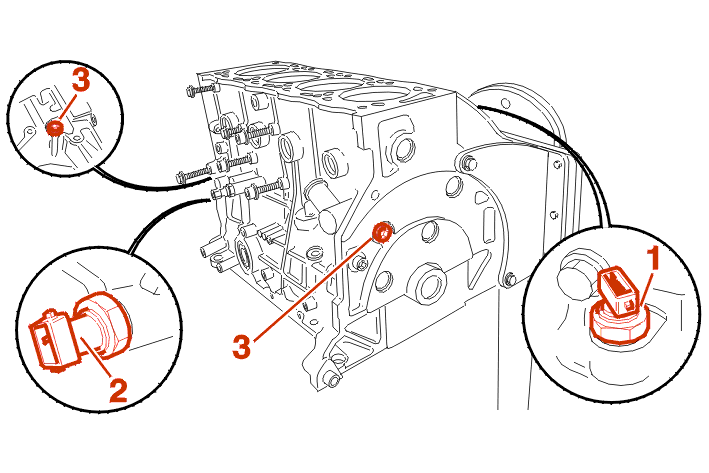
Fit :
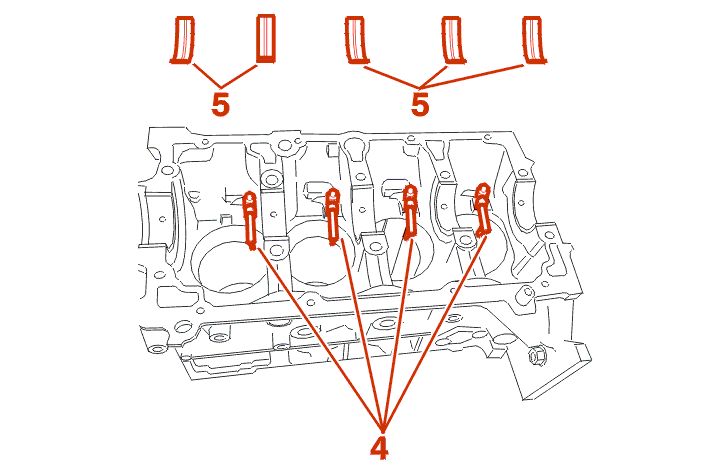
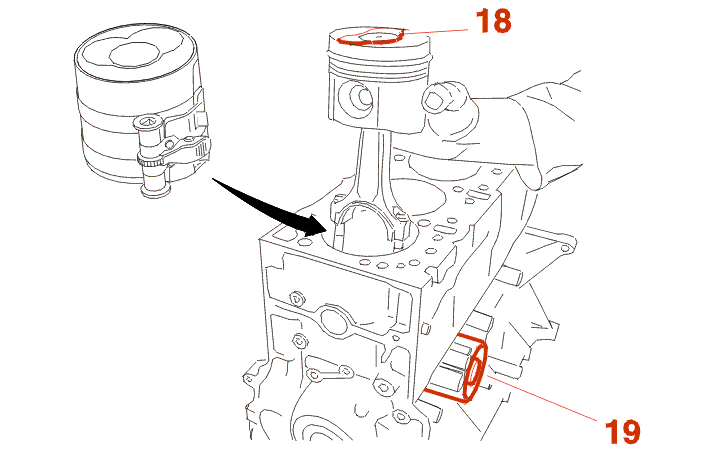
Refit the piston base spray jets (4), Tighten the bolts to 1 da.Nm .
Fit the grooved main bearing half-shells (5), on the cylinder block side .
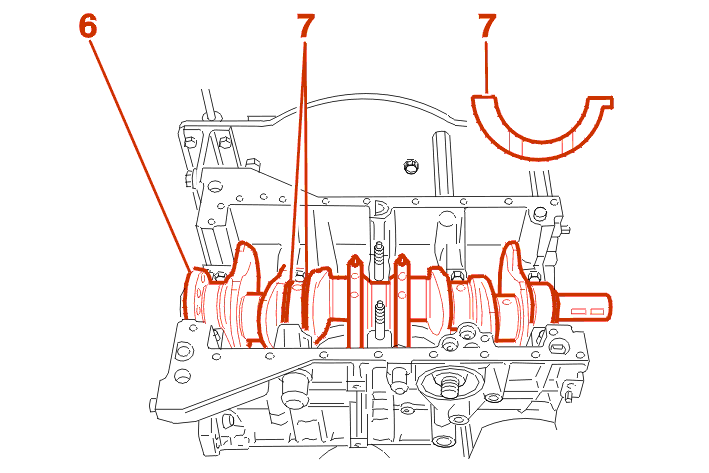
Lubricate the crankshaft main bearings .
Fit :
NOTE : THICKNESS OF THE STOP THRUST WASHERS .
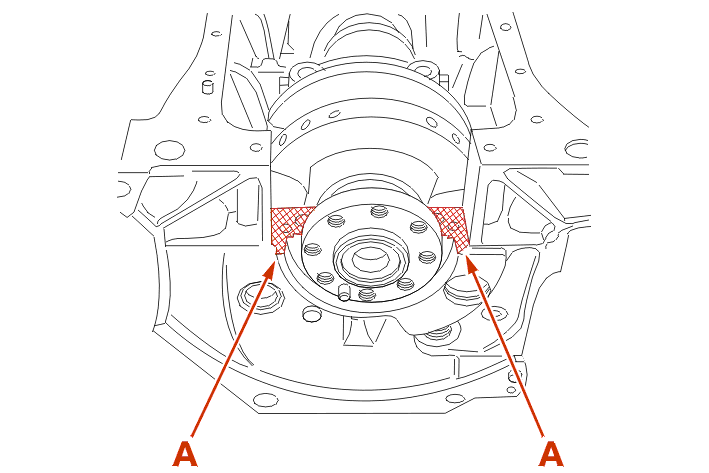
APPLY (E10) SEALING COMPOUND TO THE CORNERS AND ENDS (A) OF MAIN BEARING NO. 1 .
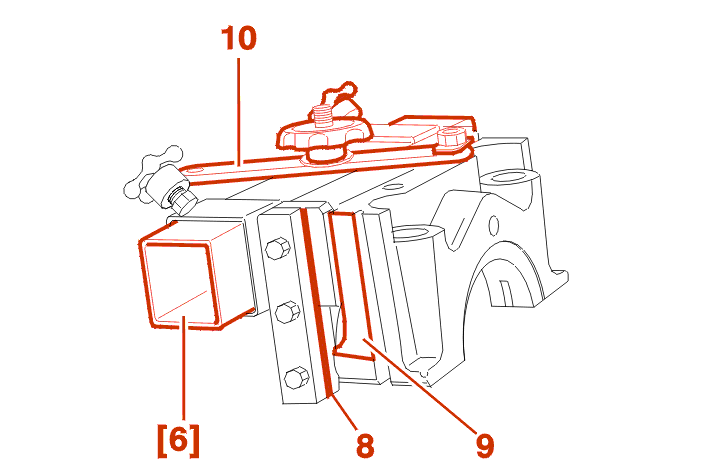
PLACE TOOL [6] ON THE CAP OF BEARING NO. 1 :
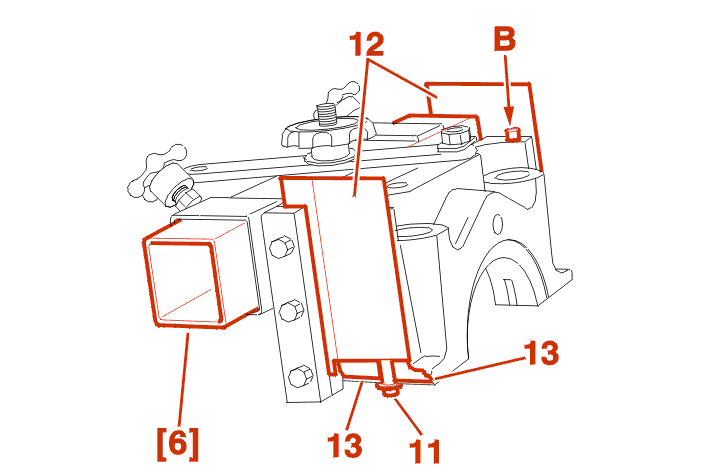
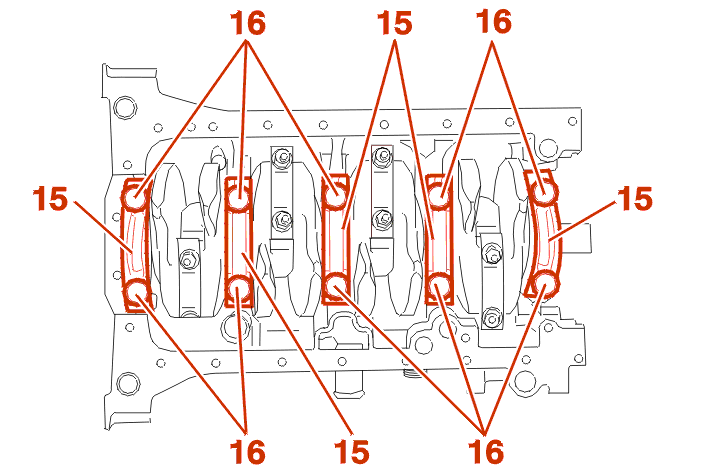
Refit the side seals (11) in the groove of the main bearing cap, with the minimum protrusion at (B) .
Lubricate the two surfaces of the feelers (12) .
PLACE THE FEELERS (12) ON TOOL [6] ABOVE THE HEEL (13) OF THE MAIN BEARING CAP .
The side seals (11) must have a minimum protrusion of approximately 1.5 mm (Maximum = 4 mm) .
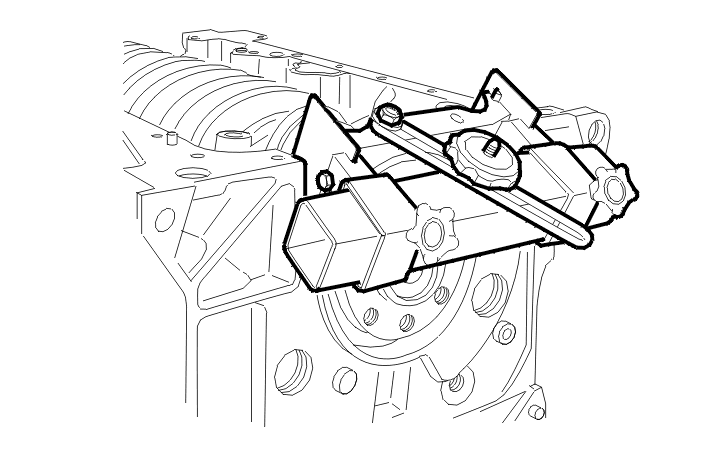
Engage the cap/side seal assembly in the cylinder block, by tilting the assembly .
Position the main bearing on the centralising bushes .
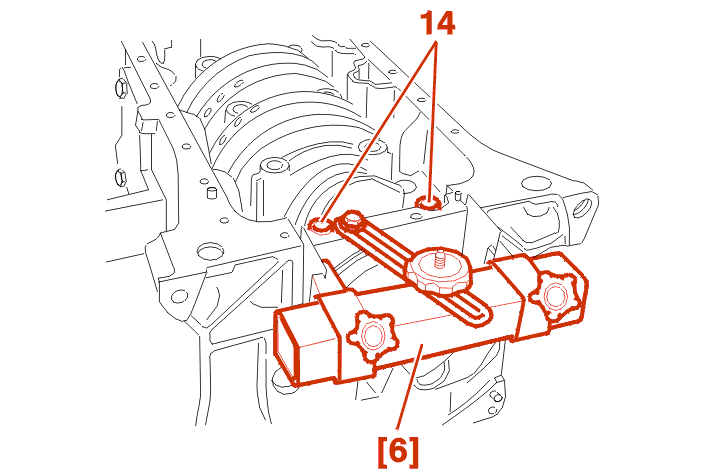
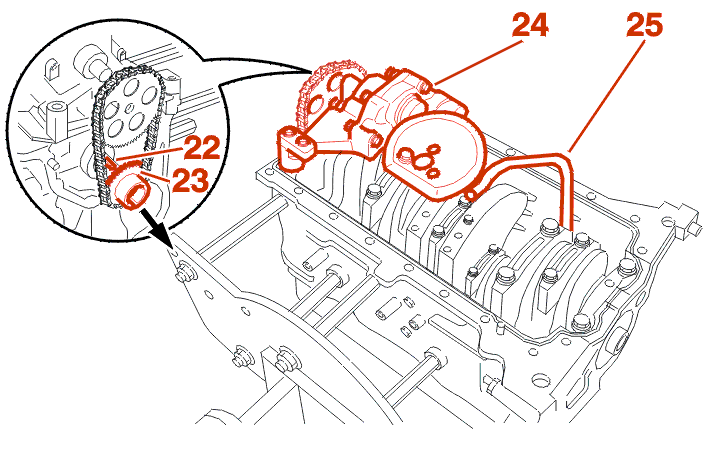
Tighten the 2 bolts (14) .
REMOVE THE TOOL [6] SIDEWAYS .
IMPERATIVE : the new side seals are supplied to the correct length and must not be cut, if the protrusion is too great, repeat the fitting operation .
Position :
IMPERATIVE : MARKING AND DETERMINING OF THE BEARING HALF SHELLS .
Tighten :
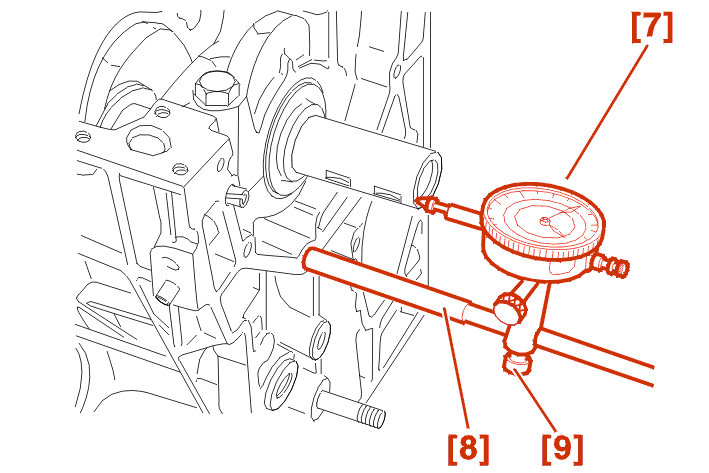
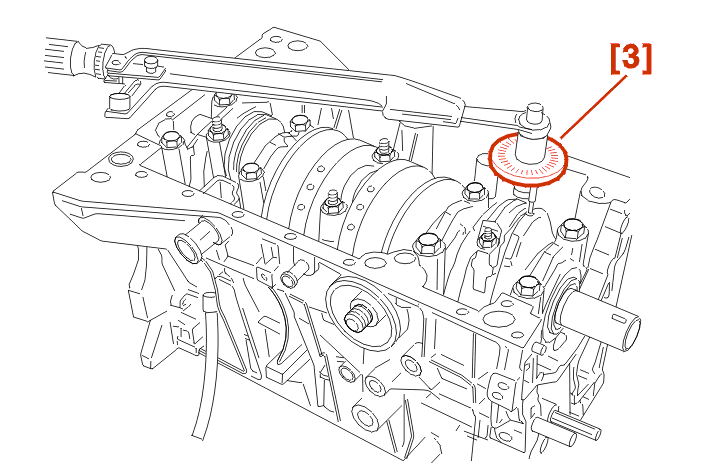
FIT THE DIAL GAUGE [7] USING TOOLS [8] - [9] .
This end float should be between 0.07 and 0.32 mm .
Adjust the clearance by adjusting the thickness of the side stop thrust washers .
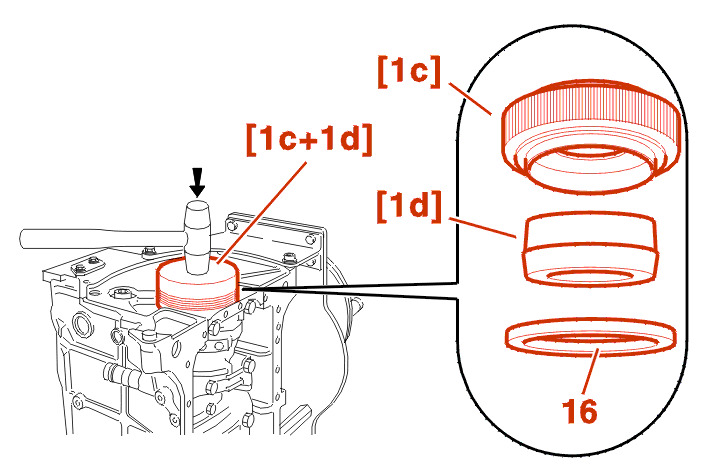
FIT A NEW OIL SEAL (16) USING THE TOOL [1C + 1D] .
Refit the seal by tapping with a mallet to the limit .
Remove the tool with a rotating movement .
IMPERATIVE : the outer face of the lip seal must be free of all traces of oil .
Con rod positioning .
Check that the new main bearing shell is fitted on the con rod big end .
MARKING AND DETERMINING OF THE BEARING HALF SHELLS .
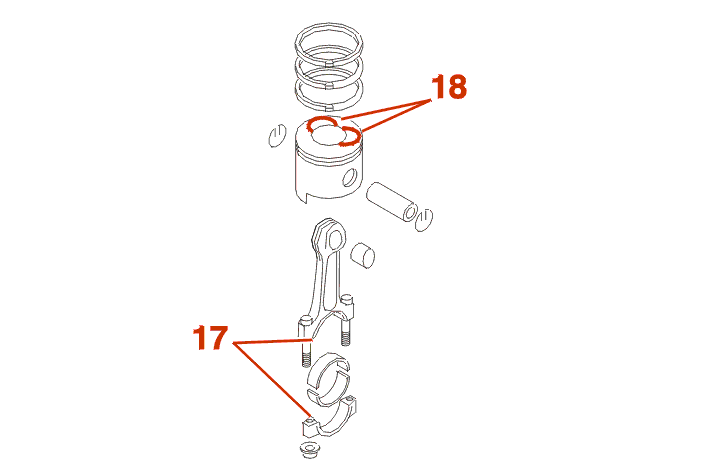
IMPERATIVE : piston and pin must match .
Assemble the connecting rods and pistons directing the notches (17) to the side opposite the recesses (18) on the pistons .
Fit :
Ensure that the con rods turn freely on their pins .
Fit the rings using piston ring pliers .
IMPERATIVE : turn the word TOP stamped on the rings to face upwards .
Position the ring gaps at 120 degrees to the scraper ring gap .
IMPERATIVE : direct the recesses (18) to the side opposite the oil filter fixing (19) .
Oil the piston rings and cylinder jackets .
Insert the con rod/piston assembly in the corresponding cylinder using a ring compressor .
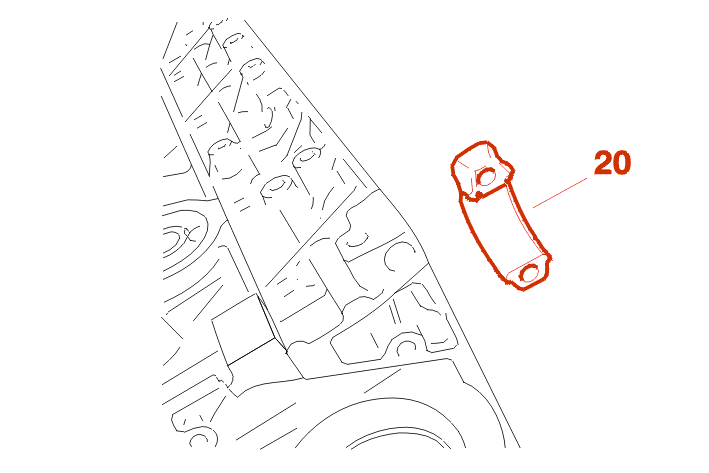
Fit the big end cap with a new oiled main bearing shell .
IMPERATIVE : line up the cap bearing shell notch (20) with the con rod bearing shell notch (17) .
IMPERATIVE : always fit new connecting rod cap nuts .
Clean : The bolts, The nuts .
COAT THE BIG END NUTS (THREAD AND CONTACT SURFACE) WITH G10 .
Tightening is carried out in two stages .
Stage 1 :
Stage 2 :
(X) = 10 mm .
Clean the checking surfaces .
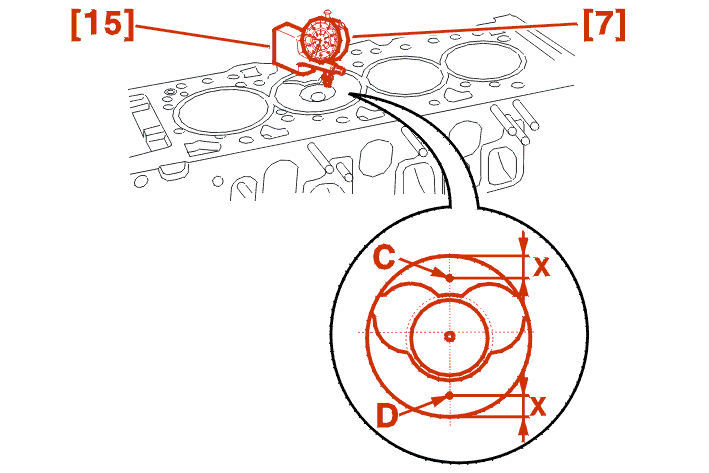
FIT THE DIAL GAUGE [7] ON THE BRACKET [15] .
Turn the crankshaft .
Place the needle of the dial gauge on one of the checking points (Checking point C) .
Continue turning the crankshaft until the piston reaches TDC ; Read the value .
Turn a quarter turn backwards .
Move the piston to the Top Dead Centre value without ever exceeding it .
Zero the dial gauge .
MOVE THE DIAL GAUGE/BRACKET ASSEMBLY [7] AND [15] OVER THE CYLINDER BLOCK .
Read the value .
Place the needle of the dial gauge on one of the checking points (Checking point D) .
Zero the dial gauge .
Read the value .
Calculate the average of the 2 values measured .
Continue in the same way for the other three cylinders .
NOTE : maximum gap between 2 pistons : = 0.07 mm .
WARNING : the highest average value determines the thickness of the gasket .
Fit :
Tighten the bolts to 1.6 da.Nm .
Fit :
TIGHTEN THE BOLT : 0.9 da.Nm + E3 .
COAT THE PLATE (26) WITH E10 SEALING COMPOUND .
Fit :
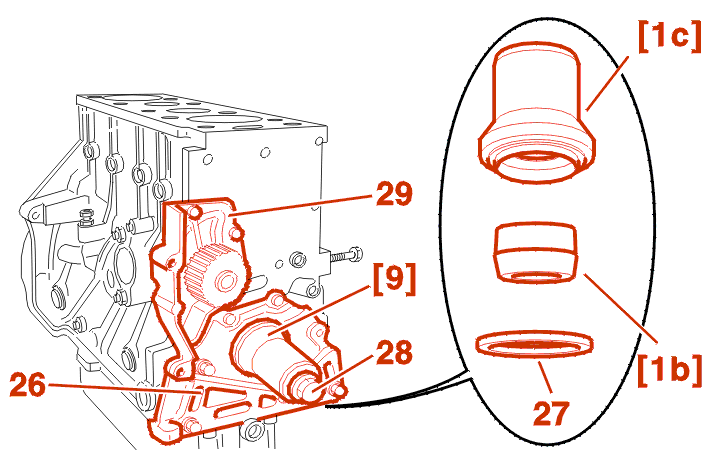
FIT A NEW OIL SEAL (27) USING THE TOOL [1B] + [1C] .
FIT A NEW LIP SEAL USING TOOL [1B] + [1C] + Bolt (28) .
Remove the tool with a rotary movement .
IMPERATIVE : the outer face of the lip seal must be free from all traces of oil .
Fit the pump (29) using a new seal .
Tighten the bolts to 1.5 da.Nm .
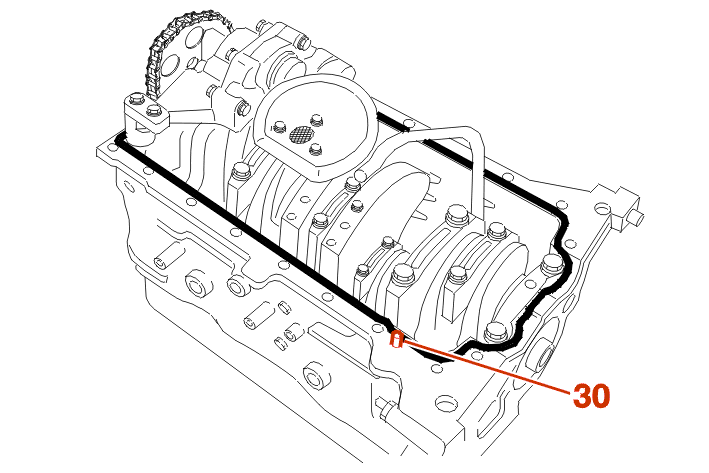
1 - 1 - ALUMINIUM OIL SUMP
NOTE : for engines fitted with an aluminium oil sump, check that the dowel pin (30) is present .
COAT THE SUMP GASKET SURFACE WITH A BEAD OF (E10) SEALING COMPOUND .
IMPERATIVE : ensure that the bead of sealing compound goes right round each of the threaded holes in order to guarantee a tight seal .
Fit the sump, Tightening torque : 1.6 da.Nm .
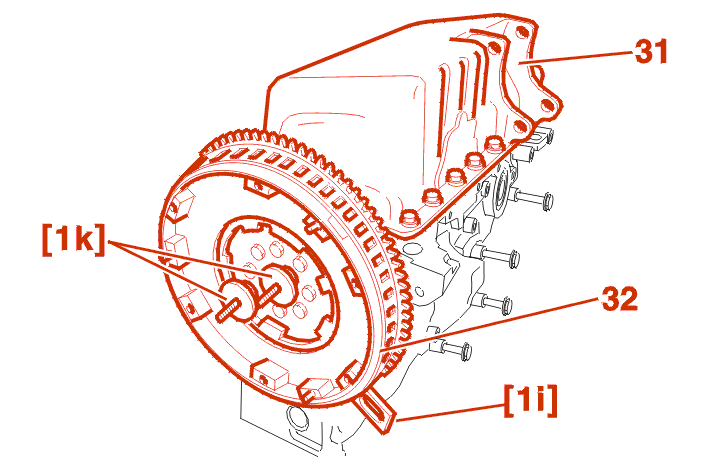
SCREW THE TWO THREADED RODS OF THE TOOL [1K] INTO THE CRANKSHAFT .
Check that the centralising pin is present .
Refit the flywheel (32) .
RETAIN THE ENGINE FLYWHEEL (32) IN PLACE USING THE CENTRING PINS AND FASTENERS OF THE TOOL (1K) .
INSERT THE FLYWHEEL STOP [1I] .
CLEAN AND COAT WITH (E3) THE BOLTS .
1st fitting : Single engine flywheel .
CLEAN AND COAT WITH (E3) THE BOLTS .
Tightening torque : 4.75 da.Nm .
2nd fitting : Double flywheel .
IMPERATIVE : following any work: when disassembling the double flywheel from the crankshaft, always replace the double flywheel bolts .
Fit the pre-coated bolts .
Tightening torque : 4.8 da.Nm .