B1CJ0BK1 - 406D9 XU INJECTION
REASSEMBLY ENGINE (CYLINDER BLOCK)
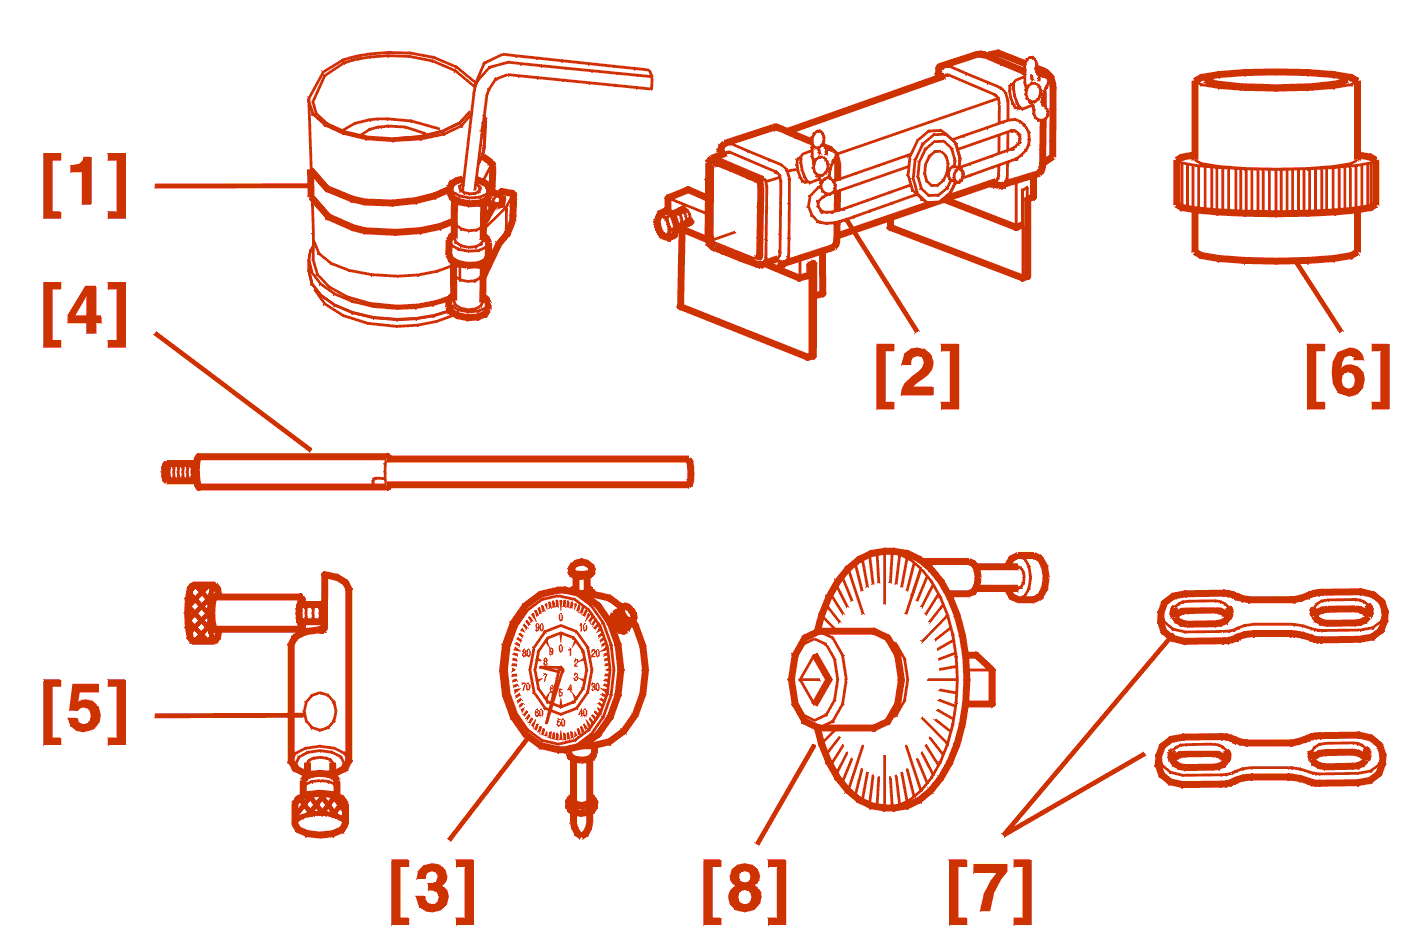
1 - SPECIAL TOOLS
| reference | description | reference | reference |
|---|---|---|---|
| [1] | engine piston rings fitting collar | MULLER 204 250 - 21 |
750 - T |
| [2] | bearing no. 1 side seals fitting tool | (-).0153-A | 7004 - T.F |
| [3] | dial gauge with securing lug | (-).1504 | 2437 - T |
| [4] | dial gauge support rod | (-).0132 | 1132 - T |
| [5] | dial gauge carrier | ||
| [6] | crankshaft seal fitting tool width 10 mm flywheel end |
(-).0153-PZ | 7016 - T.Q |
| [6] | crankshaft seal fitting tool width 7 mm flywheel end |
7017 - T.T | |
| [7] | liner retaining clamp | (-).0132-A1Z | 8132 - T |
| [8] | angular locking cotter | FACOM D 360 |
4069 - T |
2 - REFITTING THE PISTON RINGS
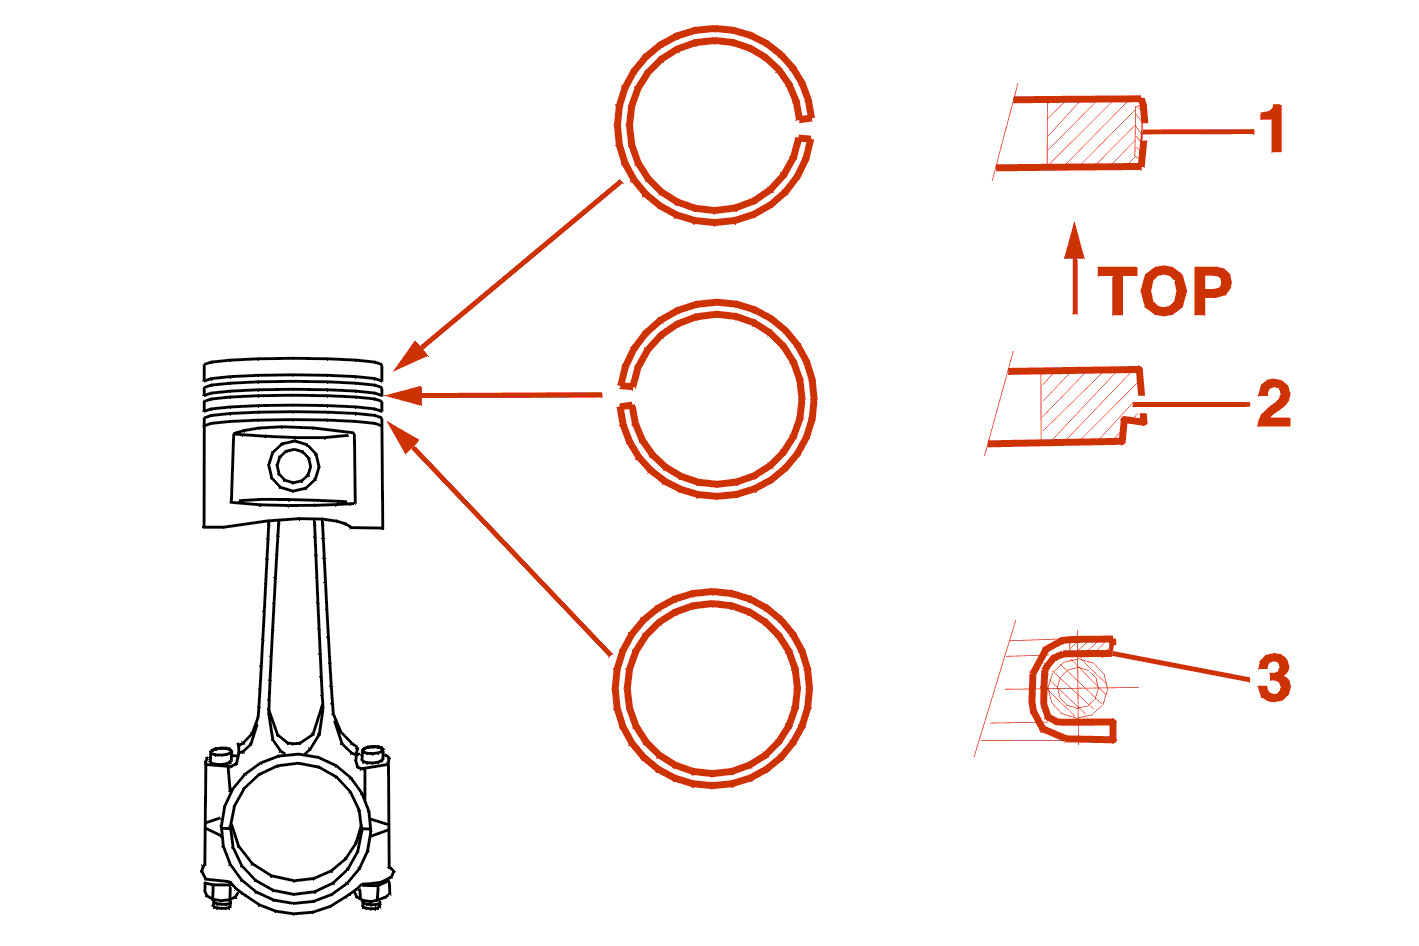
Refit the rings using the ring pliers .
The face of the sealing ring (2) marked TOP must be to the top .
Turn the gap of the ring (2) 180 degrees in relation to the gap of ring (1) .
The UFLEX type scraper ring (3) does not have a gap .
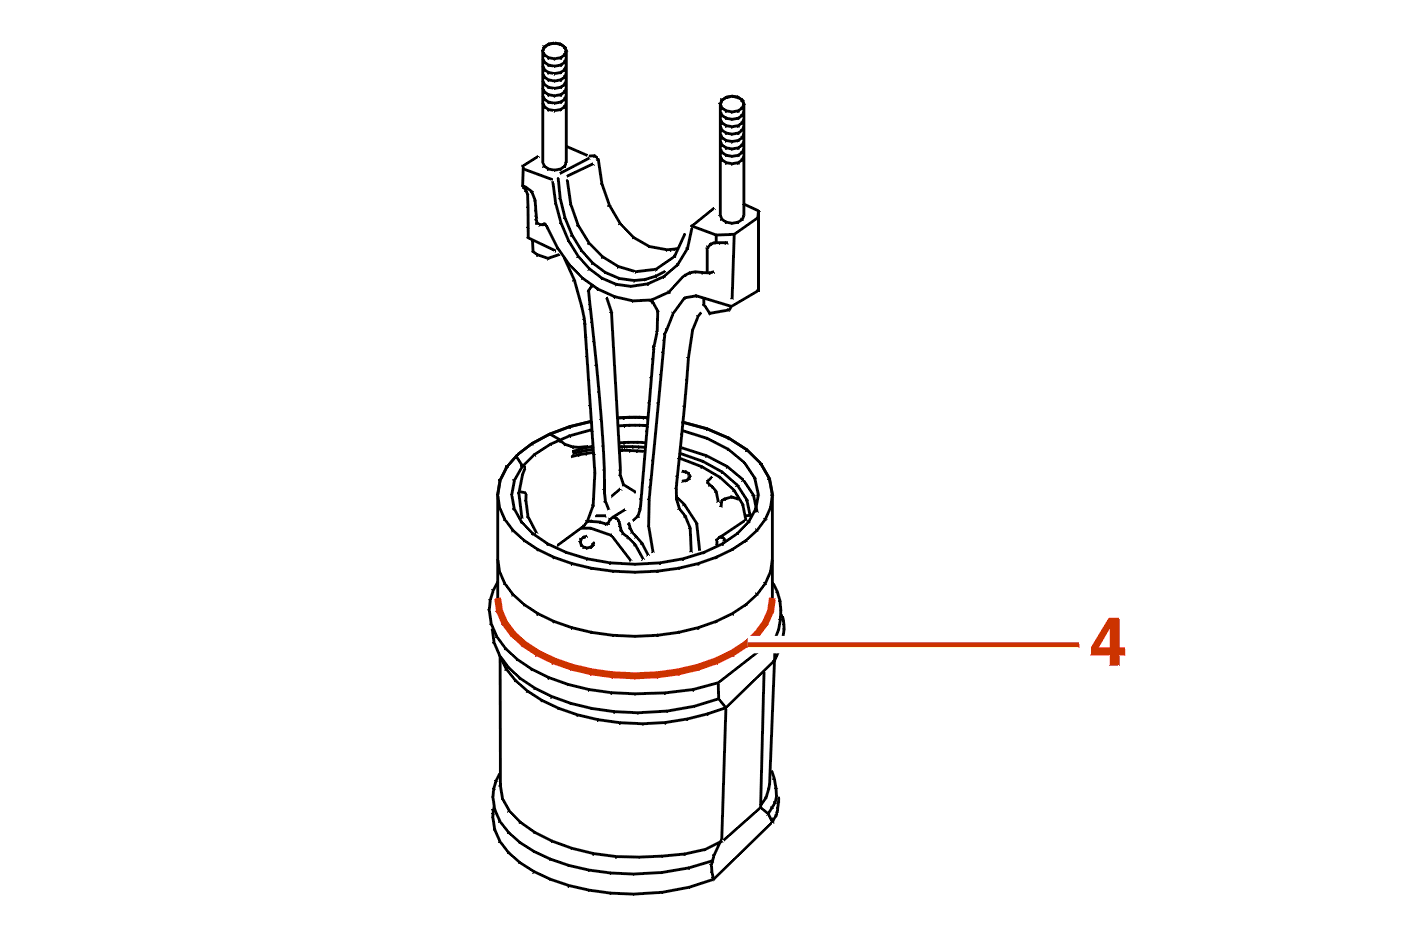
3 - LINERS/PISTONS ASSEMBLY
IMPERATIVE : it is necessary to assemble the liners/pistons before refitting the liners .
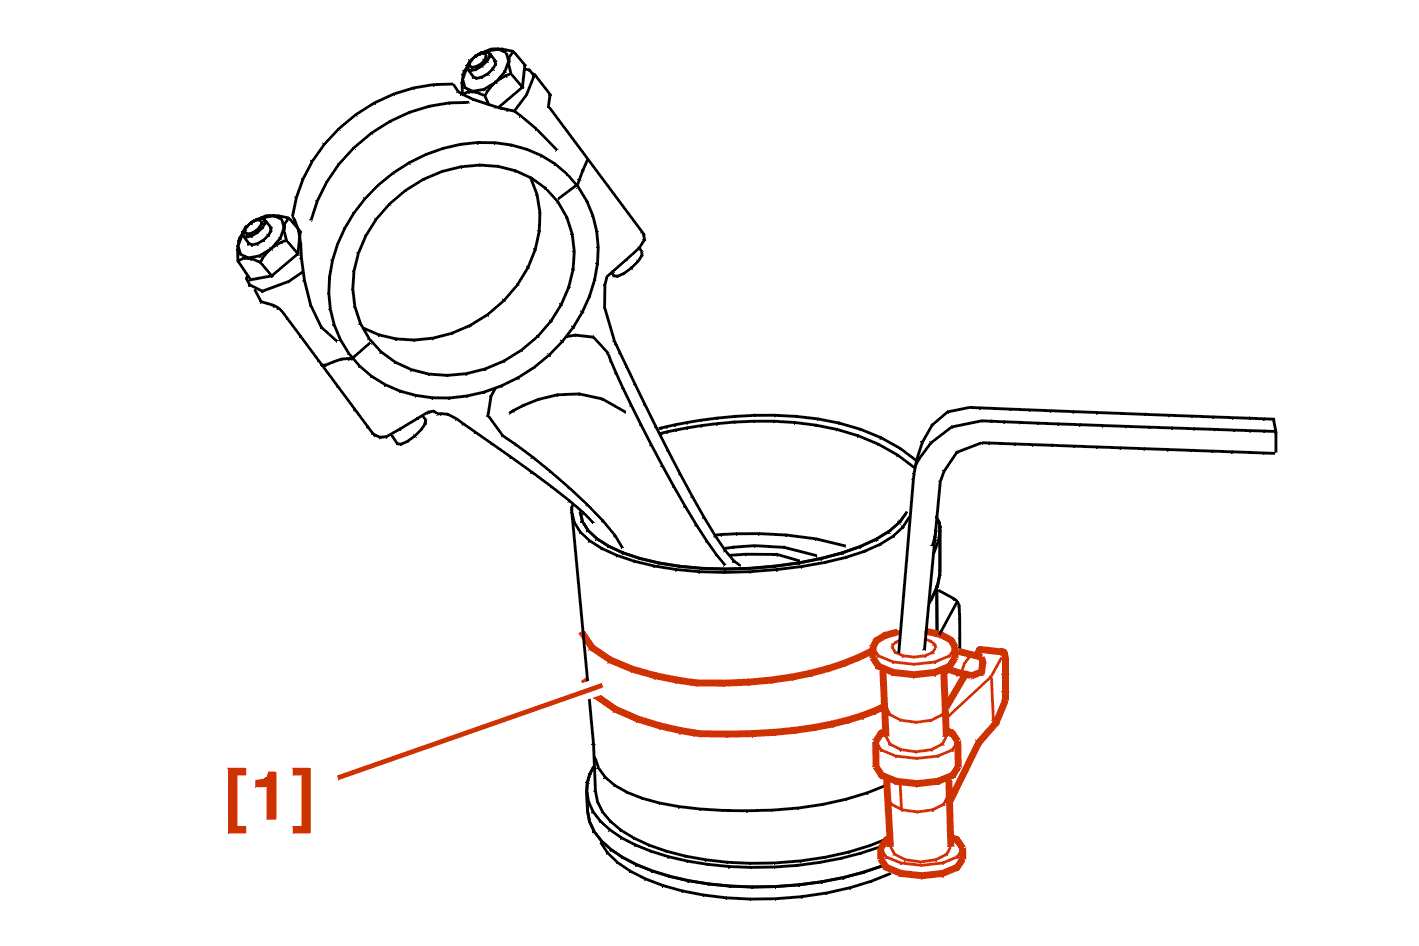
Oil the pistons .
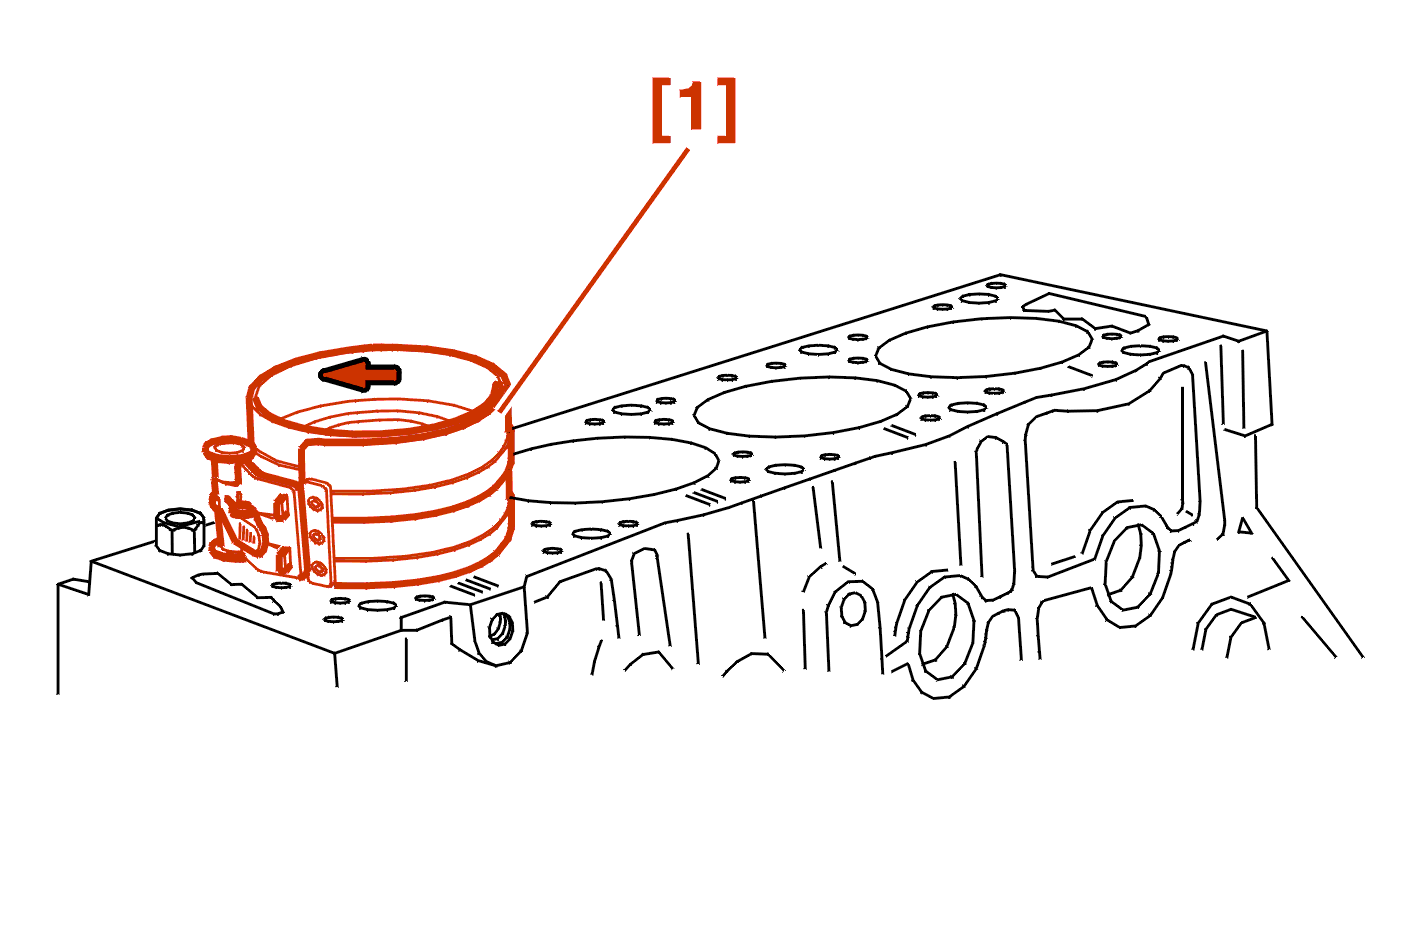
Fit the ring collar [1] Moderately tighten .
Position the piston on the liner to obtain on fitting :
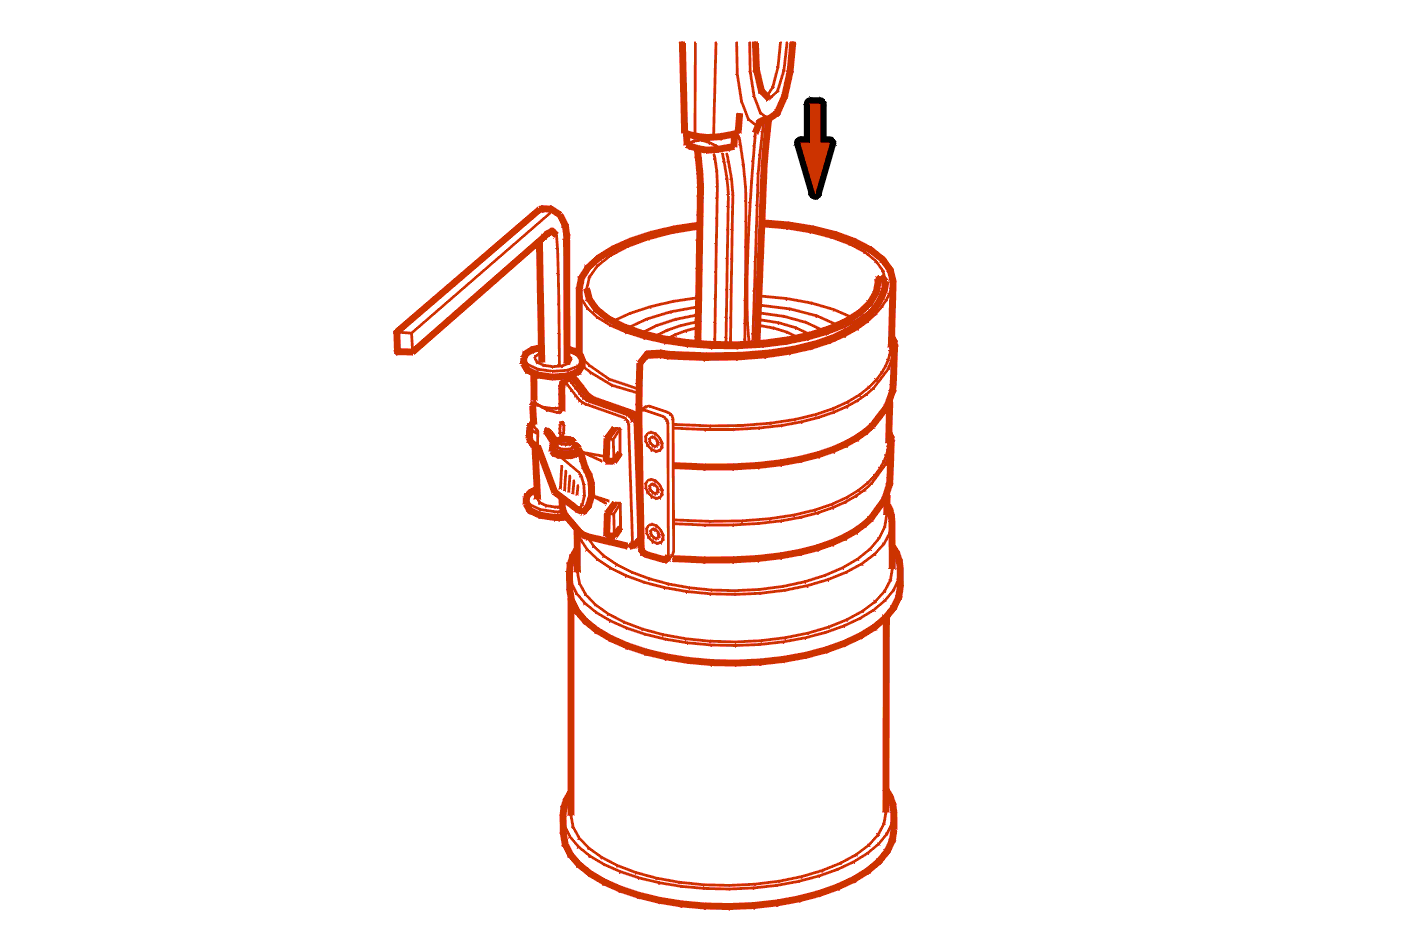
Push the piston in the liner until the collar is freed .
Proceed in the same way for the other three assemblies .
Fit a new seal (4) to each liner taking care not to twist it .
Fit :
NOTE : FOR THE THICKNESSES OF THE BIG END SHELLS .
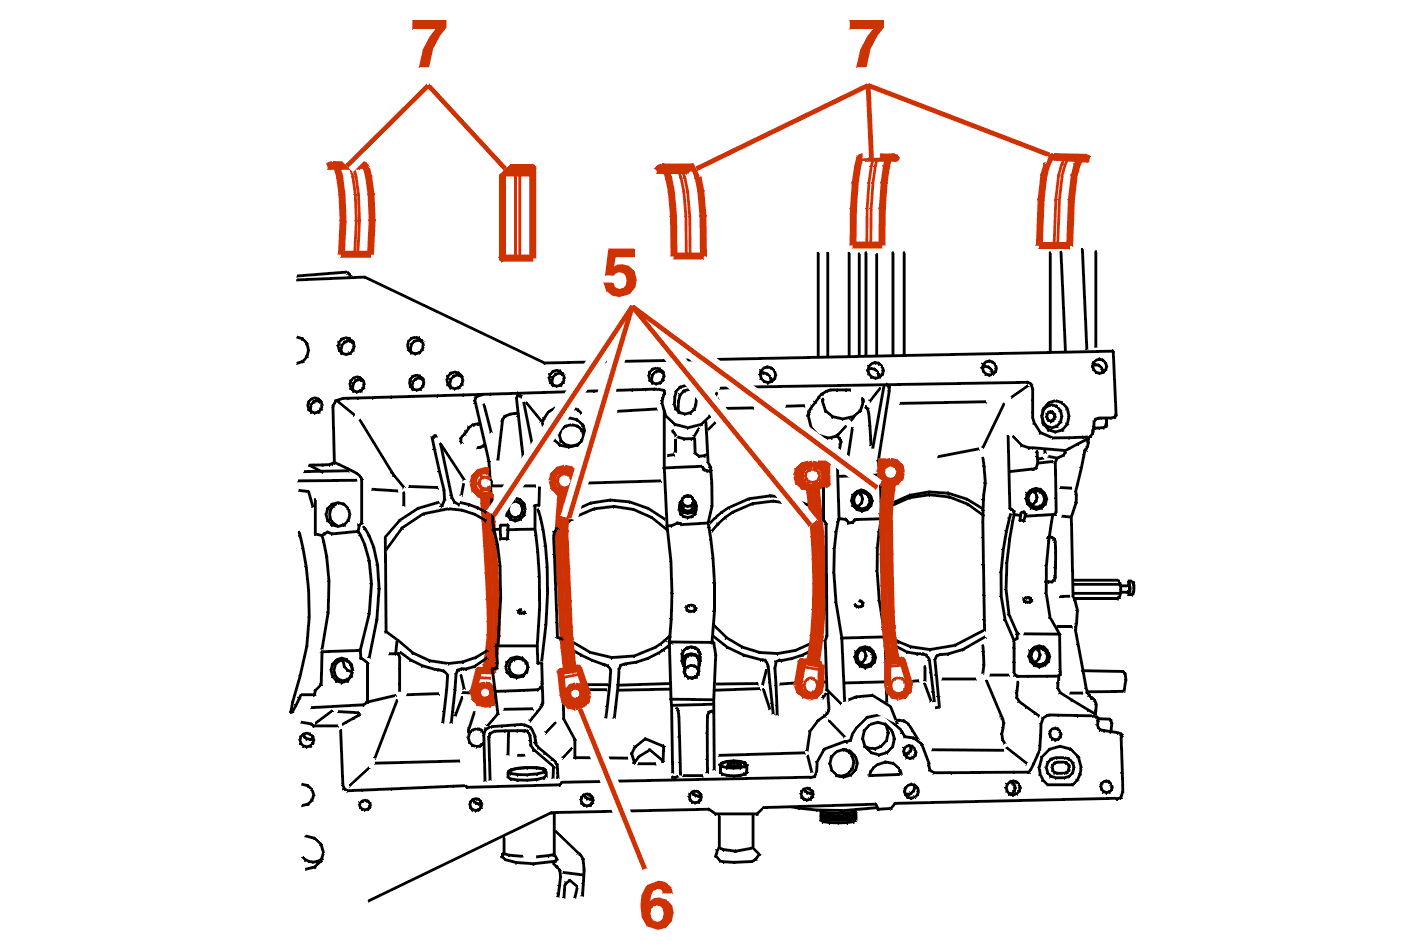
4 - REFITTING THE CRANKSHAFT
On the crankshaft, check the condition of the following parts :
Depending on engine type :
Refit the grooved half shells (7) on the cylinder block .
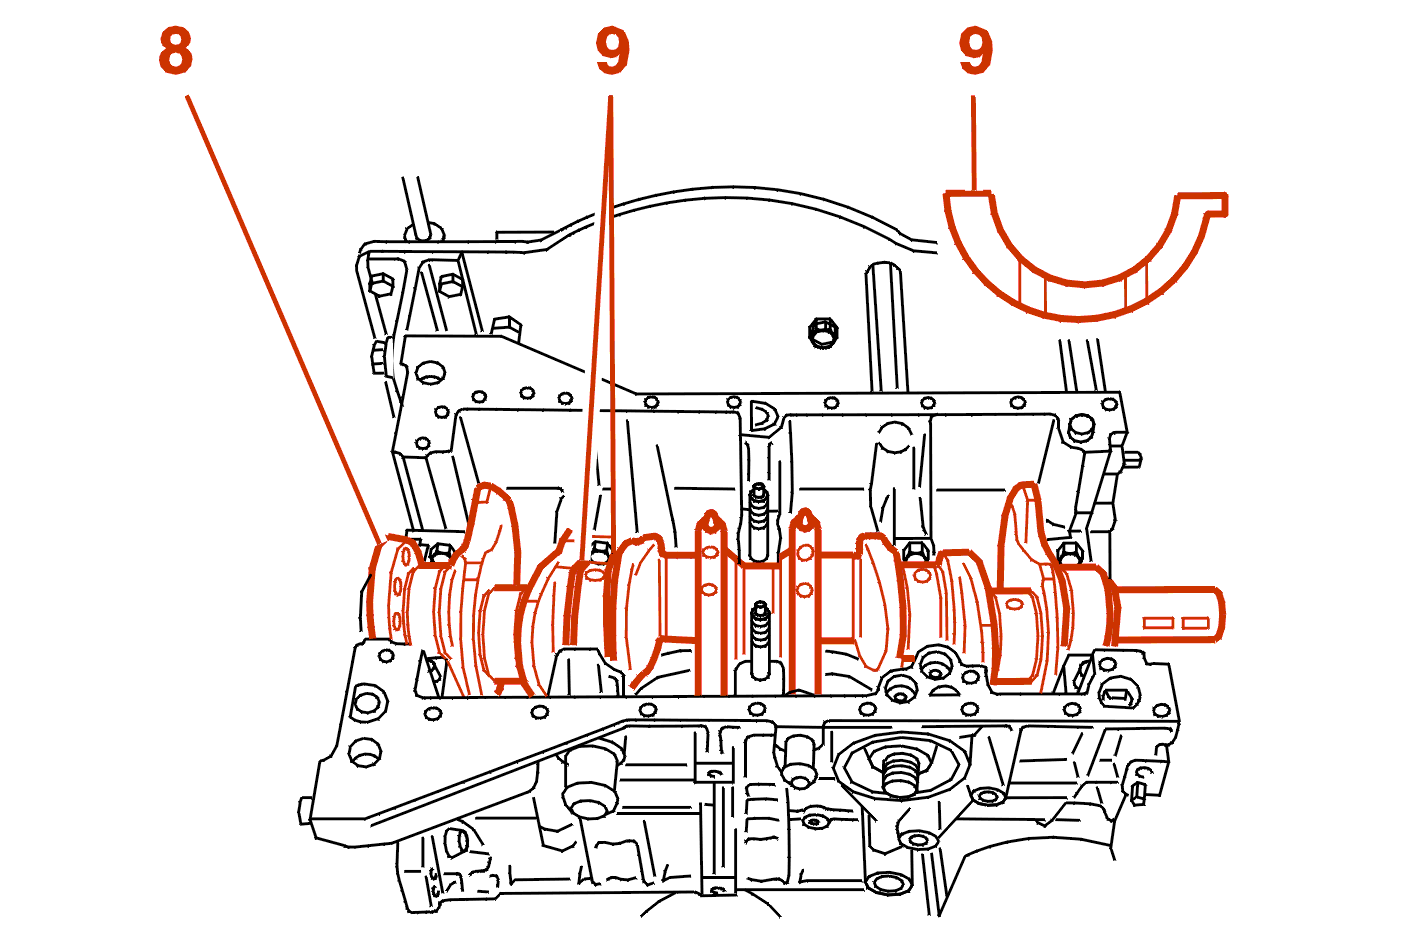
Lubricate the crankshaft main bearings .
Fit :
NOTE : FOR THE THICKNESS OF THE STOP THRUST WASHERS .
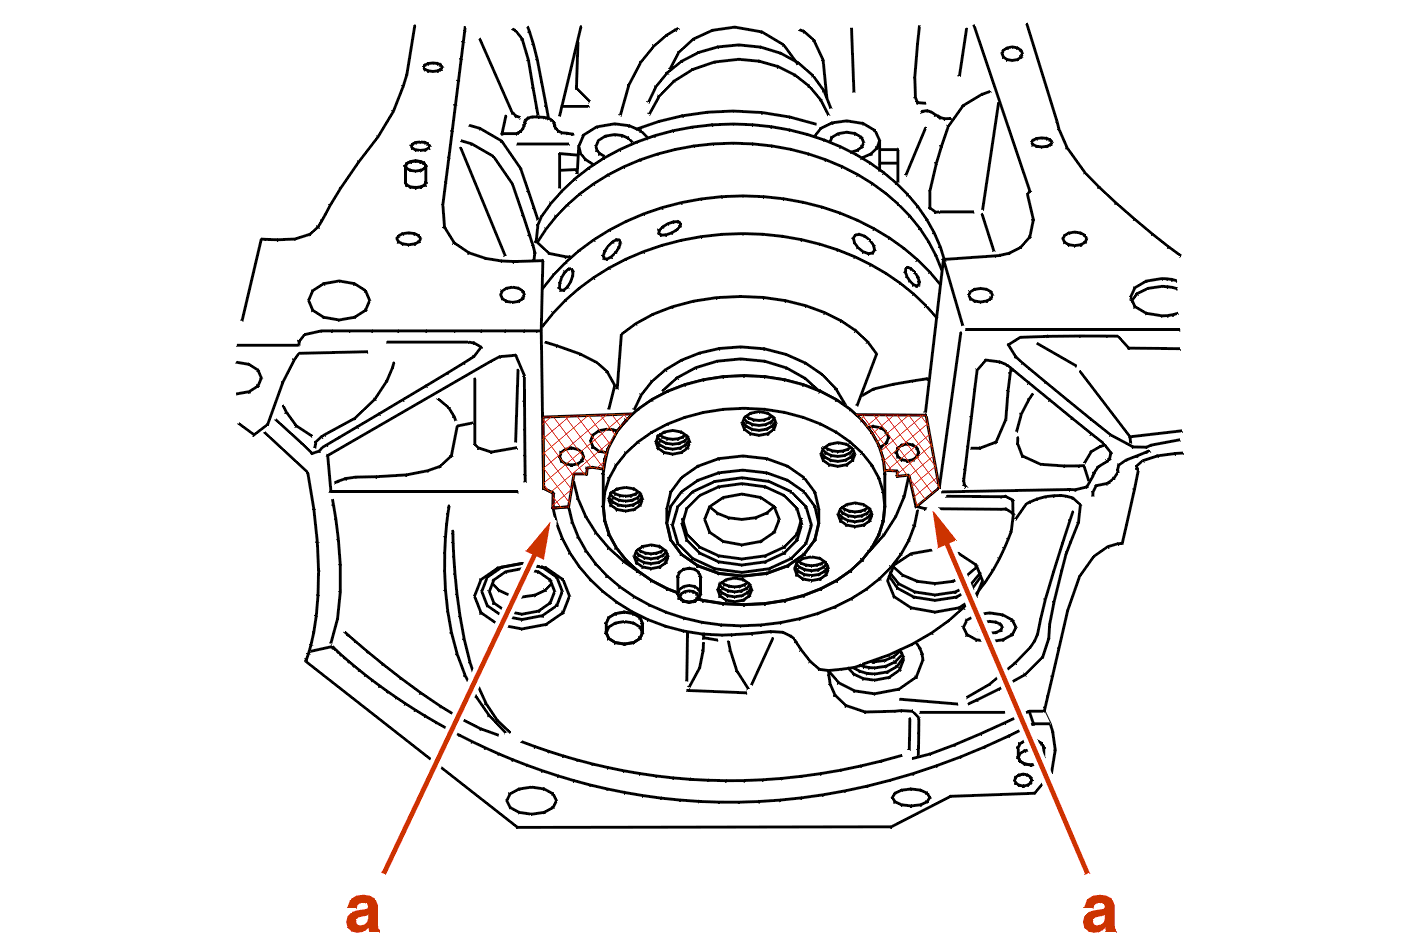
Apply AUTO-JOINT OR sealing compound to the corners and ends (a) of main bearing no. 1 .
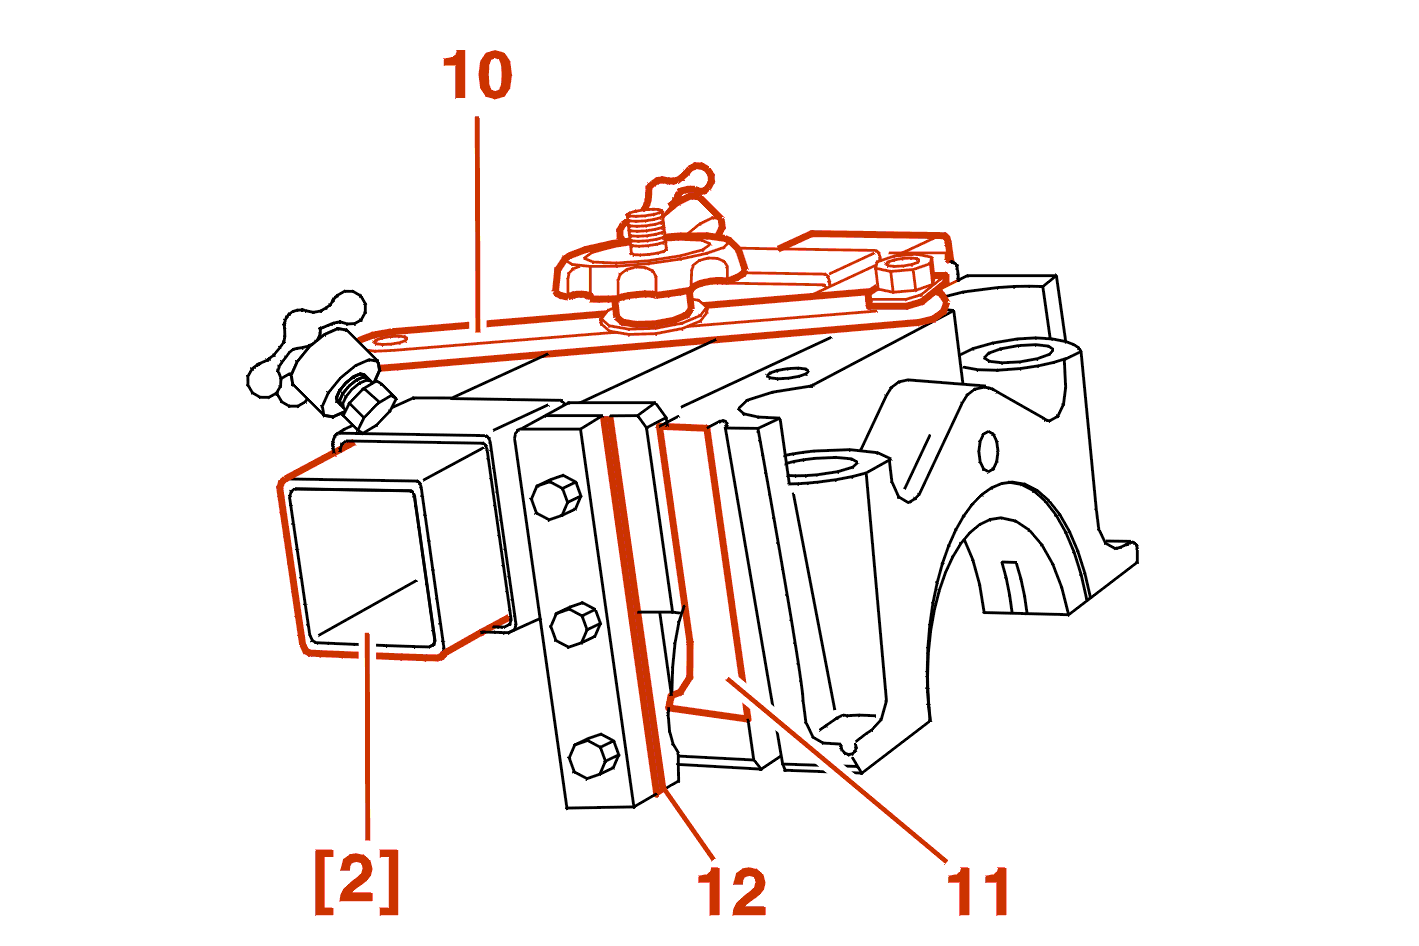
Place tool [2] on the cap of bearing no. 1 :
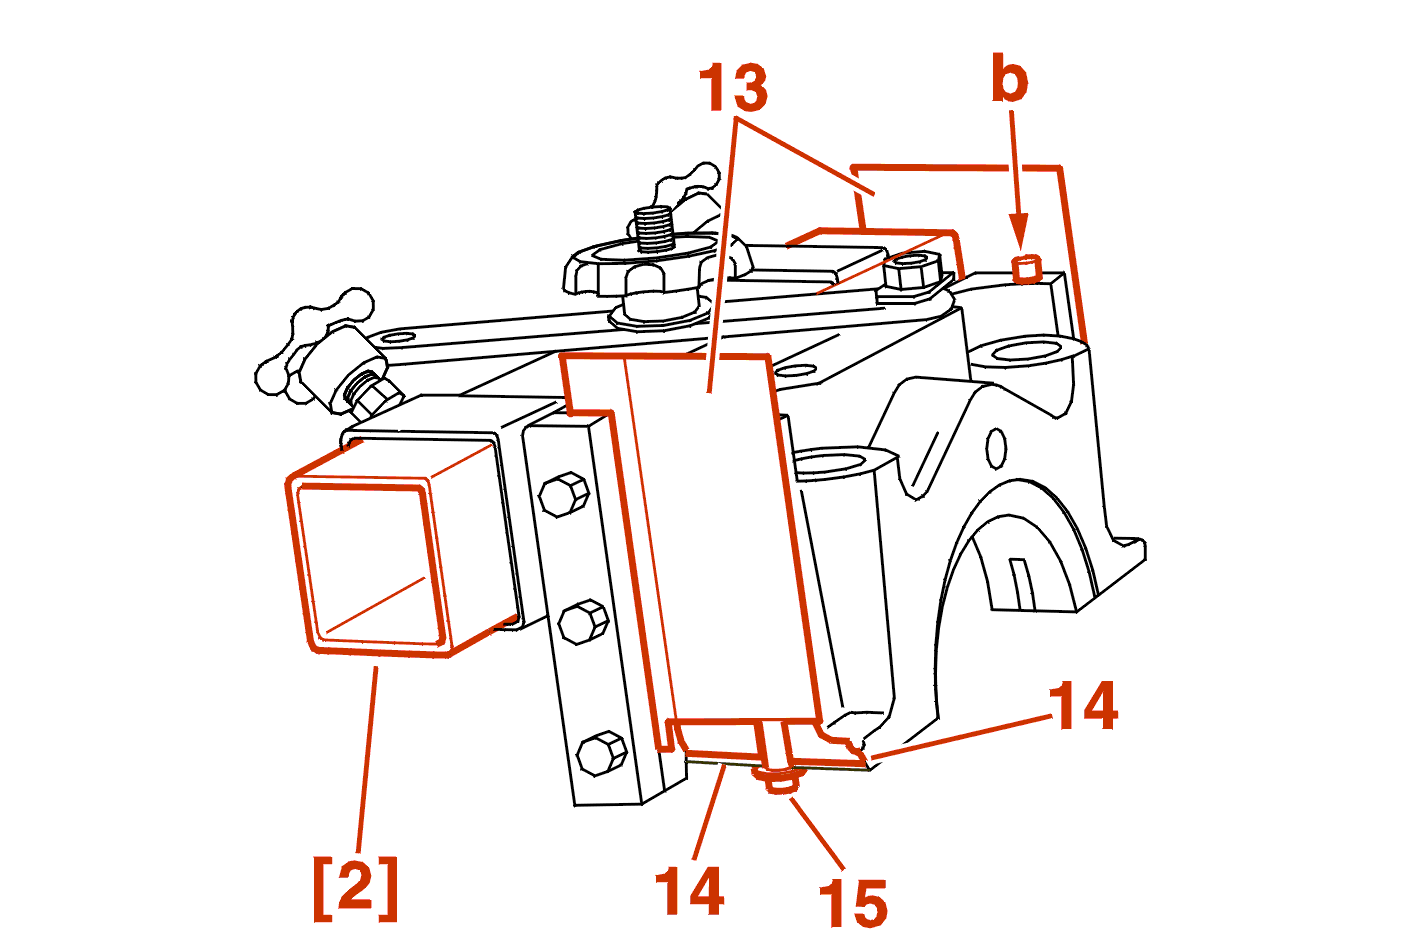
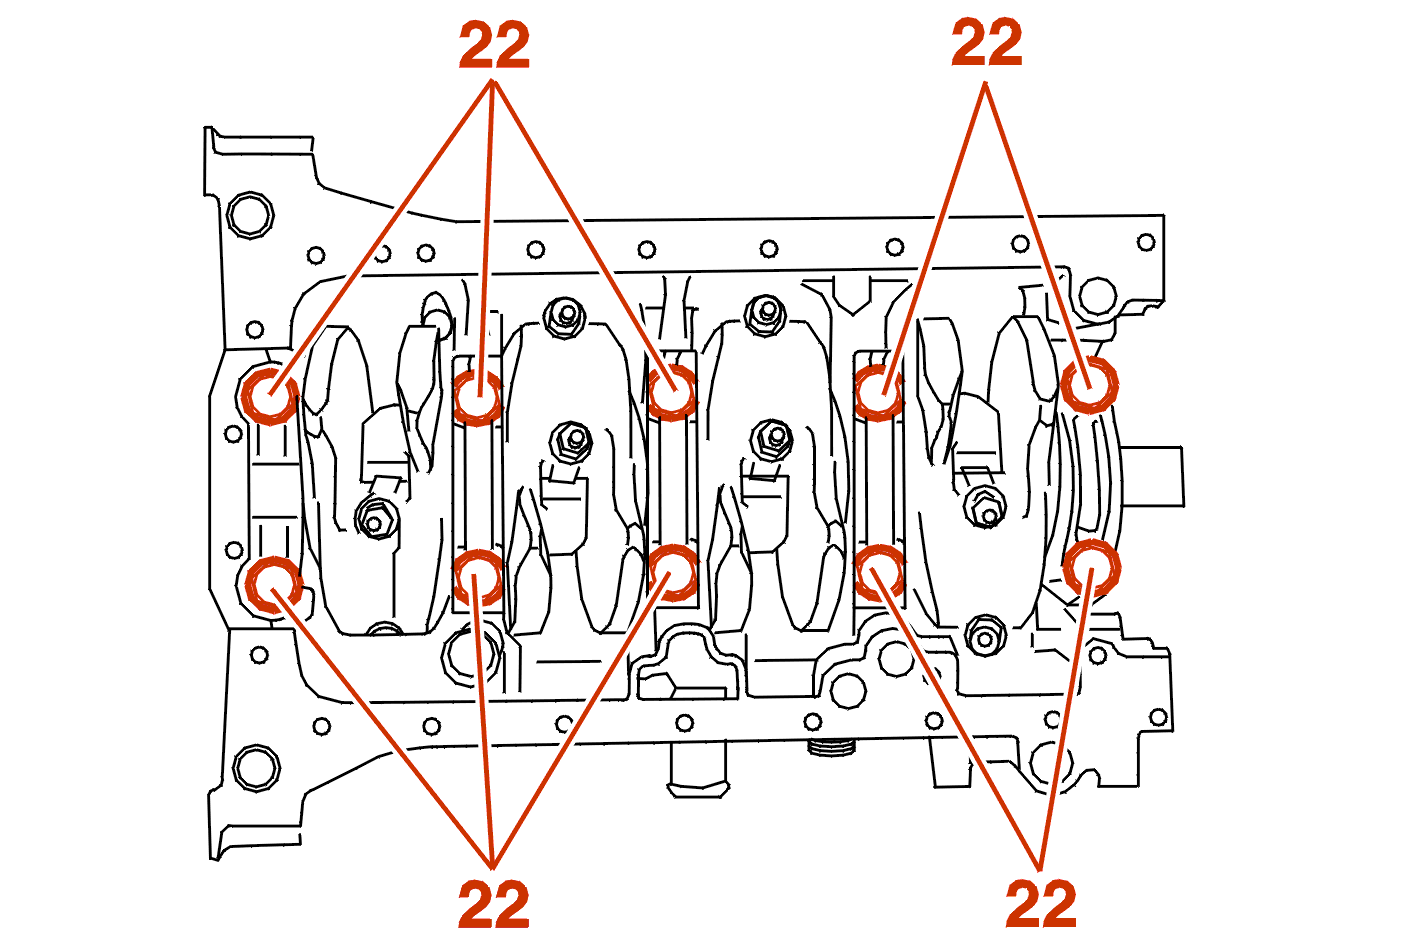
Refit the side seals (15) in the groove of the main bearing cap, with the minimum protrusion at (b) .
Lubricate the two surfaces of the feelers (13) .
Place the feelers (13) on tool [2] above the heel (14) of the main bearing cap .
The side seals (15) must have a minimum protrusion of approximately 1 mm .
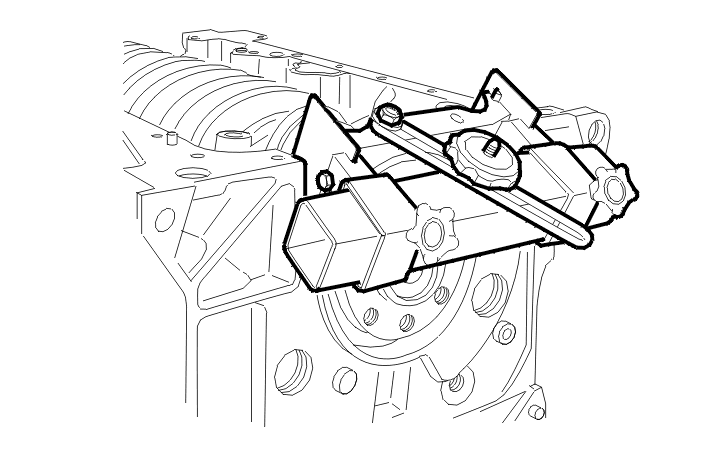
Engage the cap/side seal assembly in the cylinder block, by tilting the assembly .
Position the main bearing on the centralising bushes .
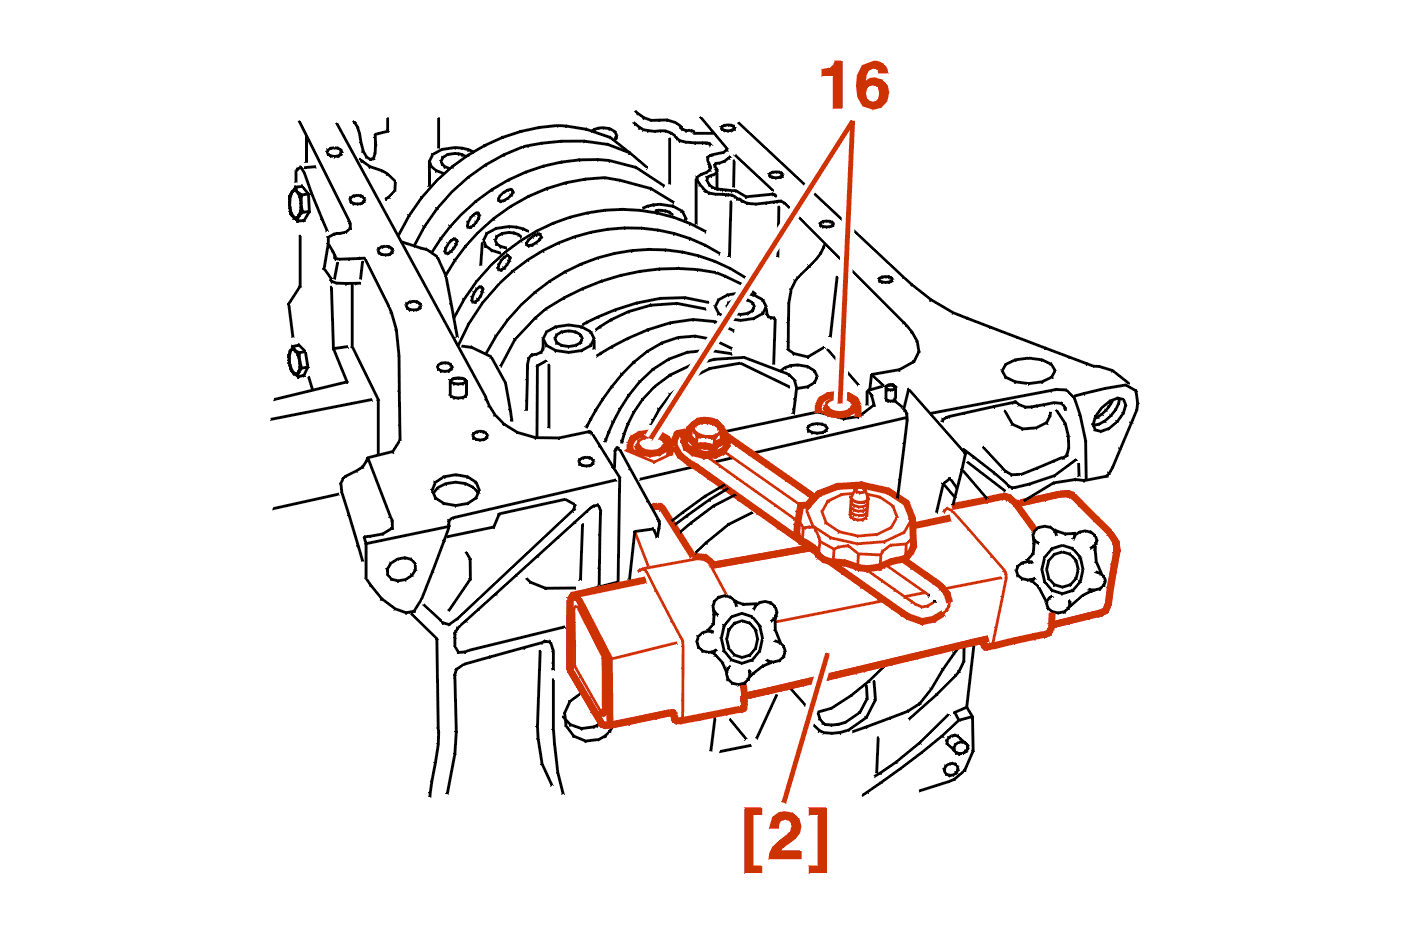
Tighten the 2 bolts (16) .
Remove the tool [2] sideways .
IMPERATIVE : the new side seals are supplied to the correct length and must not be cut, if the protrusion is too great, repeat the fitting operation .
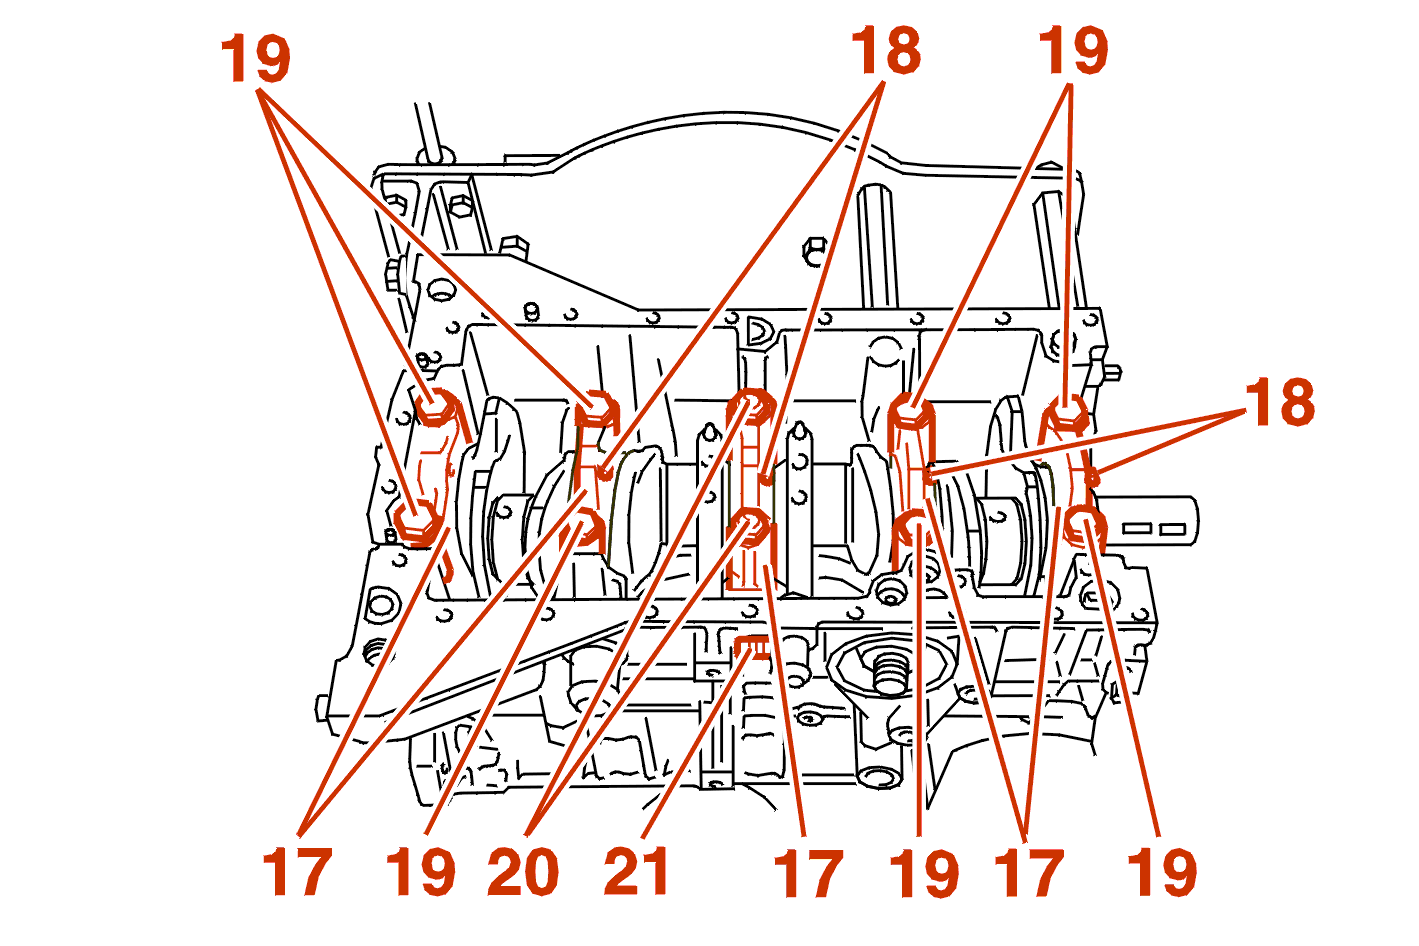
Position the main bearing caps (17) with their half shells by positioning the lugs (18) towards the timing side .
IMPERATIVE : FOR THE IDENTIFICATION AND DETERMINATION OF THE BEARING HALF SHELLS .
XU5JP ENGINE XU7JB ENGINE XU7JP ENGINE XU7JP4 ENGINE
Tighten :
XU10J4R ENGINE
Tighten :
ALL MODELS
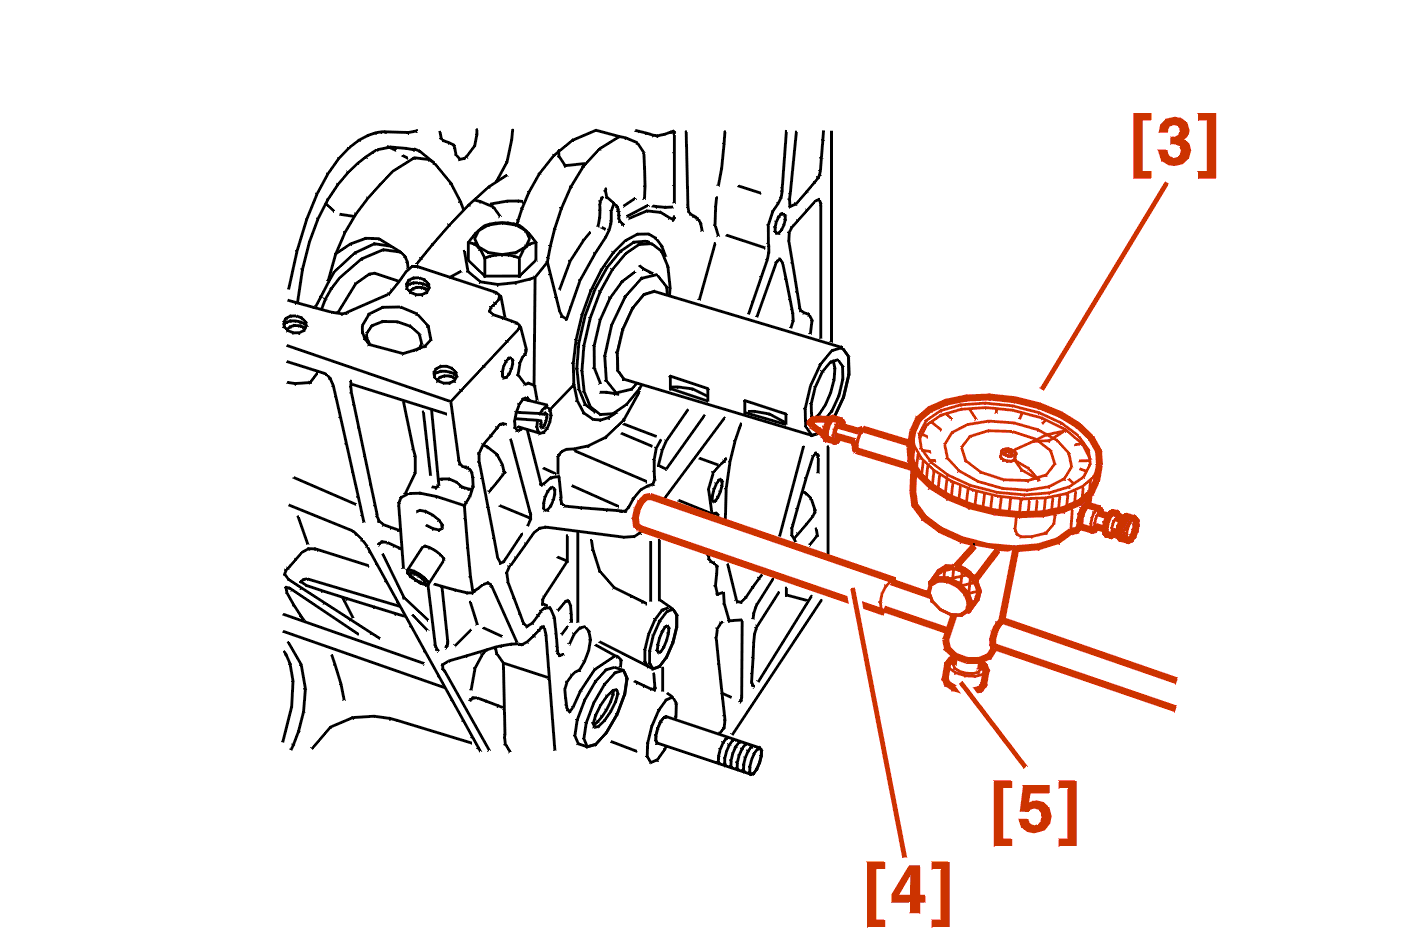
Fit the dial gauge [3] using tools [4] - [5 ] .
This end float should be between 0.07 and 0.27 mm .
Adjust the clearance by adjusting the thickness of the side stop thrust washers .
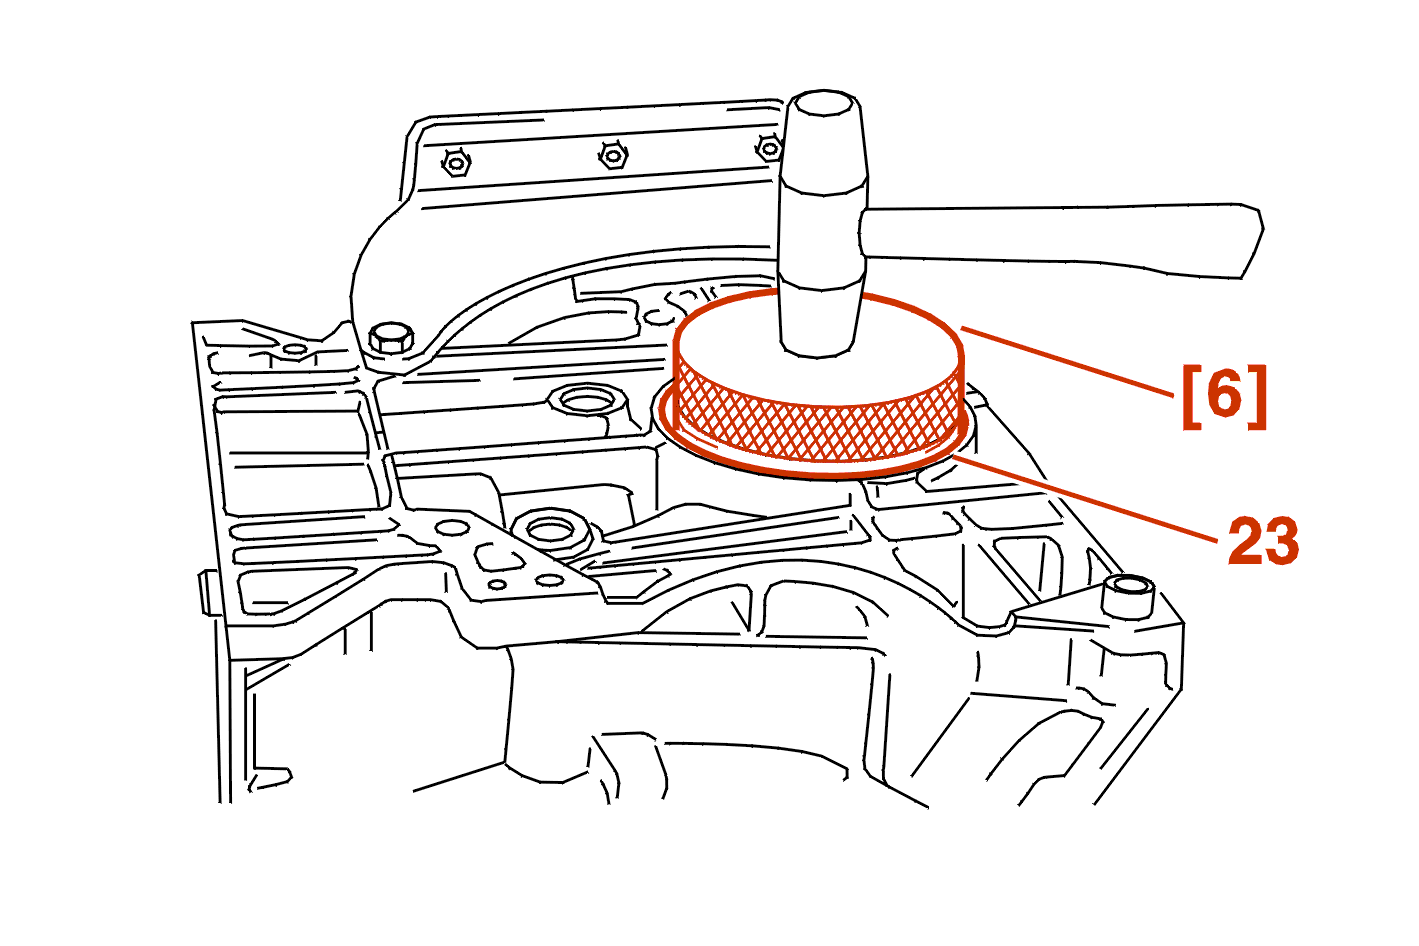
Fit a new oil seal (23) using the tool [6] .
Lubricate the lips of the seals .
Refit the seal by tapping with a mallet to the limit .
Remove the tool with a rotary movement .
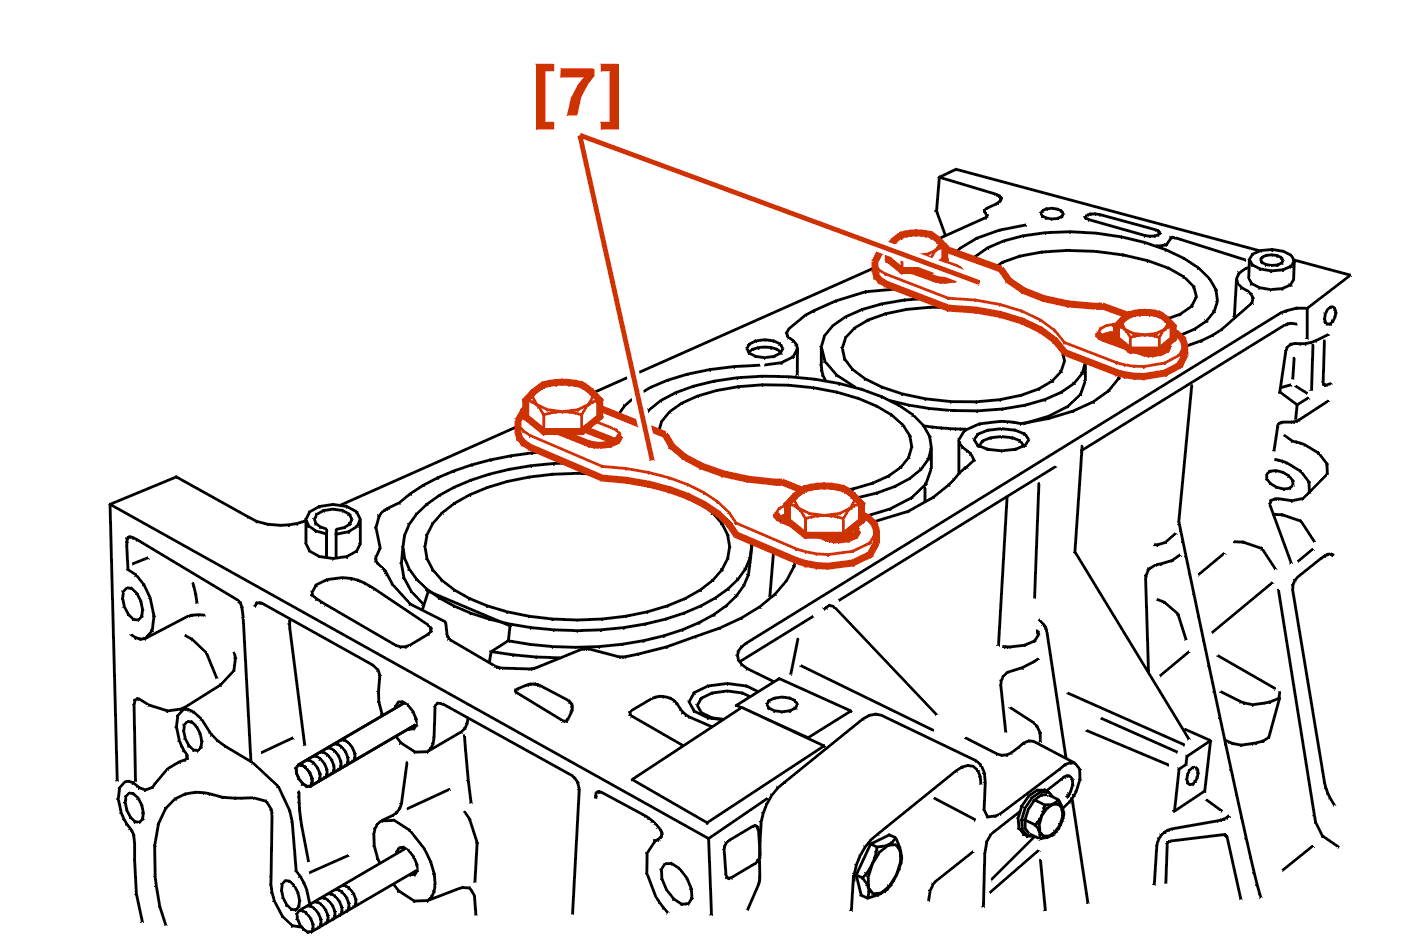
Refit the 4 piston/connecting rod/liner assemblies (According to markings made during dismantling) .
Fit the liner retaining clamps [7] .
XU10J4R ENGINE
Lubricate the cylinders .
Respect the marks made on dismantling .
The piston arrow is directed towards the timing gear .
Retain the ring collar [1] in perfect contact with the block joint face and aligned in relation to the cylinder .
Insert the piston until the collar is free .

ALL MODELS
IMPERATIVE : always fit new connecting rod cap nuts .
NOTE : the connecting rods and their caps are matched and marked with coloured spots or numbers .
Lubricate the crank pins .
Refit the big end caps together with new half shells .
FOR THE IDENTIFICATION AND DETERMINATION OF THE BIG END HALF SHELLS .
Tighten the connecting rod cap nuts to the correct torque Using the tool [8] .
IMPERATIVE : FOR THE VARIOUS TIGHTENING TORQUES .
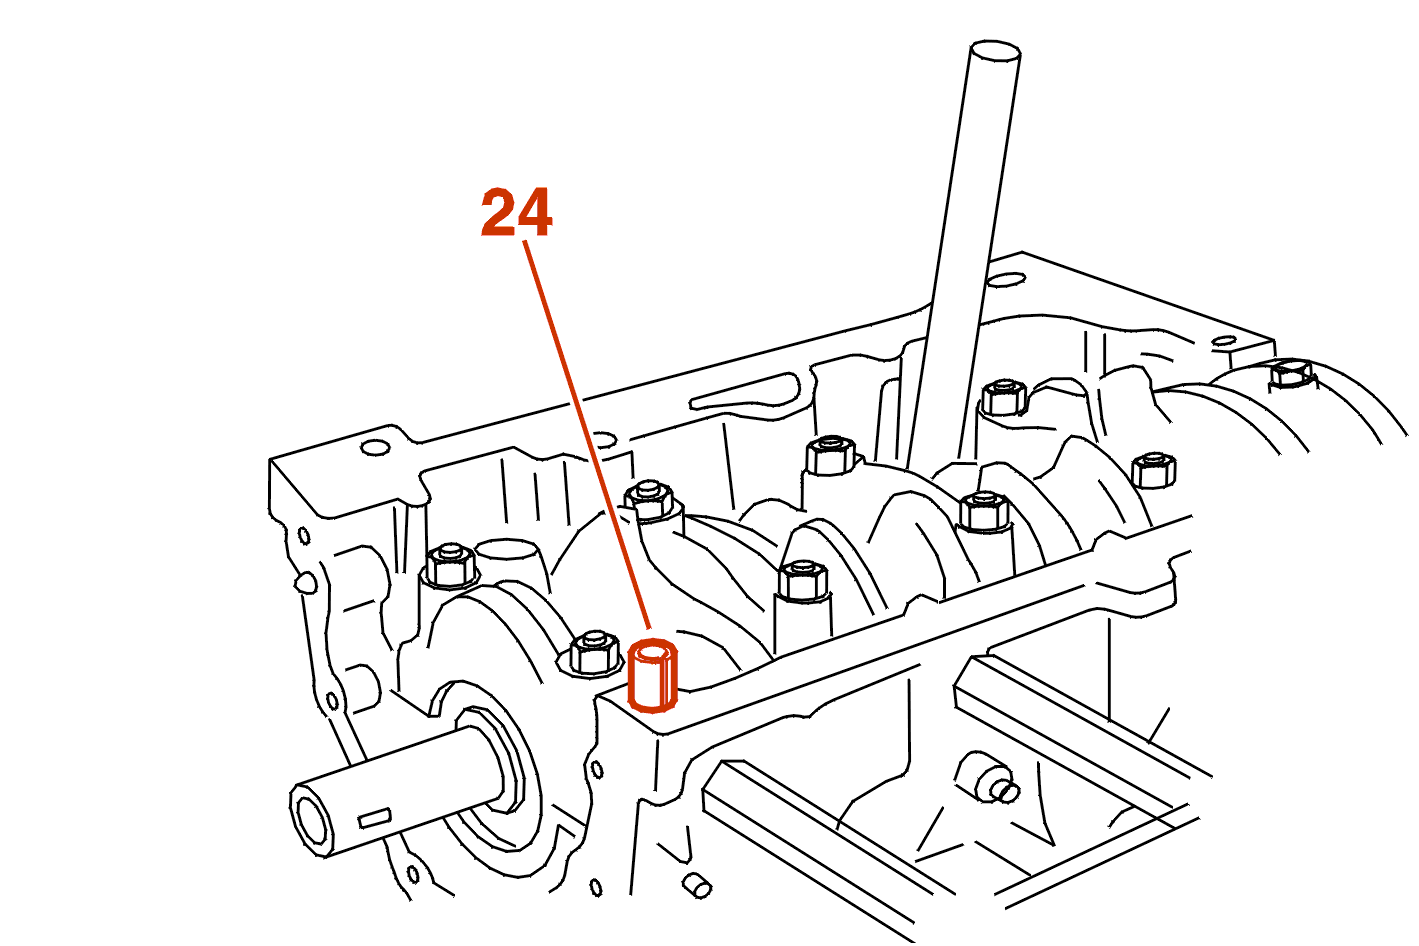
Refit the centralising pin (24) .
Fit :
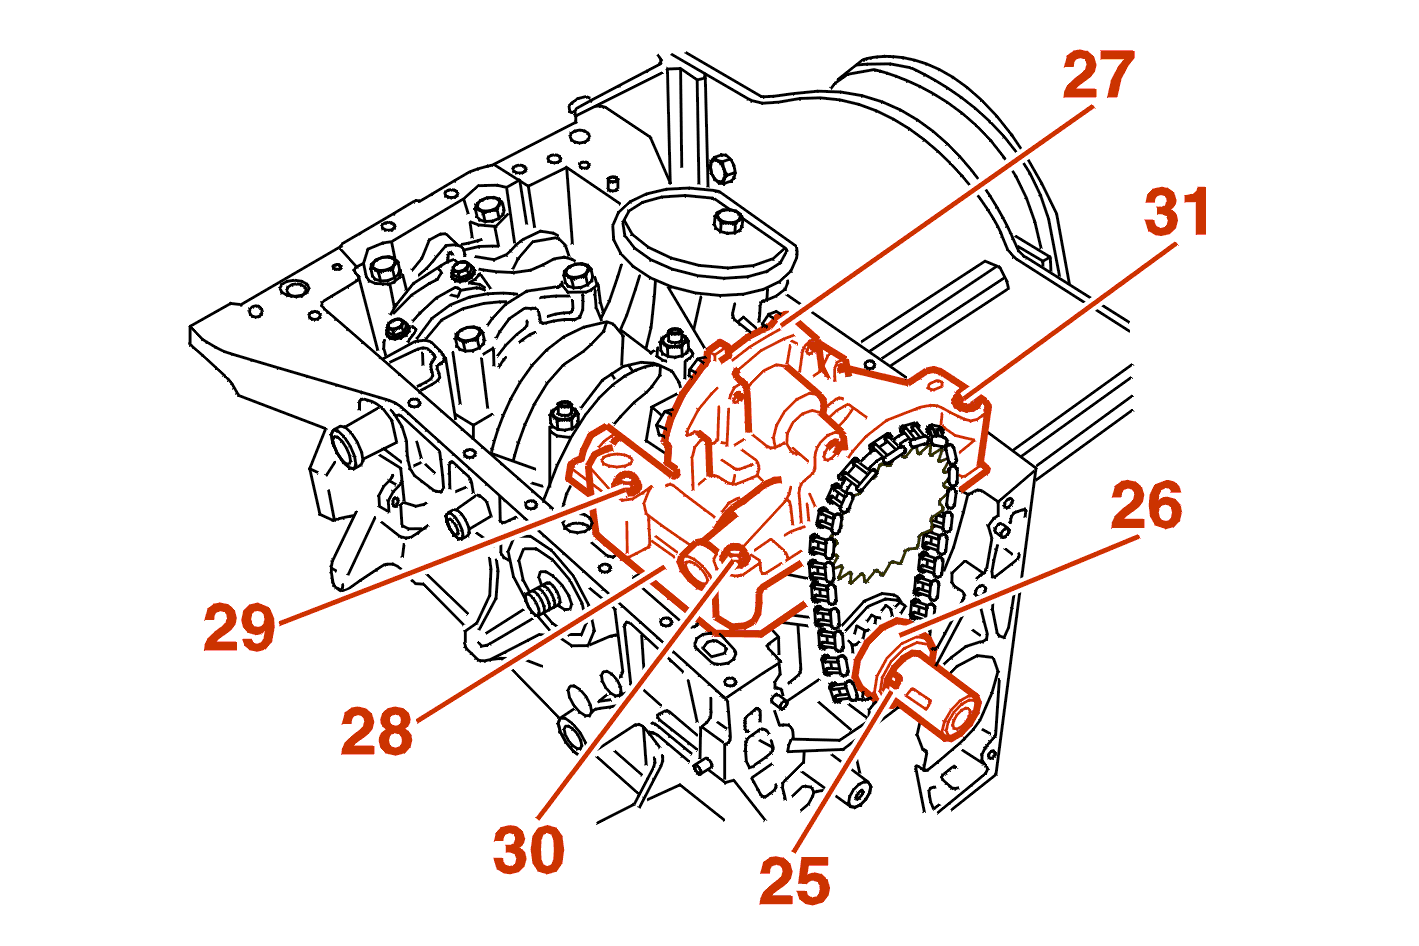
Lift the oil pump (27) .
Insert the spacer (28) (Depending on engine type) .
Tighten the bolts (29), (30), (31) to 1.6 daN.m .
NOTE : bolt (29) is used to align the oil pump .
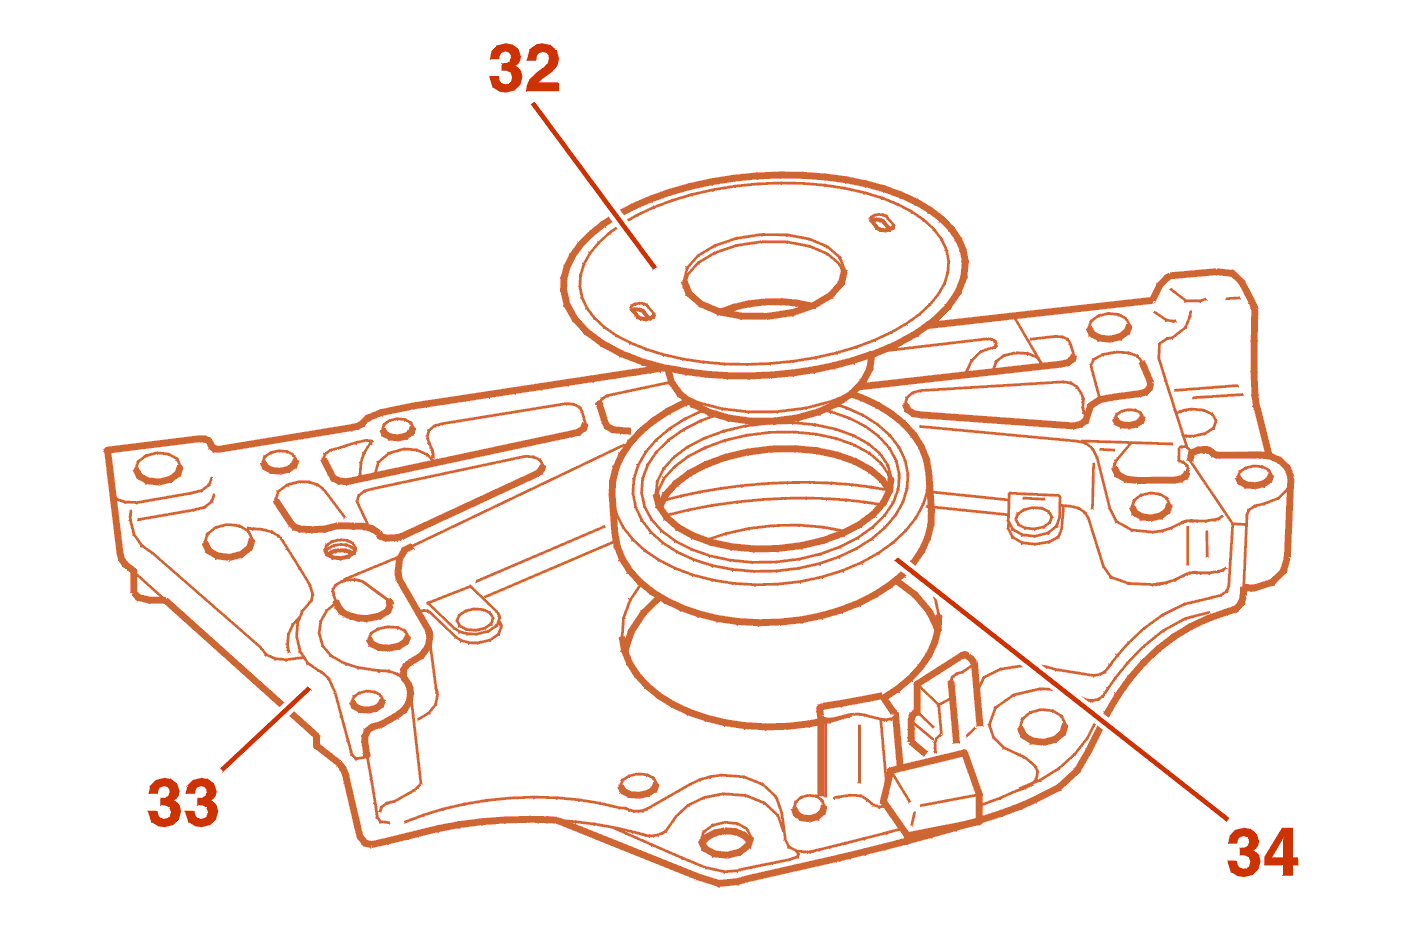
Fit a new lip seal (34) using the oil pump gear spacer (32) .
Coat the plate (33) with SILICONE CATEGORIE 2 sealing compound .
Tighten the bolts to 1.5 daN.m .
Depending on engine type :
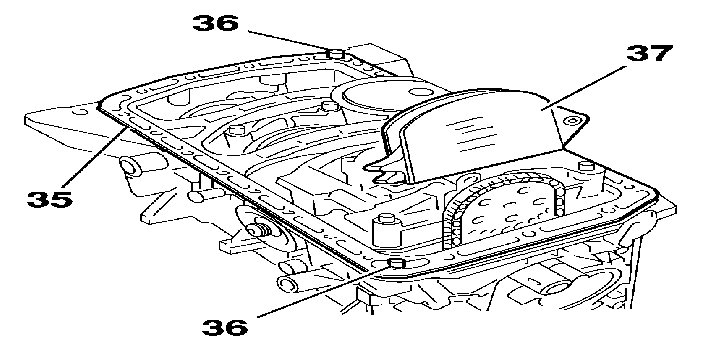
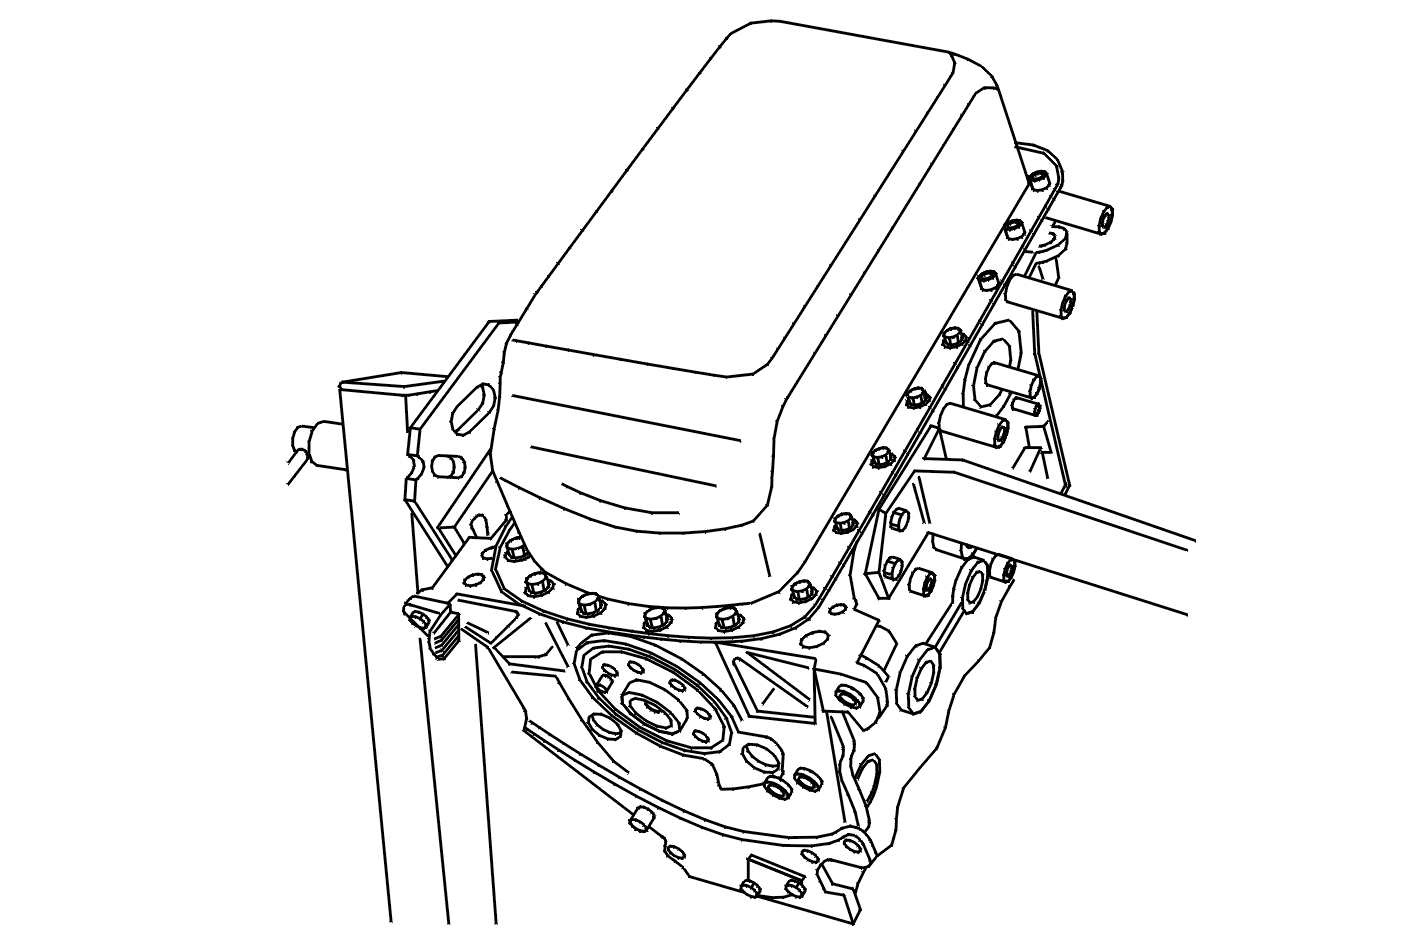
5 - REFITTING SUMP
Coat the cylinder block joint face with a thin even coat of LOCTITE AUTO-JOINT OR sealing compound .
The securing of the different oil sumps, depending on the engines, requires different bolts .
When refitting the sump, follow the relevant diagram and table .
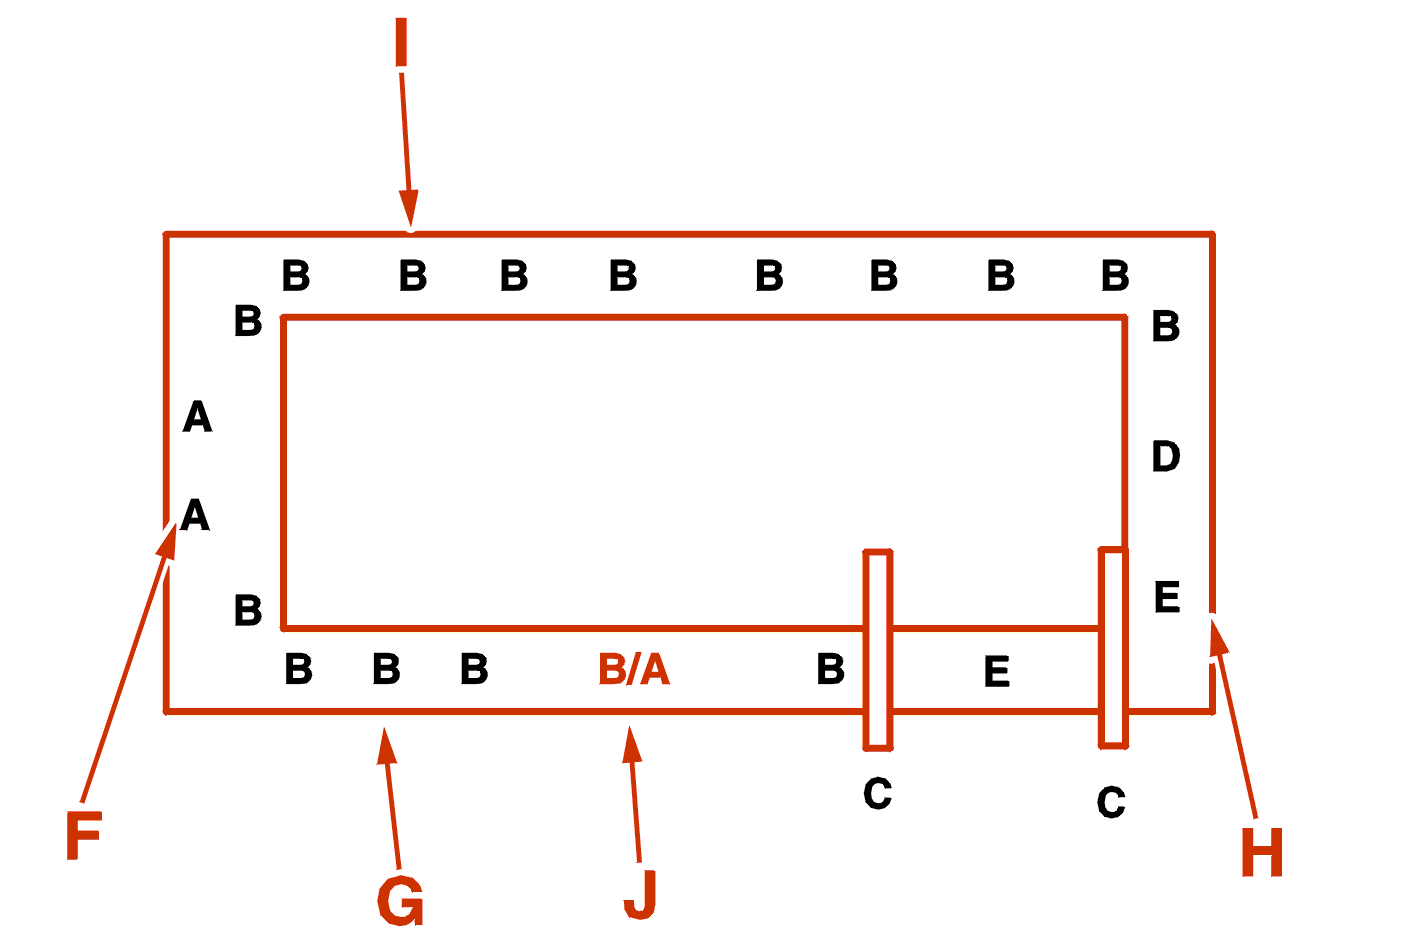
F : At the gearbox end .
G : Oil filter cartridge side .
H : Timing gear end .
I : Exhaust side .
J : Reference A - XU10 .
J : Reference B - XU5 - XU7 .
5 - 1 - ALUMINIUM OIL SUMP
| quantity of bolts (CHC bolt(s)) | ||
|---|---|---|
| distribution of bolt(s) | length 21 | length 50 |
| A | 2 | - |
| B | 16 | - |
| C | - | 2 |
| D | 1 | - |
| E | 2 | - |
5 - 2 - STEEL SUMP
| quantity of bolts (CHC bolt(s)) | |
|---|---|
| distribution of bolt(s) | length 15 |
| A | 3 |
| B | 15 |
| C | 2 |
| D | 1 |
| E | 2 |